| FAQ |
| Members List |
| Social Groups |
| Calendar |
| Search |
| Today's Posts |
|
#1
|
||||
|
||||
|
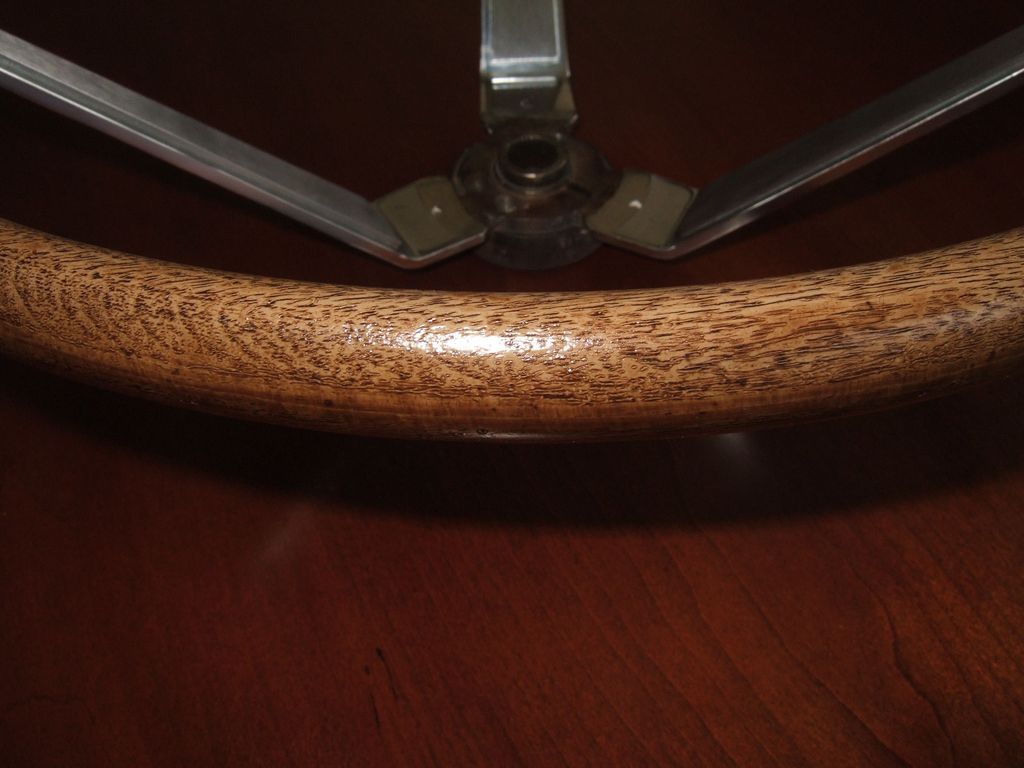
Could someone post a few close-up photos of your '67 (or 65-66) sport steering wheel so I can see the wood grain pattern? I'm attempting an epoxy restore on one and I'm looking for guide photos for applying the wood grain effect. I tried searching but I'm having no luck with the current forum issues. Thanks.
__________________
Andy North Carolina 1967 GTO SG over Parchment / mom original owner / sold in '78 / found 35 years later |
|
#2
|
||||
|
||||
|
Here's mine. I had it remolded/refinished using PY's service 5-6 years ago. I had another one done more recently and it turned out a little darker, but the pattern is the same.
__________________
"If the best Mustang is the Camaro, the best Camaro is actually the Firebird" David Zenlea |
|
#3
|
||||
|
||||
|
Thanks Gator. Exactly what I was looking for. Is the grain on the PY remold "cut in" with a 3D like texture, or is it smooth? And is the effect 360 including the back finger grip side?
__________________
Andy North Carolina 1967 GTO SG over Parchment / mom original owner / sold in '78 / found 35 years later |
|
#4
|
||||
|
||||
|
Here are a couple of pictures of mine. The florescent lights in the garage give them a slight greenish tint but otherwise they are pretty close, maybe a little darker than in person.
Like Gator67, mine was remolded by PY. I had it done some time back in the early '90s. To answer your questions, yes, there is a texture and it does wrap all the way around the wheel. 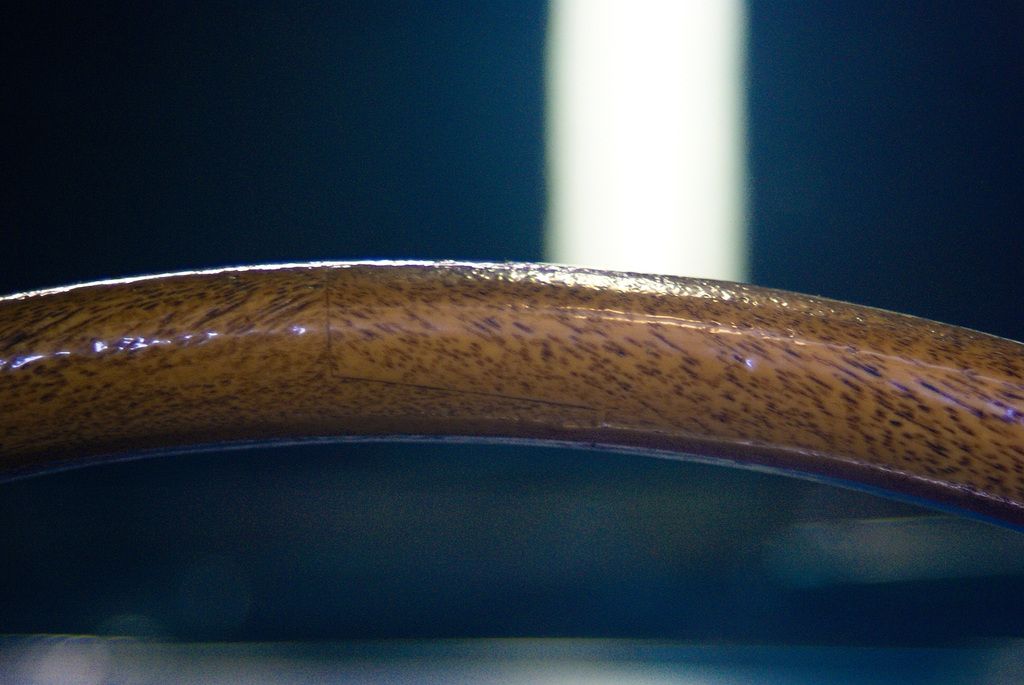 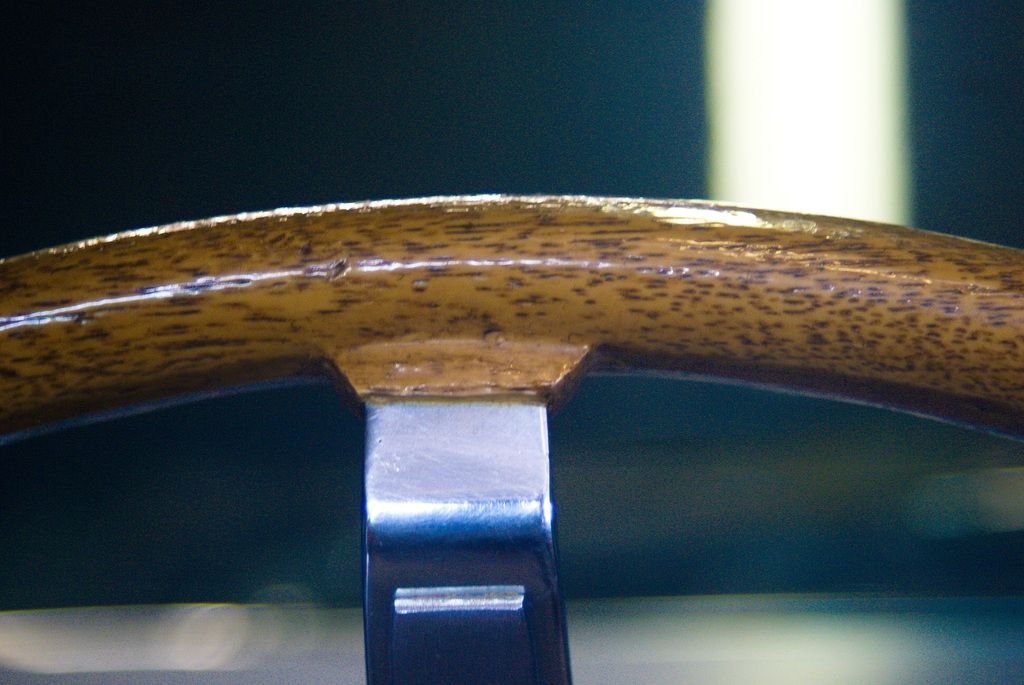 Hope this helps. Edit: Here is another picture without the overhead florescent lights throwing the tint off, and showing the wood grain wrapping around. 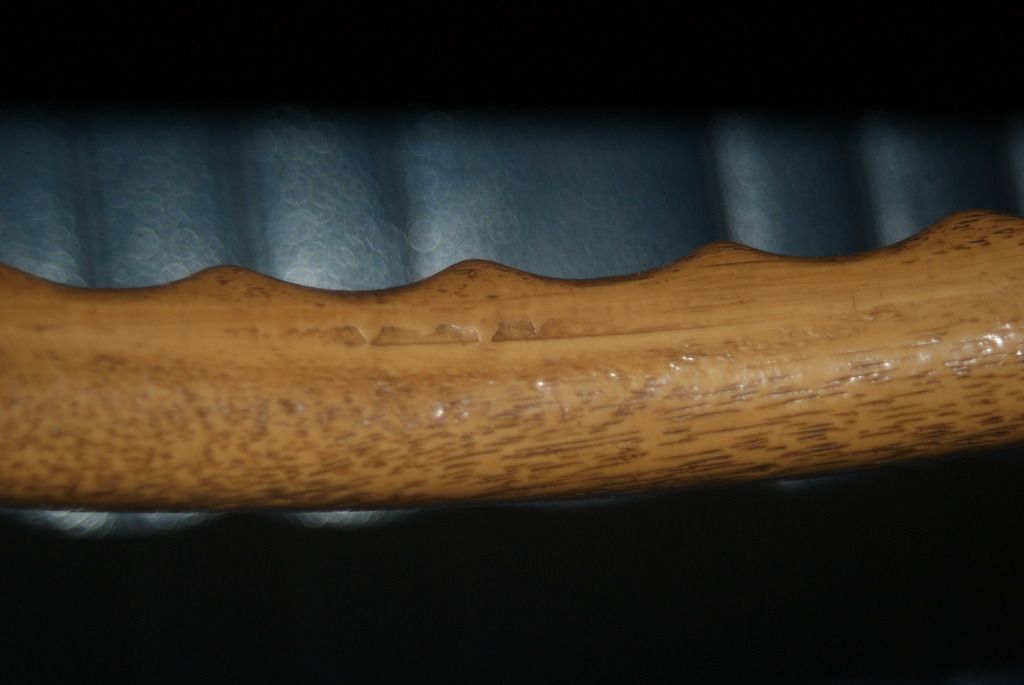
__________________
"I fishtail through the lanes, and I make my tires squeal. Power at my feet, and glory at the wheel. I wind the windows down, let the wind blow through my hair. God knows where I'm goin' to, but me... I don't care." Last edited by richardk; 05-10-2015 at 02:49 PM. Reason: Add picture |
|
#5
|
||||
|
||||
|
The grain is cut in and it goes all the way around. Grain that is simply painted on can look really good, but it tends to rub off with use.
__________________
"If the best Mustang is the Camaro, the best Camaro is actually the Firebird" David Zenlea |
|
#6
|
||||
|
||||
|
__________________
When I die, I want to go peacefully like my grandfather did, in his sleep. Not screaming like the passengers in his car. 
|
|
#7
|
||||
|
||||
|
Thanks Jeff. Is that straight line towards to top of the photo a simulated wood joint? Are there more than one on the wheel?
__________________
Andy North Carolina 1967 GTO SG over Parchment / mom original owner / sold in '78 / found 35 years later |
|
#8
|
||||
|
||||
|
Quote:

__________________
When I die, I want to go peacefully like my grandfather did, in his sleep. Not screaming like the passengers in his car. 
Last edited by Jeff Hamlin; 01-27-2016 at 07:21 AM. |
|
#9
|
||||
|
||||
|
Quote:
Would you mind describing the procedures you use and list the materials? I would like to try the same with my wheel. Since PY takes off all the old plastic when they redo the wheel, I figure I might as well try to do it myself, and if it does not turn out, I can always send it to them. I have heard of some using a dremel to cut the grain pattern. My wheel is slick, no grain left. Would you mind continuing this thread with the processes you implement while restoring your sports steering wheel? Thanks.
__________________
1966 GTO Vert automatic. 1969 CR Judge Ram Air III 4sp Pattern Car. 1969 GTO standard 350HP TH-400. 2006 GTO Phantom Black 6spd. 1972 Formula 455HO Ram Air. 1976 LE Trans Am 50th Anniversary Edition with T top. 1976 Formula 350. 1977 Grand Prix Model J 350. 1978 Trans am 400 Pontiac. 1979 Trans am 403 Olds. 1968 Olds 442. 1971 TR6. |
|
#10
|
||||
|
||||
|
Sure Charles. I'll keep a photo log and post my techniques. The condition of yours sounds similar to mine. I plan to use a dremel and PC7 to fix a few cracks, but the wood graining and coloring will be done with a variety of other tools. I will also try to replicate the finger joints too. I'm sure sending it out for recast is the more durable route to go, but I want to give it a go myself to see how it turns out.
__________________
Andy North Carolina 1967 GTO SG over Parchment / mom original owner / sold in '78 / found 35 years later |
|
#11
|
||||
|
||||
|
I found an old wheel at the swap meet today that is in nice condition except the graining is worn off so I will be watching this thread as well.
__________________
Remember no one is perfect. Everyone's butt has a crack in it! |
|
#12
|
||||
|
||||
|
I wouldn't send your wheel to PY. Mine has been there since 8 December 2014, that is 23 weeks so far and I can't even get a status or guess from them as to when I might get it back. Not real happy.

|
|
#13
|
||||
|
||||
|
Jeff, any chance you could give me a few more measurements on those joints? Depth, width at narrowest, width at widdest, etc. I know mine won't be exact, but hoping to get a reasonable approximation.
Sorry about that Chuck. I saw a post from them saying they are discontinuing the service by the end of this year. I remember Phil posting in his build thread that his took a long time. The photos from Gator and Richard posted look pretty good. Hopefully when it arrives you'll be happy with the results.
__________________
Andy North Carolina 1967 GTO SG over Parchment / mom original owner / sold in '78 / found 35 years later |
|
#14
|
||||
|
||||
|
[QUOTE=67Twistytee;5403678]Jeff, any chance you could give me a few more measurements on those joints? Depth, width at narrowest, width at widdest, etc. I know mine won't be exact, but hoping to get a reasonable approximation.
OK, best I can do with it mounted; Center wheel. Then measure clockwise off the center of upper LH spoke and go from there. I used a true "TAPE" measure taped onto outer dia of wheel. Total outside Dia 50.25'' shown in RED. Center to center of spokes shown in WHITE. The joints are laid out 2 per section (between spokes) and are 1'' end to end. Joint measurements shown in YELLOW.  Here is a cross section of the joint. Centered on the mold seam. So it repeats on each half as shown.  Hope this make sense? As far as depth of indentation/pattern it is very slight, just enough to retain colorant.
__________________
When I die, I want to go peacefully like my grandfather did, in his sleep. Not screaming like the passengers in his car. 
|
|
#15
|
||||
|
||||
|
Thanks Jeff! This is awesome. The cross section is particularly helpful. The mold seam is very faint on mine and will probably be lost with the fill and sanding I need to do, but I should be able to map the joints with this guide. I'm hoping to start working on the crack repairs next weekend.
__________________
Andy North Carolina 1967 GTO SG over Parchment / mom original owner / sold in '78 / found 35 years later |
|
#16
|
||||
|
||||
|
From what I understand, the machine used to re-mold the wheels is in poor condition and Py is not sure how many more jobs they can get out of it. They did take about 6 months to get mine done but it came out real nice except it did not have the joints in it.
Does anybody else do them? Is Platinum Al still in business? He did them at one time.
__________________
Remember no one is perfect. Everyone's butt has a crack in it! |
|
#17
|
|||
|
|||
|
Quote:
This is a great thread though and the use of the PC7 is the best stuff out there. |
|
#18
|
||||
|
||||
|
So better late than never, I finally started my steering wheel restoration. Per an earlier request in this thread, I'm posting my steps thus far and will continue adding to the thread as I get into applying color and wood grain texture. The first few photos are the condition of the wheel when I got it. Although generally in good shape, it had cracks at the spokes and checking along the outer circumference of the resin wheel.
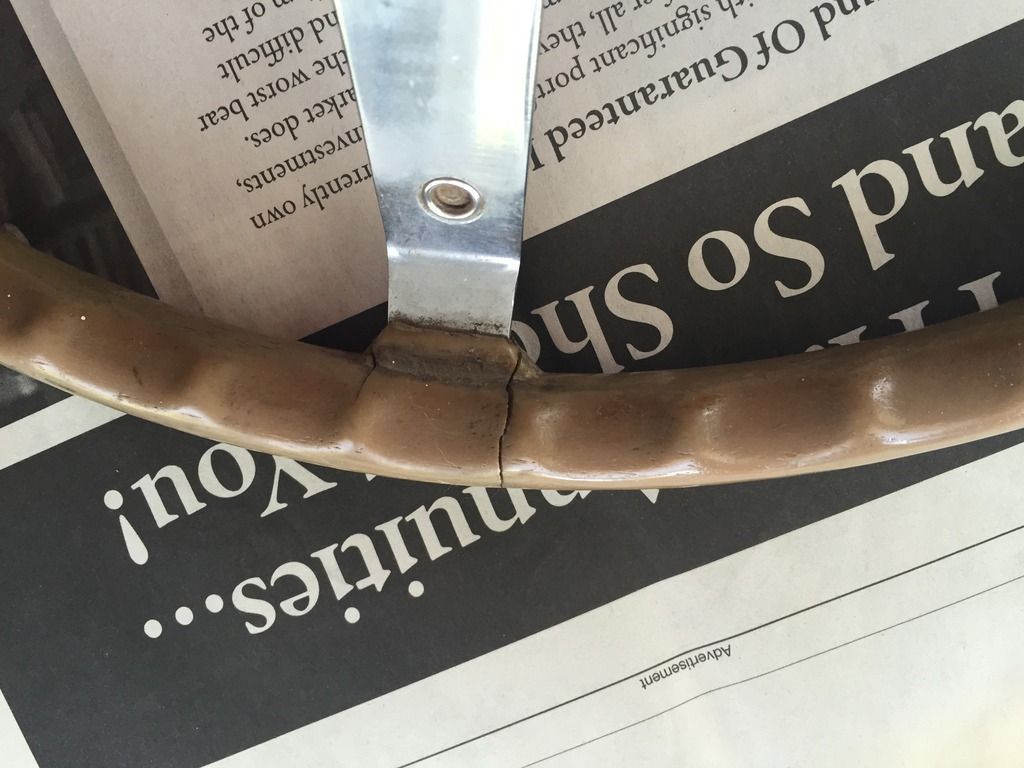 Outer checking: 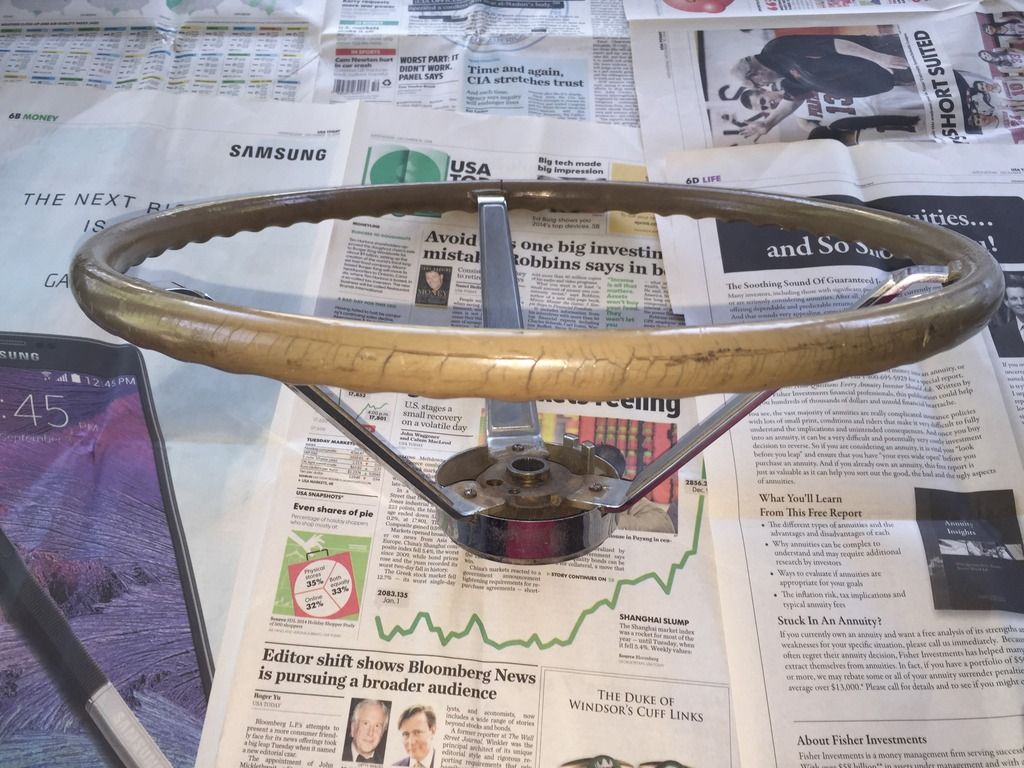 I started on the finish of the stainless spokes with a combination of cleaning products. I found Dawn plus Bar Keepers Friend with a toothbrush and steel wool did a good job removing rust and grime. I followed that with a combo of Never Dull and Brasso. 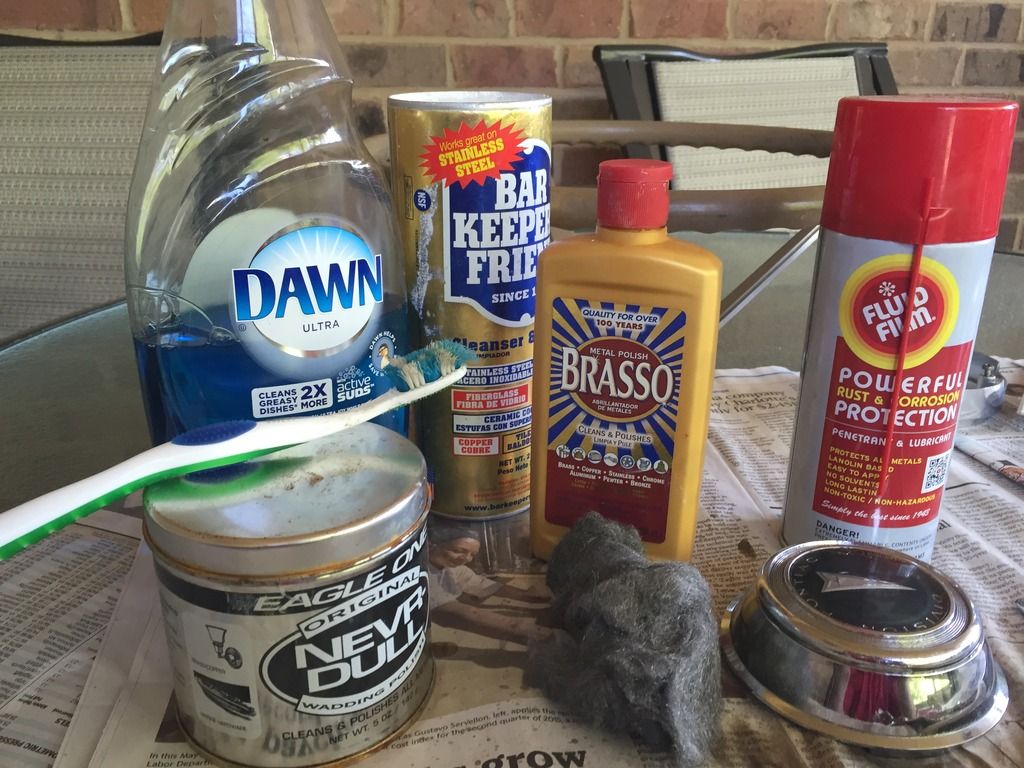 Cleaned spokes: 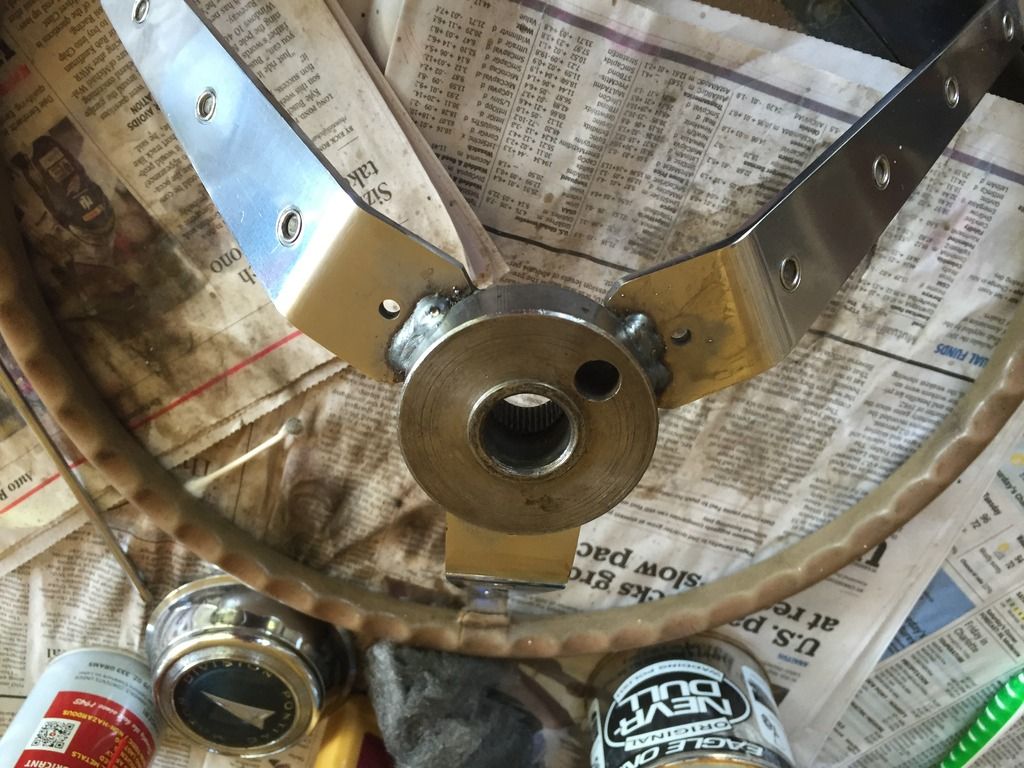
__________________
Andy North Carolina 1967 GTO SG over Parchment / mom original owner / sold in '78 / found 35 years later |
|
#19
|
||||
|
||||
|
After cleaning the wheel I wrapped the spokes in painters tape to protect the finish from epoxy and paint.
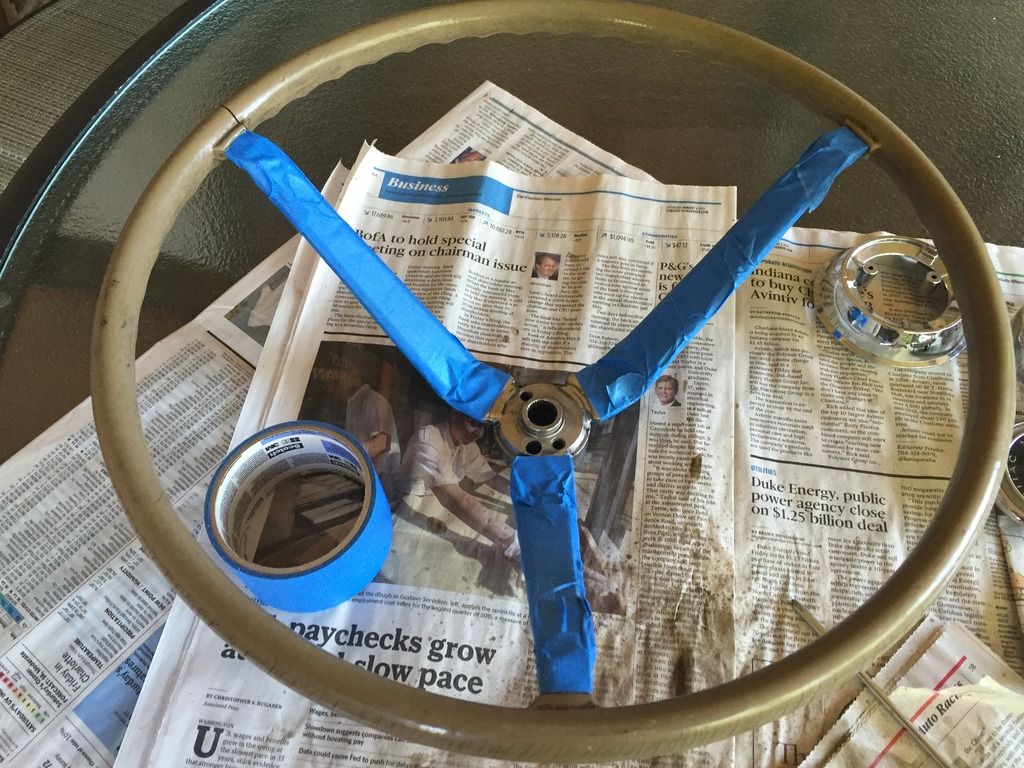 I began cleaning out the cracks and widening them in a "V" pattern down to the metal ring. Doing this allows you to get the PC7 or your filler of choice pressed down into the rim and provides a better opportunity to adhere against the metal core. I used a dremel and a combination of different cutting wheels. 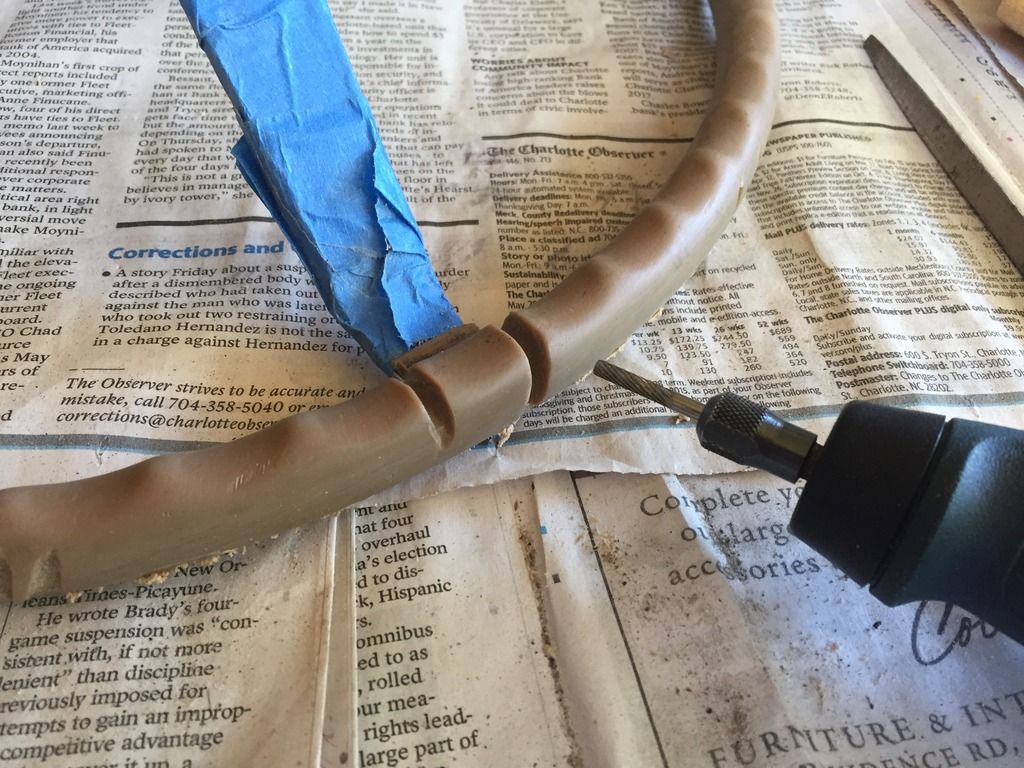 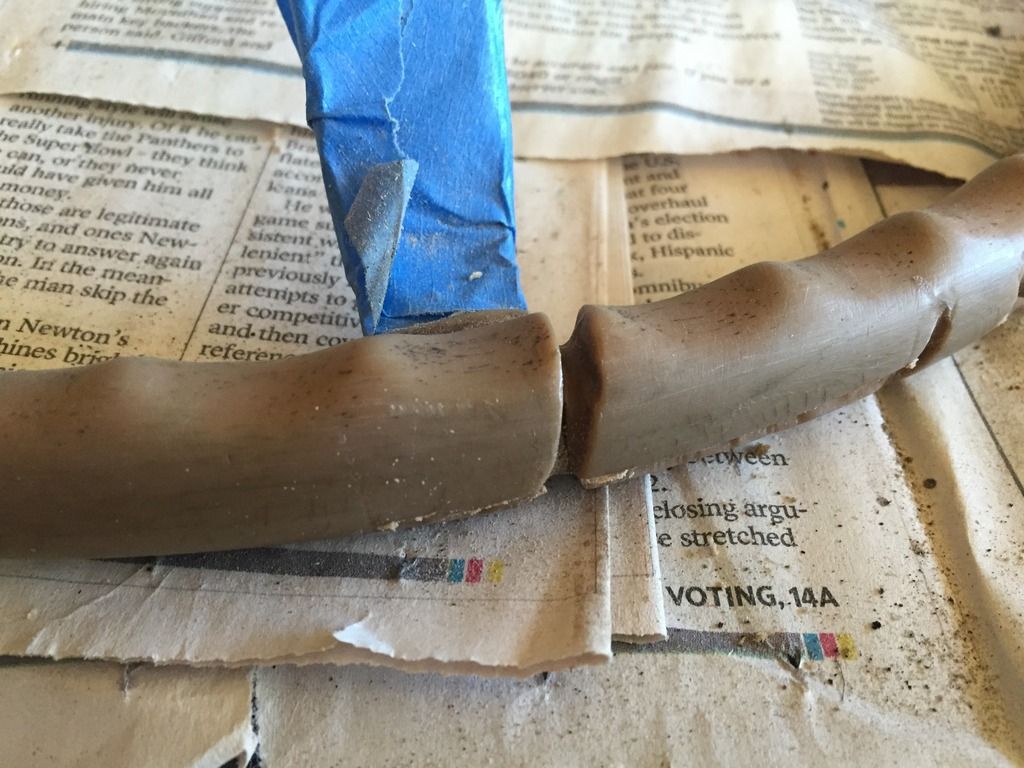 After drilling out the cracks, I cleaned out the wheel with compressed air. 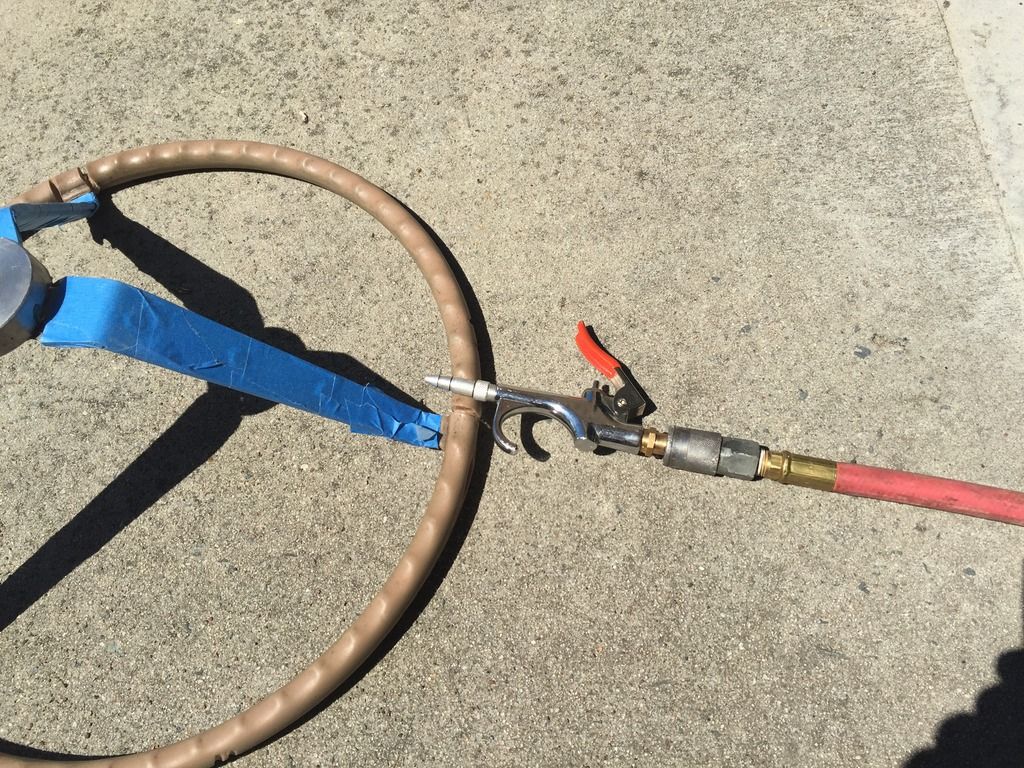
__________________
Andy North Carolina 1967 GTO SG over Parchment / mom original owner / sold in '78 / found 35 years later |
|
#20
|
||||
|
||||
|
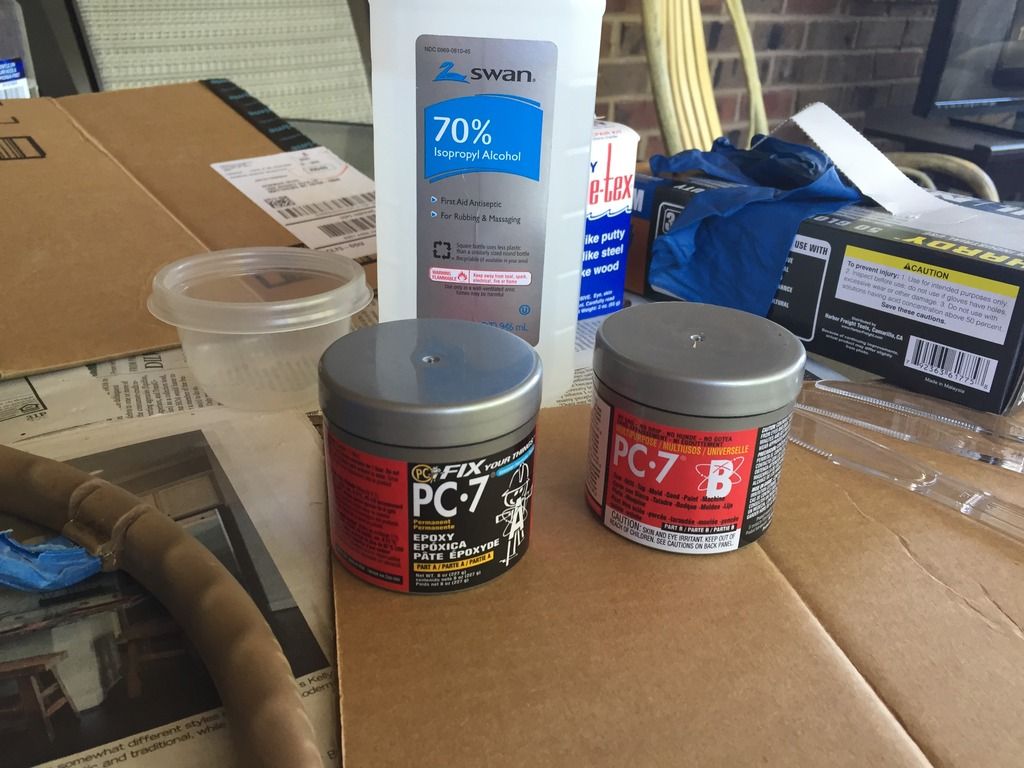
I debated between using the PC-7 paste vs the putty which I believe comes in some of the Eastwood steering wheel repair kits. I ultimately went with the paste based on a review on the pcepoxy website. I used nitrile gloves to apply it and found pressing it into the cracks with my fingers produced the best results. You can also use denatured alcohol to smooth it so you don't get to much caked on. If you allow it to build-up too much, it can make sanding it after it cures a bit tougher. I didn't have any around so I grabbed some rubbing alcohol and it seemed to work just fine.
 After reading some reviews about letting PC7 fully cure before attempting to sand, I decided to wait a full week. I let it cure inside in order to reduce humidity. I think this strategy paid off and I was able to sand it without too much trouble. I used a dremel sanding drum to take down the high spots, and then I experimented with a combination of other sanding methods. I found the 3M sponge blocks worked well for the initial pass. I then used paper wrapped around craft sticks and one of my wife's nail filers  to sand between the finger grips and around the spokes. to sand between the finger grips and around the spokes.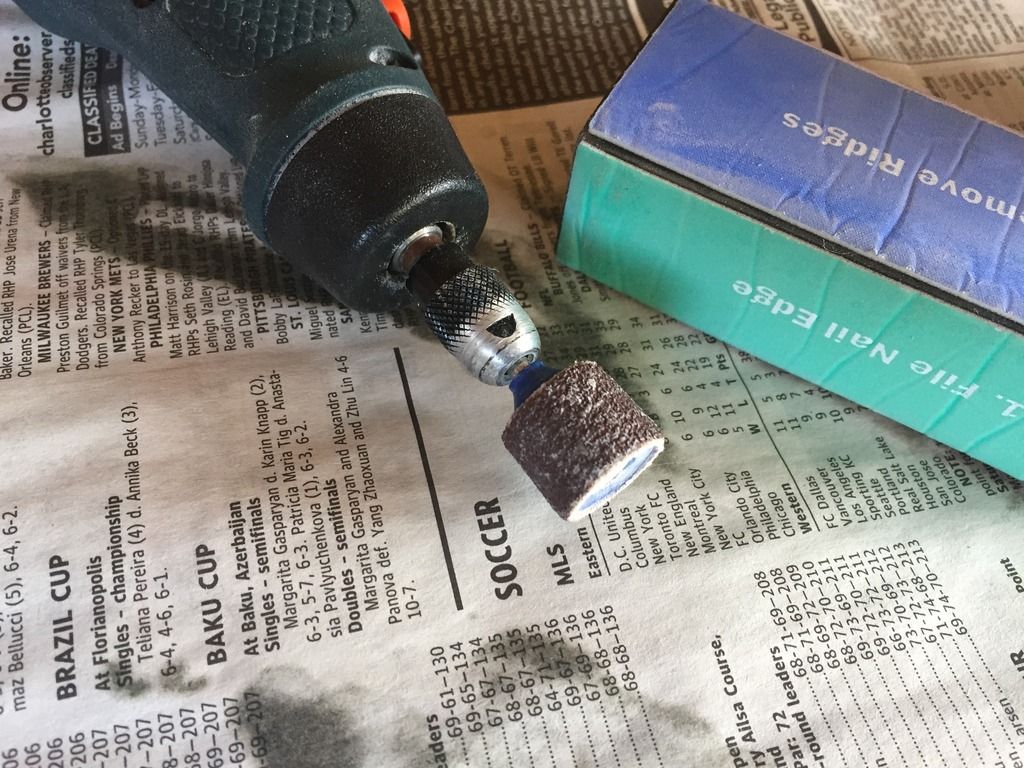 Sanding blocks: 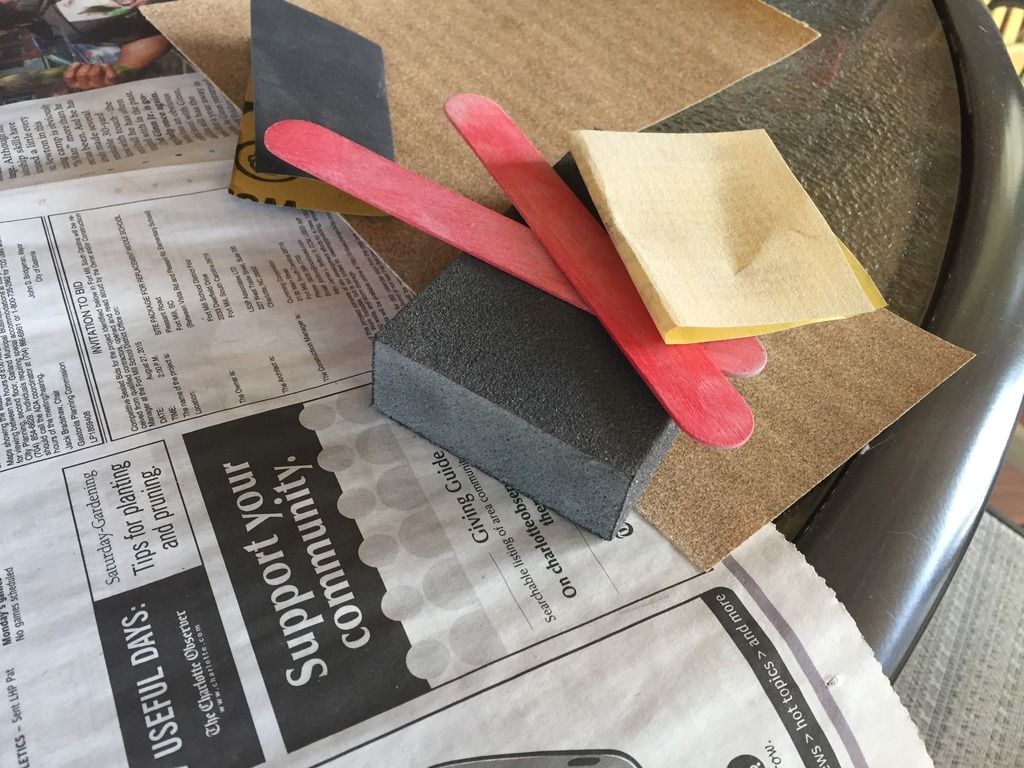 If the PC7 is well-cured, it sands reasonably well and you can blend it into the surrounding resin. 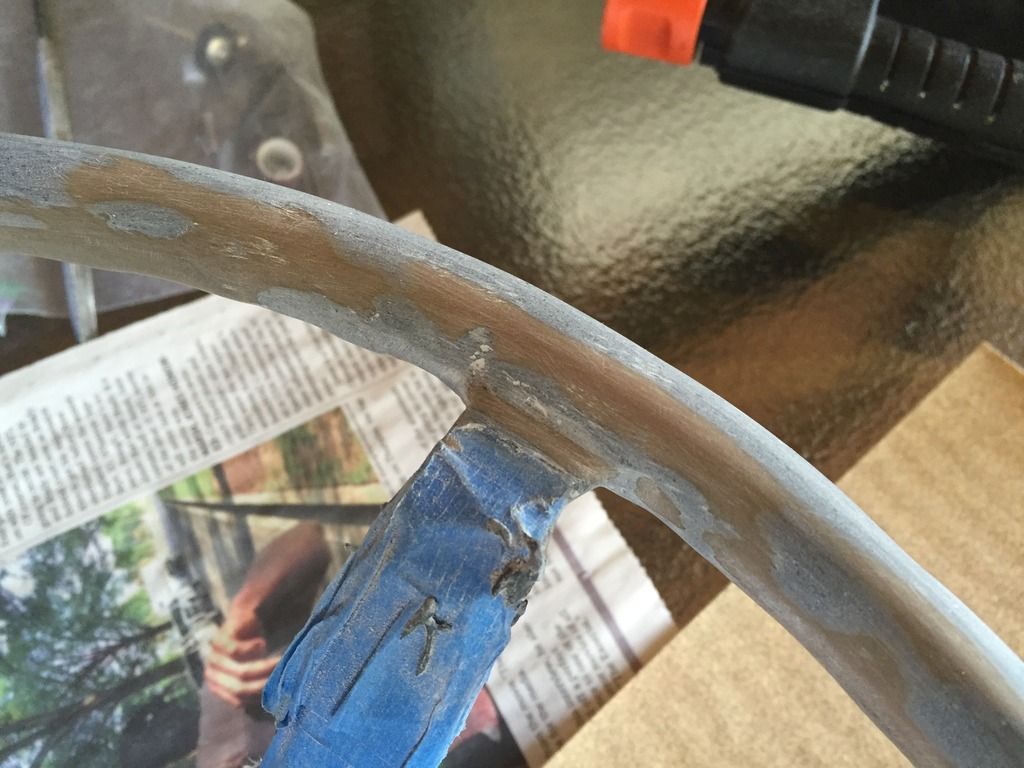
__________________
Andy North Carolina 1967 GTO SG over Parchment / mom original owner / sold in '78 / found 35 years later |
| Reply |
|
|