| FAQ |
| Members List |
| Social Groups |
| Calendar |
| Search |
| Today's Posts |
 |
|


Menu
| The Body Shop TECH General questions that don't fit in any other forum |


| Reply |
|
|
Thread Tools | Display Modes |
|
|
| The Body Shop TECH General questions that don't fit in any other forum |
| Reply |
|
|
Thread Tools | Display Modes |
|
#1
 02-20-2013, 08:52 AM
|
||||
|
||||
|
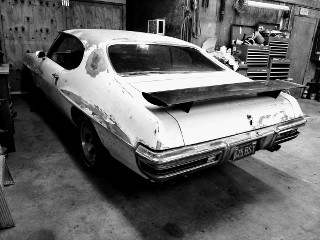
I will be starting a new project very soon. Some of the windows have the suds rotted out that hold the clips for the molding in.
Do they make a 18GA piece of sheet metal with a bunch of the studs on it that you can cut out and weld into place? What fixes are there? Thanks Dave
__________________
1967 Pontiac Tempest 2dr HRDTP Coupe 468 C.I. 500 HP 5 speed = FUN!!! 1990 Chevy Suburban R2500 Daily Driver 1986 Volvo DL245 Wagon.. Project car!!! The Burb Files |
|
#2
02-20-2013, 09:04 AM
|
|||
|
|||
|
There is screw on clips available that dose not require a stud , of course you need good steel to attach to .
|
|
#3
02-20-2013, 09:05 AM
|
||||
|
||||
|
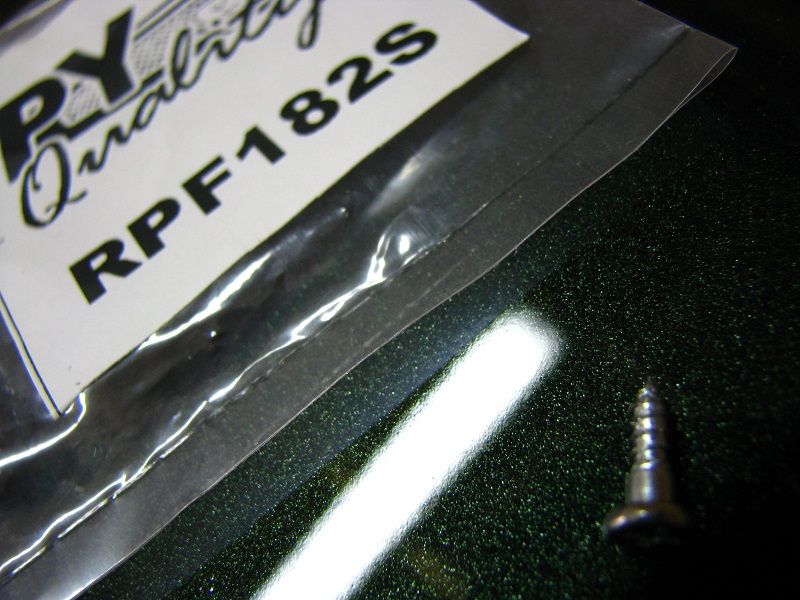
PY sells special shouldered screws to take the place of the stud. I have used them and they work fine.
I have never seen a repair strip w/the studs already attached. |
|
#4
02-20-2013, 09:14 AM
|
||||
|
||||
|
Quote:
Part number? Thanks!
__________________
1967 Pontiac Tempest 2dr HRDTP Coupe 468 C.I. 500 HP 5 speed = FUN!!! 1990 Chevy Suburban R2500 Daily Driver 1986 Volvo DL245 Wagon.. Project car!!! The Burb Files |
|
#5
02-20-2013, 09:27 AM
|
||||
|
||||
|
Quote:
|
|
#6
02-20-2013, 09:48 AM
|
||||
|
||||
|
Groovy! Thanks!
Do I repair the window channel and then drill a pilot hole, insert screw than tack weld this in or is the screw good enough by itself?  Thanks again! Dave
__________________
1967 Pontiac Tempest 2dr HRDTP Coupe 468 C.I. 500 HP 5 speed = FUN!!! 1990 Chevy Suburban R2500 Daily Driver 1986 Volvo DL245 Wagon.. Project car!!! The Burb Files |
|
#7
02-20-2013, 09:51 AM
|
||||
|
||||
|
Repair, drill small pilot hole and the dip screw threads into some sort of epoxy before installing.
|
|
#8
02-21-2013, 07:39 AM
|
||||
|
||||
|
I did mine using the screws. I put a bit of drip check sealer on the threads before screwing them in. I thought i had a pic of the screws but can't find it.
|
|
#9
02-21-2013, 07:52 AM
|
||||
|
||||
|
Quote:
So you drilled a pilot hole first.. Remember what size it was? Also there is no "schedule" for the screws. Granted I will space them evenly, but I can have 12 for 30 if I wanted to. Right? Thanks for the pic!!!  Dave
__________________
1967 Pontiac Tempest 2dr HRDTP Coupe 468 C.I. 500 HP 5 speed = FUN!!! 1990 Chevy Suburban R2500 Daily Driver 1986 Volvo DL245 Wagon.. Project car!!! The Burb Files |
|
#10
02-21-2013, 09:00 AM
|
||||
|
||||
|
Sorry don't remember the drill size. i just drilled some holes in scrap metal and tried the screws till i found a size that let the screw fit snug. Spacing isn't important and you should be able to use as many as you like. Just be sure to keep them 'close' to the same distance from the edge or the trim won't sit properly against the window.
|
|
#11
02-21-2013, 09:06 AM
|
|||
|
|||
|
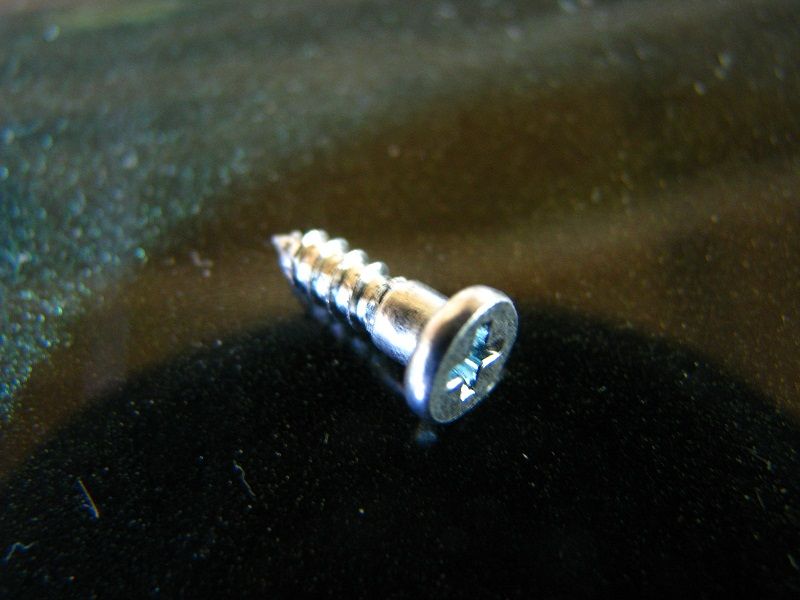
Pic of said screw...
__________________
Good judgement comes from experience.....experience comes from....well....that comes from bad judgement. Build thread for my poppa ~~> CLICKY CLICKY |
|
#12
02-21-2013, 09:10 AM
|
||||
|
||||
|
Yep,that be it.
|
|
#13
02-21-2013, 09:22 AM
|
||||
|
||||
|
I couldn't remember at the time I did mine, but there were originally many more pins in the bottom rear channel. I only put in six, but it will be rectified.
Unrestored 67 GTO. Sent to me by J V Cox (hottrodd). He sent these to me the day after I put the chrome on and 5 days before Cruisin' the Coast. Charles |
|
#14
02-21-2013, 09:28 AM
|
||||
|
||||
|
Good points. I think that is a good idea to put more clips closer to the edges..
Thanks!! Dave
__________________
1967 Pontiac Tempest 2dr HRDTP Coupe 468 C.I. 500 HP 5 speed = FUN!!! 1990 Chevy Suburban R2500 Daily Driver 1986 Volvo DL245 Wagon.. Project car!!! The Burb Files |
|
#15
02-21-2013, 09:50 AM
|
||||
|
||||
|
They must have put more there to insure window at high speeds with side windows open!
|
|
#16
03-02-2013, 10:30 PM
|
|||
|
|||
|
Bought front lower Chanel from Ames had all the studs in it very nice piece.
|
|
#17
03-05-2013, 03:39 PM
|
||||
|
||||
|
I think you can buy the stud and install it with a stud welder also, although not many hobbyists would own a stud welder. When determining what size drill to use for a screw, I eyeball the drill to the shank of the screw. (the small part of the thread) I make sure the drill bit is just slightly smaller than the shank.
|
|
#18
03-05-2013, 09:14 PM
|
|||
|
|||
|
Quote:
__________________
Everything comes and goes Pleasure moves on too early And trouble leaves too slow |
|
#19
03-05-2013, 10:23 PM
|
||||
|
||||
|
Factory spacing on mine is in the 6"-7" range. Just be sure to avoid areas where two moldings join.
|
|
#20
03-05-2013, 10:55 PM
|
||||
|
||||
|
Quote:
|
| Reply |
|
|
The PY Online Forums is the largest online gathering of Pontiac enthusiasts anywhere in the world. Founded in 1991, it was also the first online forum for people to gather and talk about their Pontiacs. Since then, it has become the mecca of Pontiac technical data and knowledge that no other place can surpass.


 Linear Mode

