| FAQ |
| Members List |
| Social Groups |
| Calendar |
| Search |
| Today's Posts |
|
#1
|
||||
|
||||
|
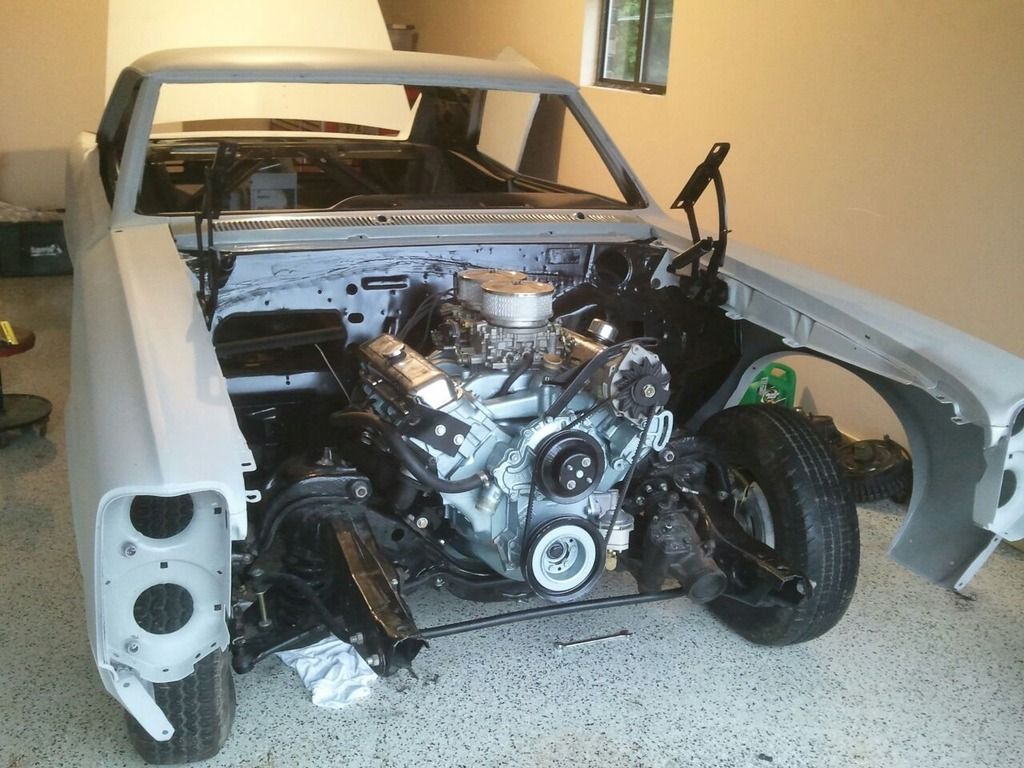
Tomorrow I will begin some final assembly of my 67 GTO for the first time in 10 years! The body work is complete and it will be going to paint in a couple weeks. The firewall, interior, and underside are painted already. Tomorrow I'm planning on installing the engine, trans, driveshaft, firewall pad, steering column and heater box. I've got off tomorrow and Friday so I'm getting up early to do some duck hunting then I'll put some hours in the garage.
I for sure want to get the drivetrain in before paint because after the car is painted, the painter is reassembling the car and I don't want to pull the hood off and have to risk messing up the fresh paint or re-aligning the hood. I ordered 100sqft of fatmat which I will be putting on the floor. Will the factory style molded firewall pad be enough insulation or should I put fatmat under that as well? Though the fatmat won't be in until next week.
__________________
1967 GTO, 432 (428+.030), 4-bolt mains, factory Nodular crank, scat rods, icon dished pistons, Lunati HR 243/251@.050, .618/.622 lift, Edelbrock 72cc round port heads, 10.5:1, offy 2-4 intake, Edelbrock 650cfm carbs, Super T10 trans (2.64 first), BOP 10 bolt w/ Eaton posi and 3.36 gears |
|
#2
|
|||
|
|||
|
When I did mine a few years ago putting in the dynamat was the first thing I did, went all the way up the firewall and under the dash a little bit, I then installed the factory firewall pad also did the roof, cant really say how much it helped but I know it did, I have a very strong 421 motor with headers and can listen to the radio going down the road, conversation is not a big deal either. good luck jd grim 66 gto
|
|
#3
|
|||
|
|||
|
Show us some pics of your accomplishments.
|
|
#4
|
||||
|
||||
|
Quote:

__________________
Remember no one is perfect. Everyone's butt has a crack in it! |
|
#5
|
||||
|
||||
|
Today I focused on the engine and trans install. All was going great until I realised my engine mount to fame bolts were missing! So after a little run I got some new replacement grade 8 bolts. The majority of the time was spent messing with them damn headers. Half-way through I almost considered tossing them out and putting on factory manifolds.
The fatmat won't be in until next week so I'll hold off on some interior assembly. Tomorrow I will get the driveshaft installed, fuel tank and get the steering column temporarily installed. If I have time I will lay the engine harness over and begin putting ends on. I purchased an aftermarket harness from American autowire so some assembly is required. If I could figure out how to post pictures I would, although half my problem is I forget to take pictures as I go
__________________
1967 GTO, 432 (428+.030), 4-bolt mains, factory Nodular crank, scat rods, icon dished pistons, Lunati HR 243/251@.050, .618/.622 lift, Edelbrock 72cc round port heads, 10.5:1, offy 2-4 intake, Edelbrock 650cfm carbs, Super T10 trans (2.64 first), BOP 10 bolt w/ Eaton posi and 3.36 gears |
|
#6
|
||||
|
||||
|
Turns out the fatmat came in today! I will begin rolling it out tomorrow! I do have dynomat for the roof. I went with dynomat since it is a better product it should adhere better. . . Hopefully there will be no future issues of it falling off the roof.
__________________
1967 GTO, 432 (428+.030), 4-bolt mains, factory Nodular crank, scat rods, icon dished pistons, Lunati HR 243/251@.050, .618/.622 lift, Edelbrock 72cc round port heads, 10.5:1, offy 2-4 intake, Edelbrock 650cfm carbs, Super T10 trans (2.64 first), BOP 10 bolt w/ Eaton posi and 3.36 gears |
|
#7
|
|||
|
|||
|
No matter what you do you should put Dynamat or a similar product down on your floor to help keep the inside of the car quite. It will also take a lot of the rattles out of the car. You don't have to put it on the entire roof area but just put strips on the single panel areas to keep the noise out. Just a little on the roof will make a big difference. If you can get it to you can go to the hardware store & get the insulation that looks like tin foil over fiberglass insulation it comes in a 40 ft roll usually & is about $ 25.00. It work so good to keep the heat away from you & to keep the inside cool or warm which ever you need it to be. Then the carpet goes in. Don't worry it won't make the carpet look bad, all the stuff under the carpet will lay down & make your carpet look great.
|
|
#8
|
||||
|
||||
|
congrats on your progress I know it takes awhile.
I also installed fatmat on my interior. Put it on the floor, front to rear, roof and up the package tray support as well as over the rear wheel well. If I had it to do again I would not put it over the rear wheel well as when I open the trunk you can see it. However it does cut down on the noise dramatically. To make it easier I did measure, cut and lay it out in the sun to make it more pliable. Then used a roller to smooth it out.
__________________
Bring back my 67 GTO: Shes ALIVE as of 2-19-13 previously owned 78 Firebird 67 Nova 64 Nova |
|
#9
|
||||
|
||||
|
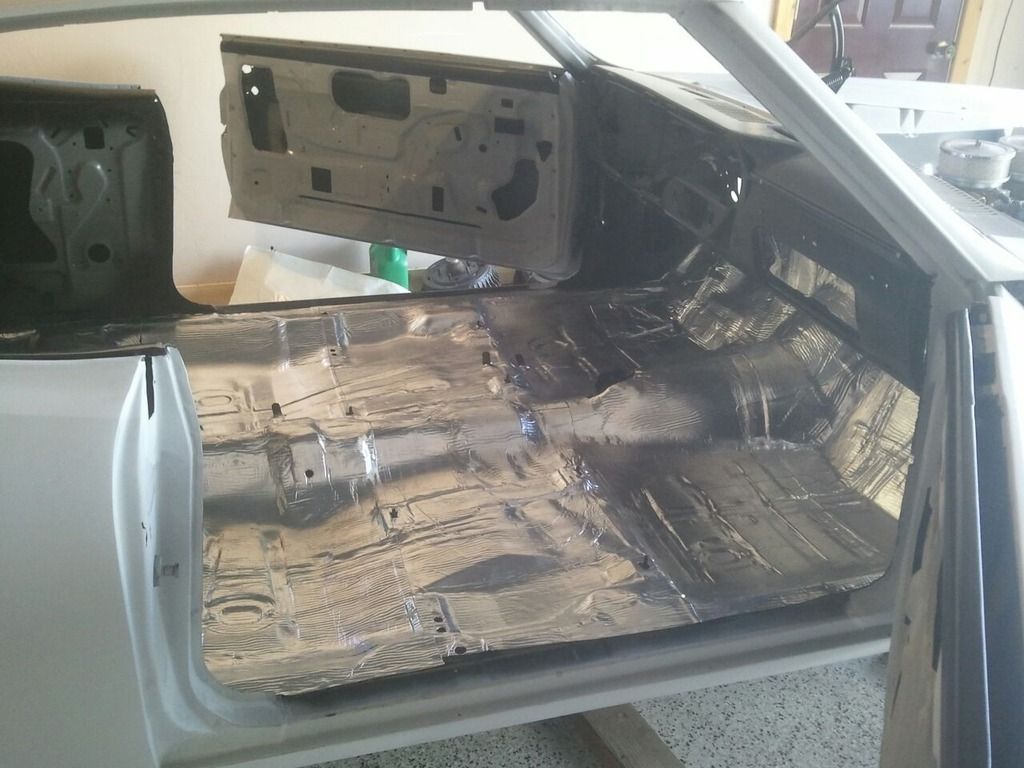
I got all the fatmat layed out today! Started under the dash, down the firewall and all the way to under the rear seat area. Used about 60sqft of the 100 I bought. I put a strip on each support that the fuel tank rests on; which brings up my next question.
- is there a secret I don't know to get the fuel tank straps around the fuel tank? I have new straps since the originals are rotted away. I bent the straps to fit around the tank and the straps are still short, about 1/2". Besides that, I also got the firewall pad in today as well as the driveshaft. I slid the heater box in also, but quickly realized I have misplaced all the hardware that fasten the inner box to the outer box. Does anybody have a picture of the hardware? I may just paint up some 1/4-20 nuts and washers and use them though.
__________________
1967 GTO, 432 (428+.030), 4-bolt mains, factory Nodular crank, scat rods, icon dished pistons, Lunati HR 243/251@.050, .618/.622 lift, Edelbrock 72cc round port heads, 10.5:1, offy 2-4 intake, Edelbrock 650cfm carbs, Super T10 trans (2.64 first), BOP 10 bolt w/ Eaton posi and 3.36 gears |
|
#10
|
||||
|
||||
|
I forgot to add that today I got my tail light housings straightened out but they need to be blasted and painted.
My question is: after I blast them I'm going to paint the insides gloss white, but what should I paint the outsides? I was thinking spatter paint to match the trunk or silver. It appears they were originally galvanized. Is this correct?
__________________
1967 GTO, 432 (428+.030), 4-bolt mains, factory Nodular crank, scat rods, icon dished pistons, Lunati HR 243/251@.050, .618/.622 lift, Edelbrock 72cc round port heads, 10.5:1, offy 2-4 intake, Edelbrock 650cfm carbs, Super T10 trans (2.64 first), BOP 10 bolt w/ Eaton posi and 3.36 gears |
|
#11
|
|||
|
|||
|
Had the same issue with my gas tank straps and there the originals to the car, I used longer stainless carriage bolts and tightened them up till I felt the new tank was in place and tight then cut off the excess bolt, this worked for me, what I did with my tail light housings was I scrubbed them with CLR I think they look better then new, then left them natural finish never liked the splatter paint, my trunk is the same color as the car, white.good luck jd grim 66 gto
|
|
#12
|
||||
|
||||
|
Quote:
__________________
1967 GTO, 432 (428+.030), 4-bolt mains, factory Nodular crank, scat rods, icon dished pistons, Lunati HR 243/251@.050, .618/.622 lift, Edelbrock 72cc round port heads, 10.5:1, offy 2-4 intake, Edelbrock 650cfm carbs, Super T10 trans (2.64 first), BOP 10 bolt w/ Eaton posi and 3.36 gears |
|
#13
|
||||
|
||||
|
Quote:
__________________
1967 GTO, 432 (428+.030), 4-bolt mains, factory Nodular crank, scat rods, icon dished pistons, Lunati HR 243/251@.050, .618/.622 lift, Edelbrock 72cc round port heads, 10.5:1, offy 2-4 intake, Edelbrock 650cfm carbs, Super T10 trans (2.64 first), BOP 10 bolt w/ Eaton posi and 3.36 gears |
|
#14
|
||||
|
||||
|
Yesterday I got the column and pedals in. I put in an aftermarket Ididit tilt column. Bolts right in and is a very nice product. Also, picked up some longer carriage bolts to suck the gas tank straps up and that worked great! Only a few more parts here and there to assemble before paint!
I have the heavy duty style pushrod for my clutch linkage and its adjusted as short as it goes. It seems as though its not short enough. Is there a good way to modify it so I can shorten the overall length?
__________________
1967 GTO, 432 (428+.030), 4-bolt mains, factory Nodular crank, scat rods, icon dished pistons, Lunati HR 243/251@.050, .618/.622 lift, Edelbrock 72cc round port heads, 10.5:1, offy 2-4 intake, Edelbrock 650cfm carbs, Super T10 trans (2.64 first), BOP 10 bolt w/ Eaton posi and 3.36 gears |
|
#15
|
|||
|
|||
|
Had the same issue with my heavy duty clutch rod I bought from Ames, just cut a little bit off the threated part and the tube this will make it work, if I remember correctly I took at least 1/2" off both, but do your own thing go small numbers first, can't put it back on. good luck. jd grim 66 gto
|
|
#16
|
||||
|
||||
|
Thanks JD, I was thinking that was the solution but figured I'd rack a mind or two first
__________________
1967 GTO, 432 (428+.030), 4-bolt mains, factory Nodular crank, scat rods, icon dished pistons, Lunati HR 243/251@.050, .618/.622 lift, Edelbrock 72cc round port heads, 10.5:1, offy 2-4 intake, Edelbrock 650cfm carbs, Super T10 trans (2.64 first), BOP 10 bolt w/ Eaton posi and 3.36 gears |
|
#17
|
||||
|
||||
|
Last weekend I cut off about 3/8" off the pushrod and that helped a lot. I still have the pushrod bottomed out for the adjustment to be just right but I didn't want to cut too much off since there weren't a whole lot of threads left. Other than that I finished installing the inner and outer heater box as well as the new blower motor. Also got the entire glovebox assembly installed and the dynomat on the roof. I tried to install the hydroboost but ran into problem after problem. I got the issues worked out I believe and will get it fitted up this weekend.
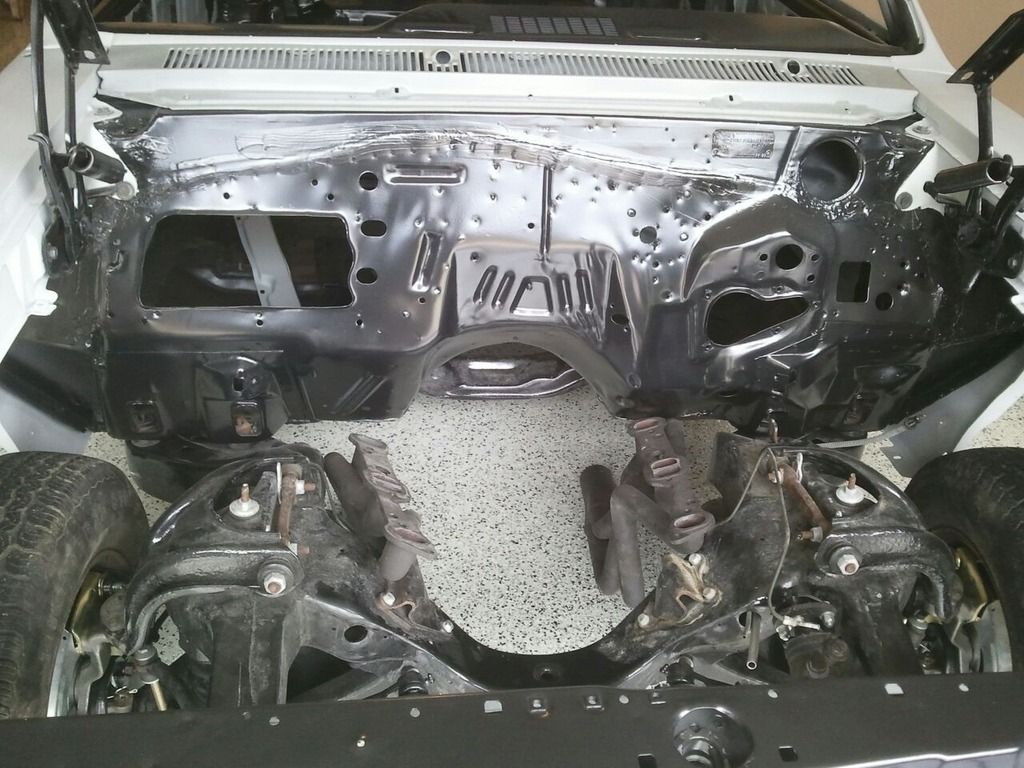
One problem I have encountered is with my wiring harness. I have chose to go with the aftermarket American Autowire Classic update kit. It is a very complete kit but requires widening of the fuse block hole. Wish I would've seen this before or during bodywork and especially before I installed the firewall pad. I will carefully sawzall the hole as to create less sparks than a cutoff wheel. I have almost everything assembled as far as I can before paint. I still have a lot of smaller parts and assemblies to blast and paint and many many hours of bright work which I'm not really looking forward to. I will continue to update as I go.
__________________
1967 GTO, 432 (428+.030), 4-bolt mains, factory Nodular crank, scat rods, icon dished pistons, Lunati HR 243/251@.050, .618/.622 lift, Edelbrock 72cc round port heads, 10.5:1, offy 2-4 intake, Edelbrock 650cfm carbs, Super T10 trans (2.64 first), BOP 10 bolt w/ Eaton posi and 3.36 gears |
|
#18
|
||||
|
||||
|
Here are a few pictures from a couple weeks ago. Guess I forgot to take some updated ones as I went. I'll get a few more this weekend.
  
__________________
1967 GTO, 432 (428+.030), 4-bolt mains, factory Nodular crank, scat rods, icon dished pistons, Lunati HR 243/251@.050, .618/.622 lift, Edelbrock 72cc round port heads, 10.5:1, offy 2-4 intake, Edelbrock 650cfm carbs, Super T10 trans (2.64 first), BOP 10 bolt w/ Eaton posi and 3.36 gears |
|
#19
|
||||
|
||||
|
looking good, keep up the good work
|
|
#20
|
|||
|
|||
|
Looking good just keep plugging away, I look at your project and can't believe I was in the same place a few years ago, took me almost 8 years to get mine where it's at, never will be done, I'll measure my clutch rod for you, yes mines out, lol. jd grim 66 gto
|
| Reply |
|
|