


| FAQ |
| Members List |
| Social Groups |
| Calendar |
| Search |
| Today's Posts |
|
|
|
#1
 04-11-2020, 09:58 PM
|
|||
|
|||
|
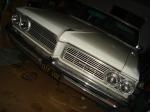
I started the process of pulling the motor today for an eventual rebuild. This is the most complex automotive project I've ever attempted, so I am hoping I can lean on you for advice and assistance through the process.
It is a '65 GTO, with a 455, #48 cylinder heads, '65 tri-power, Doug's exhaust headers, 4-speed w/ z-bar, and a 3.55 differential. The engine was previously rebuilt in 1993 and has about 17K miles on it. The previous owner has memory issues, and other than telling me it has Rhodes lifters, I have no idea about the specs. The problems are a rear main seal leak (about 1 quart/100 miles), engine run on after shut off without an octane booster/mix of race gas, and the engine has relatively low power for the combo, 325rwhp on a chassis dyno. The plan is a general refresh, with bearings, rings, seals, gaskets, new hardware, assess /adjust the compression ratio, and then re-paint. I will asses the internals once I see what I'm working with. I've been doing a lot of research, reading, and YouTubing and I feel I can do this. The first issue is going to be getting the engine out of the car. In my garage, with the headers and z-bar, it may get interesting. I will unbolt the z-bar from the frame and I'm hoping it will slide out. The second issue is whether to leave the headers on or off the engine during removal.
__________________
1965 Pontiac GTO 455/469 w/ #48 Heads, '65 Tri-Power 9.25:1 CR Stump Puller Cam Muncie M22W 1st-2.56 2nd-1.75 3rd-1.37 4th-1.00 3.55 Rear Differential Front: 225/60R15 Height: 25.6" Rear: 275/60R15 Height: 28" |
|
#2
04-11-2020, 10:12 PM
|
||||
|
||||
|
I’m not sure you really need a full bearing/ring refresh based on your description. I think you need to figure out what cam is in it and take care of the tuning. Might not be a bad idea to tear the heads off to see what pistons are in it. Take the pan off to see what rods you have too. I’d have the heads checked out too. Ideally the short block probably won’t have to be touched.
May be a good time to start from scratch with a cam/lifter selection so you know what’s in there. Also some of your running/dieseling issues sound like carb tuning and timing. Maybe see where your timing is set and what your max advance is before pulling everything apart. Take the bolts out of the headers before engine removal and remove the headers as the engine is being pulled.
__________________
1967 GTO, 432 (428+.030), 4-bolt mains, factory Nodular crank, scat rods, icon dished pistons, Lunati HR 243/251@.050, .618/.622 lift, Edelbrock 72cc round port heads, 10.5:1, offy 2-4 intake, Edelbrock 650cfm carbs, Super T10 trans (2.64 first), BOP 10 bolt w/ Eaton posi and 3.36 gears |
|
#3
04-12-2020, 12:15 AM
|
|||
|
|||
|
Thanks for the reply.
Timing is 12 initial, 32 total. The cold start is perfect, warm idle at 875rpm with an AFR of 13.5 to 14. Underload, 12.5 AFR. The throttle response is decent. The hot start has some issues, but that may be related to vapor lock. You may be right about not having to touch the short block. No matter what I have to replace the RMS and I will look at ARP main fasteners. Once I get it open, I will post photos. I enjoy this, and it is a great learning opportunity. A bit of a mystery as to what's inside.
__________________
1965 Pontiac GTO 455/469 w/ #48 Heads, '65 Tri-Power 9.25:1 CR Stump Puller Cam Muncie M22W 1st-2.56 2nd-1.75 3rd-1.37 4th-1.00 3.55 Rear Differential Front: 225/60R15 Height: 25.6" Rear: 275/60R15 Height: 28" |
|
#4
04-14-2020, 09:22 AM
|
|||
|
|||
|
Oddly, no noise. The "step" in the pilot bushing is bizarre. I need to see if the tranny input shaft is galled.
The ID of the pilot bushing is too large, there is slop when it is fitted on the input shaft of the tranny. I'm not sure if it was like that from day one or is sloppy as a result of some other alignment problem. Also, I will go back to using factory thin head bolts, so they clear the clutch springs. What is your opinion on the clutch? Do you think the springs are compromised with that level of wear? I'll send out better picks of everything later
__________________
1965 Pontiac GTO 455/469 w/ #48 Heads, '65 Tri-Power 9.25:1 CR Stump Puller Cam Muncie M22W 1st-2.56 2nd-1.75 3rd-1.37 4th-1.00 3.55 Rear Differential Front: 225/60R15 Height: 25.6" Rear: 275/60R15 Height: 28" |
|
#5
04-12-2020, 10:34 AM
|
||||
|
||||
|
325rwhp is actually pretty darned good, for a Pontiac with un-ported D-port heads. Your torque at the wheels is probably 100+ better than the HP.
Check the pistons for damage, or just replace them with dished pistons to get the compression ratio down to pump gas levels. If the pistons happen to check out, then consider installing some aluminum heads. A nice set of KRE's will give you a nice bump in rwhp. NO WAY would I try to pull the engine with the headers! Drop the starter, the oil filter housing, and pull the engine by itself. You may be tempted to use the BOP Engineering one-piece rear seal. It is a GREAT product, but it is a two-person job to install it, and could be rather frustrating for a beginner (and a fair chance you'll ruin it in the process). Their 2-piece is much simpler to install. Factory main and head bolts are fine. If you need to have the rod resized, then consider having ARP's installed at that time - but then, why not just get some better rods to begin with, if you are at that point?
__________________
'73 T/A (clone). Low budget stock headed 8.3:1 455, 222/242 116lsa .443/.435 cam. FAST Sportsman EFI, 315rwhp/385rwtq on 87 octane. 13.12 @103.2, 1.91 60'. '67 Firebird [sold], ; 11.27 @ 119.61, 7.167 @ 96.07, with UD 280/280 (108LSA/ 109 ICL)solid cam. [1.537, 7.233 @93.61, 11.46 @ 115.4 w/ old UD 288/296 108 hydraulic cam] Feb '05 HPP, home-ported "16" D-ports, dished pistons (pump gas only), 3.42 gears, 275/60 DR's, 750DP, T2, full exhaust My webpage http://lnlpd.com/home |
|
#6
04-12-2020, 10:58 AM
|
|||
|
|||
|
In your first post, you indicate this is a big project and you are new to it but ready to jump-in. This would be my advice and may differ from others. You have a nice car from what I can tell in the pics and you don't want to bang-up or damage the engine compartment during this ordeal. So in the interest of safety and not banging up stuff: I would remove the radiator, fan and fan guard. I would put the car on a lift or jack stands as high as practical and remove the drive shaft and the crossmember and the shifter and the transmission. You can pull the engine and trans together, but need more of an angle, it's much more difficult and can be a mess as the trans will be leaking 90wt all over the place, especially if the trans doesn't have a drain. Take the headers off and leave them in the compartment or pull them or drop them if they can be easily removed. With just the engine and bellhousing left, it will come out easily.
As far as what will be needed once it's out and apart, there is honestly no way to know until you get inside. Based on needing octane boost and race gas to make it run and shut off properly, there is a high probability there is piston/ring damage. Also, you will need to determine if when it was rebuilt in 1993, what was actually done? If it still is stock bore and only had a ball hone rebuild in 1993, I would have it bored and honed and do it right this time. You can expect to pick up 40-50 HP just from having round and straight cylinders with a properly plate honed block vs a backyard ball hone ring job. Enjoy the process and do it right to the best of your ability and budget. The number 1 thing concerning the rebuild is Clean, clean, clean. Lots of detergent, lots of hot water and compressed air. Good luck and have fun. As far as the rear main seal leak, I would consider the BOP 2 piece or 1 piece rear seal and possibly their 1 piece oil pan gasket as well. |
|
#7
04-12-2020, 10:45 AM
|
||||
|
||||
|
If it doesn't have dished pistons, the 48 heads and resulting compression ratio are likely the reason for needing octane enhancement.
__________________
'65 Tempest 467 3650# 11.30@120.31 |
|
#8
04-14-2020, 11:21 AM
|
||||
|
||||
|
Clutch disc looks like it was in correct,the sprung HUB goes toward the pressure plate.. long head bolts on the flywheel mount look to be the causal part.
How is the ID of the pilot bushing? The crank may have not been machined for a pilot bushing, and someone made a custom bushing(not necessarily well  ), it does not "appear" to have been spinning in the crank. The diameter of where the flywheel meets the crank can be telling of the year of the crank, also if it has thin counterweights. Casting # to start with can rule out if it is a late crank with smaller mounting hub. ), it does not "appear" to have been spinning in the crank. The diameter of where the flywheel meets the crank can be telling of the year of the crank, also if it has thin counterweights. Casting # to start with can rule out if it is a late crank with smaller mounting hub.If it is not a close fit to the trans input shaft pilot OD, someone may have blown it there on size, or it may have worn from disc to bolt interference. Did it have a gear crunch going into gear at idle or increased rpm with vehicle stopped? You need to make sure it is 455 crank also, and not a shorter stroke! Post up pics of heads, block, crank and rods, pistons. ID 'ing what you have is important going forward. There may have been no noises because everything may have self clearanced  ... ...More pics of input shaft and bushing could be very telling. A measure of the depth from flange and width of pilot bush/bearing bore in the back of the crank should tell if work will need done there. I don't believe there is a definitive way to know by casting #, some are machined....some are not. Crap shoot unless you know it is the original crank...to that engine. What is the engine code on RF of block?? 2 capital letters stamped just below deck surface. ALso casting # on R REAR SIDE of block. And year by dizzy pad, if there is one. Last edited by STEELCITYFIREBIRD; 04-14-2020 at 12:01 PM. |
|
#9
04-15-2020, 03:43 PM
|
|||
|
|||
|
Quote:
|
|
#10
04-19-2020, 12:44 AM
|
|||
|
|||
|
PontiacJim1959,
Please see the attached photo of the intake side of the head. Circled in red is the capped water port I was curious about. Why is this blocked?
__________________
1965 Pontiac GTO 455/469 w/ #48 Heads, '65 Tri-Power 9.25:1 CR Stump Puller Cam Muncie M22W 1st-2.56 2nd-1.75 3rd-1.37 4th-1.00 3.55 Rear Differential Front: 225/60R15 Height: 25.6" Rear: 275/60R15 Height: 28" |
|
#11
04-19-2020, 01:41 AM
|
||||
|
||||
|
Quote:
The heads have water ports on both ends. Both front ports (heads bolted to the block) are used for the front thermostat crossover. The passenger side head has a heater nipple pressed in to the rear water port, the driver’s side head is simply plugged off since that rear water port isn’t needed.
__________________
1964 Tempest Coupe LS3/4L70E/3.42 1964 Le Mans Convertible 421 HO/TH350/2.56 2002 WS6 Convertible LS1/4L60E/3.23 |
|
#12
04-19-2020, 11:58 AM
|
|||
|
|||
|
Quote:
Because each head is the same, one head only gets the heater core nipple which circulates the cooland through the core and head, and you will see the onter line coming from the heater core that goes to the water pump to make a "circuit" for the water to circulate and provide heat inside the car. So the back water passage on the head supplies the hot coolant to the heater core. Now it does not matter which head gets the water outlet nipple as both heads are the same. The shop will knock these out when hot tanking. The important part is that the shop orientates one of the heads for use on the passenger side and installs the heater nipple on the rear water outlet. If they screw up, you won't be able to install your intake. Pics show the water nipple in the passenger side head and the cup in the drivers side head. Some will add a 2nd heater nipple and tie the 2 together into each other as this is said to help with head cooling on the side not having the water nipple and coolant flow. |
|
#13
04-19-2020, 04:58 PM
|
|||
|
|||
|
Looks like you are on a good path. A couple of tidbits. Your #4 and 5 on your list. Your block will likely need some attention in the main housing bore area. Look very carefully at the main cap that has the broken dowel. The cap is most likely broken at the dowel hole as well. Generally, line boring is not needed unless you are fitting new billet main caps. I much prefer line honing if not. Less material removal, better finish and more accurate. As far as the cam tunnel. Even though some folks on here talk up the woes of the Pontiac cam tunnel, I have not found that to be the case. Very few I work with need any line boring/honing of the cam tunnel. How did the camshaft turn in the block? If it spun like butter and the cam bearings don't have any weird wear, you should be OK. Oversize cam bearings are not readily available, but there are a few sets out there in an emergency. From the one pic, it looks like the oil pump driveshaft loop is damaged a little or crunched-in on one side. Just make sure the hole is round and smooth. The exact size doesn't matter. With iron un-ported heads, build for torque and a HP peak around 5200 RPM's. 455 HP will be a little bit of a stretch with your stated goals and parts. 500 Ft. lbs. of torque is very possible. Good luck and have fun.
|
|
#14
04-24-2020, 12:03 AM
|
|||
|
|||
|
Are these the nylon bushings as shown in the photo?
__________________
1965 Pontiac GTO 455/469 w/ #48 Heads, '65 Tri-Power 9.25:1 CR Stump Puller Cam Muncie M22W 1st-2.56 2nd-1.75 3rd-1.37 4th-1.00 3.55 Rear Differential Front: 225/60R15 Height: 25.6" Rear: 275/60R15 Height: 28" |
|
#15
04-23-2020, 01:26 AM
|
|||
|
|||
|
Thanks b-man.
From the engine compartment, what connects to that? When I pulled the engine I cannot remember. I'll take a look tomorrow.
__________________
1965 Pontiac GTO 455/469 w/ #48 Heads, '65 Tri-Power 9.25:1 CR Stump Puller Cam Muncie M22W 1st-2.56 2nd-1.75 3rd-1.37 4th-1.00 3.55 Rear Differential Front: 225/60R15 Height: 25.6" Rear: 275/60R15 Height: 28" |
|
#16
05-03-2020, 09:38 PM
|
|||
|
|||
|
__________________
1965 Pontiac GTO 455/469 w/ #48 Heads, '65 Tri-Power 9.25:1 CR Stump Puller Cam Muncie M22W 1st-2.56 2nd-1.75 3rd-1.37 4th-1.00 3.55 Rear Differential Front: 225/60R15 Height: 25.6" Rear: 275/60R15 Height: 28" |
|
#17
04-12-2020, 11:31 AM
|
||||
|
||||
|
I agree with pulling the trans first as well as radiator and fan . And to prevent 90wt spilling get an extra yoke to shove in the trans when you pull the driveshaft!! Just unbolt headers and leave them there. I do not have to unbolt the oil filter housing to put a Pontiac motor in my Trans Ams(or the Camaro) When I pulled the 4 speed and SBC oput to put the Pontiac motor in the Camaro I pulled trans,Zbar, and bellhousing and clutch first. I even put the TH400 back in it from underneath separate a 4 speed is even easier to do that.
__________________
Skip Fix 1978 Trans Am original owner 10.99 @ 124 pump gas 455 E heads, NO Bird ever! 1981 Black SE Trans Am stockish 6X 400ci, turbo 301 on a stand 1965 GTO 4 barrel 3 speed project 2004 GTO Pulse Red stock motor computer tune 13.43@103.4 1964 Impala SS 409/470ci 600 HP stroker project 1979 Camaro IAII Edelbrock head 500" 695 HP 10.33@132 3595lbs |
|
#18
04-12-2020, 12:25 PM
|
|||
|
|||
|
The radiator w/ e-fans is out. So lots of room toward the front now.
My plan is to support the tranny and unbolt the block to bellhousing, shift the engine forward a few inches and lift. When I get there, I will assess other options such as removing the tranny first or lifting it out with the tranny combined. I will remove the starter, oil filter housing, z-bar, steering shaft, and unbolt the headers today. Regarding the 1-piece BOP RMS, I have one, and I was planning on using it. I will have a helper and Wade at BOP has emailed me some advice. I will carefully check seal OD, cap ID, and how the cut joint mates together with and without crank. If I feel iffy about it, I will abort and go to a 2-piece RMS. I will update later today. Happy Easter!
__________________
1965 Pontiac GTO 455/469 w/ #48 Heads, '65 Tri-Power 9.25:1 CR Stump Puller Cam Muncie M22W 1st-2.56 2nd-1.75 3rd-1.37 4th-1.00 3.55 Rear Differential Front: 225/60R15 Height: 25.6" Rear: 275/60R15 Height: 28" |
|
#19
04-12-2020, 12:50 PM
|
|||
|
|||
|
If your going to leave the transmission in the car, just be aware that putting the assembly back together will be tough. Getting it out that way isn't the easiest either. Two things to consider. 1. When you separate the bellhousing from the engine, they will need to be in straight alignment as you need to disengage from the pilot bearing and the splines on the clutch disc. 2. The engine will need to move forward 4-5 inches to clear the clutch from the bellhousing. When putting it all back together, everything needs to be in perfect alignment to have the clutch and pilot bearing go smoothly back in. It can be frustrating, not impossible. This would be my third choice of how to proceed. Possible, not easy.
|
|
#20
04-14-2020, 11:29 PM
|
|||
|
|||
|
Tranny input shaft doesn't look too bad from the pilot bearing issue.
__________________
1965 Pontiac GTO 455/469 w/ #48 Heads, '65 Tri-Power 9.25:1 CR Stump Puller Cam Muncie M22W 1st-2.56 2nd-1.75 3rd-1.37 4th-1.00 3.55 Rear Differential Front: 225/60R15 Height: 25.6" Rear: 275/60R15 Height: 28" |
| Reply |
|
|
The PY Online Forums is the largest online gathering of Pontiac enthusiasts anywhere in the world. Founded in 1991, it was also the first online forum for people to gather and talk about their Pontiacs. Since then, it has become the mecca of Pontiac technical data and knowledge that no other place can surpass.


 Hybrid Mode
