


| FAQ |
| Members List |
| Social Groups |
| Calendar |
| Search |
| Today's Posts |
|
#41
 02-05-2010, 07:41 PM
|
||||
|
||||
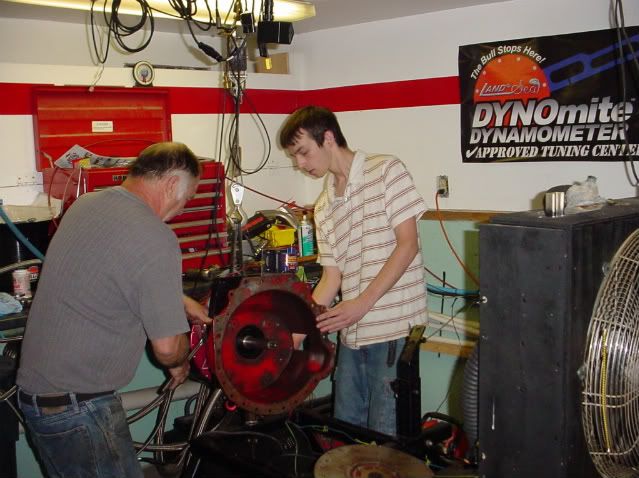 My machinist recommended that I work with Lenny Caverly to break in my new motor. Some of you may have heard of Len as a person who has competed nationally in engine building competitions. His specialty is Pontiacs, so he was the perfect person to help me bring the new motor to life. Best of all, he lives 30 minutes from my house. In this photo Lenny and his son are preparing the dyno to receive the motor.  Here's the motor mounted on the dyno. Installing Pontiac headers is never easy, even when theres lots of room. I mentioned earlier that I used the factory 068 cam for this rebuild. Melling still manufactures this original grind. Melling recommended the use of Rotella T for break-in oil, so that's what I used. I also added a small container of ZDDP just to make sure there was enough zinc phosphate present in the oil to protect the cam lobes and tappets during break-in. 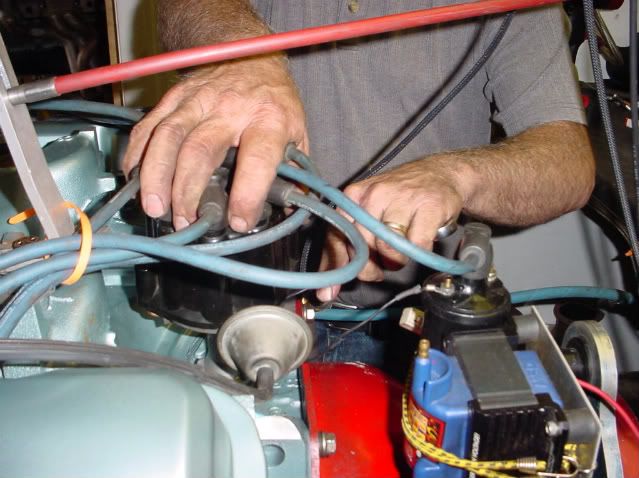 Proper ignition timing is absolutely critical to getting the motor to start on the first turn of the key. In this photo Lenny's double checking to make sure Karl and I had set the timing correctly. 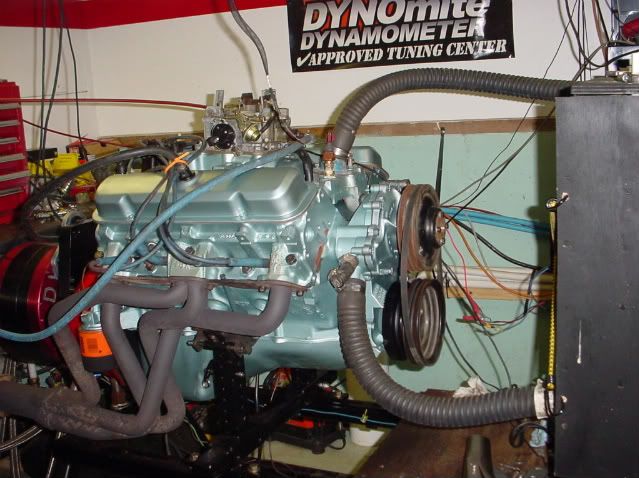 Here is the motor bolted to the dyno. The exhaust is hooked up, the gas supply is rigged, the wiring is complete, and Len installed a temporary belt to run the water pump. Everything had been checked and double checked, so this was the big moment. After 18 months of effort, would this motor run? Len hit the key, and the motor started right up. It was a pretty exciting moment. Hard to tell from the photo, but you can see the belt is in motion. An unbreakable rule for breaking in flat tappet cams - once started, the motor must stay over 2000 rpm for 20 minutes. The reason for the higher rpm is to ensure that enough oil splashes on the cam lobes during beak-in. If necessary, it is permissible to shut off and restart a motor during the break-in period. Just dont let it idle. If I had retrofitted the motor with a roller cam, an extended break-in period wouldnt have been necessary. Every motor breaks in a little bit different. This one wanted to slowly overheat. When the temperature approached two hundred degrees, Len would shut it down. In our case, we shut the motor down three times to allow it to cool off before hitting the 20 minute mark. One other small problem. There was a pretty good tap coming from under the driver's side valve cover near the number 5 and 7 cylinders. It wasn't bad enough to make us want to stop the break-in, but it was loud enough to let us know that something wasnt right. 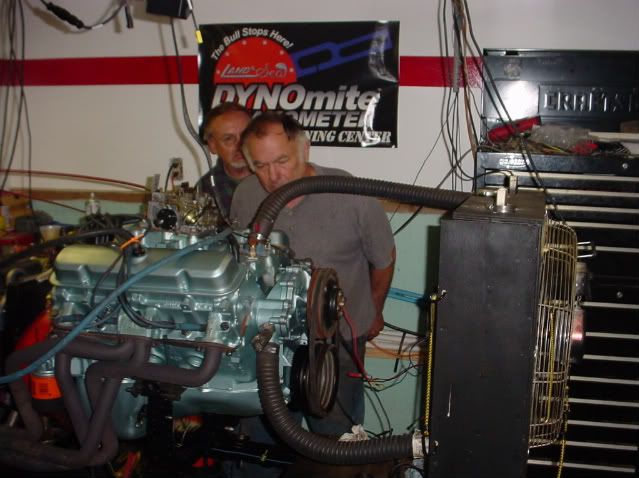 We hoped that the tapping would go away by itself early in the break-in, but it didn't. As you can see by this photo, we weren't too happy about what we were hearing. Len thought it sounded as though one of the valves didnt have insufficient pre-load, so during one of the cool down periods we pulled the valve cover and checked. Sure enough, I had not put the proper pre-load on one of the exhaust valves. Once this was fixed, the motor sounded awesome. 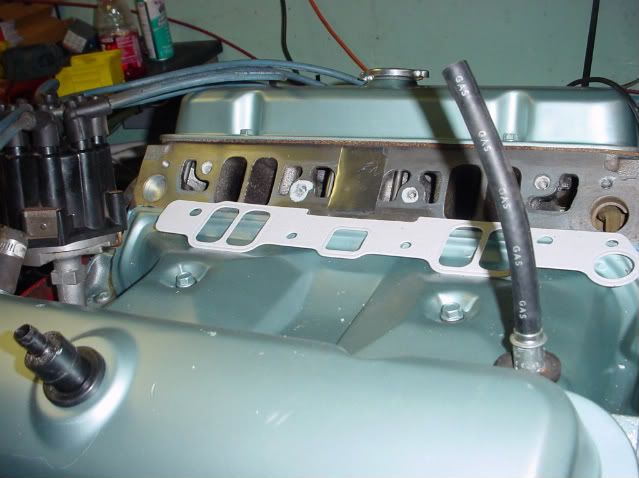 When Karl and I installed the shim on the exhaust port we used a piece of thin aluminum stock. Too thin, it turned out, so we needed to pull the intake and install a thicker stainless steel shim.  Once we had fixed the inevitable little problems. It was time to load the motor and try some preliminary pulls. 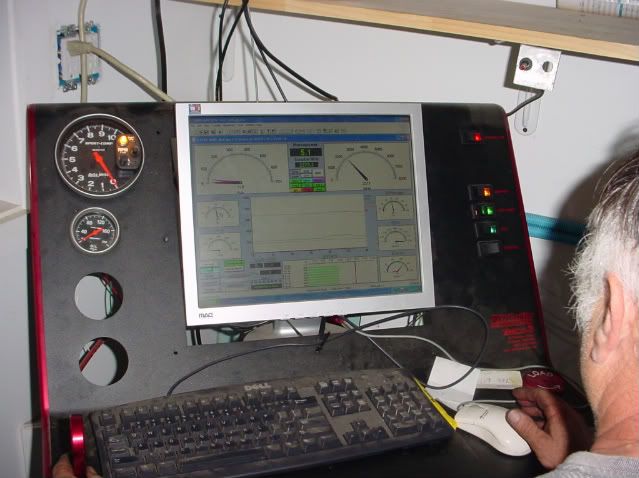 Here is a shot of the dyno screen. Don't look at the gauges on the left side. The digital display on the left allowed Len to track water temperature, oil pressure, air/fuel ratio, torque, and calculated horsepower. After several pulls, the water temperature stabilized at about 175 degrees. 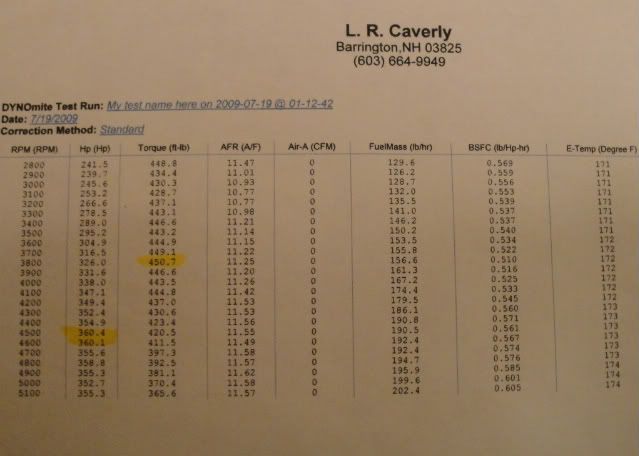 Heres the results of one of the final dyno pulls. Max power (360) occurred at a street-friendly 4500 rpm and max torque (450) occurred at 3800 rpm. For a mild street motor the torque curve was respectable, with nearly 450 foot pounds by 2800rpm and staying over the 400 foot pound mark to 4600 rpm. You may notice that the motor was running lean on this pull. We wouldnt have known about this lean condition had I just stuck the motor in the car. Although Len certainly had the skills and equipment to get every last bit of performance from this motor, I was satisfied with a mild tune and knowing that the motor would start and run uneventfully when installed in the car.
__________________
"Pay no attention to the planet Mopar. It is a strange and confusing place." ~Chiphead |
|
#42
02-05-2010, 08:32 PM
|
||||
|
||||
|
Quote:
This will be a big help for me! 
|
|
#43
02-05-2010, 08:36 PM
|
||||
|
||||
|
A good and and informative thread. That engine should make your car a pretty fun ride.
BTW, that carb on there looks kind of familiar. 
__________________
North Dakotas fastest REAL GTO 10.10 @ 131 MPH in the 1/4 Hoping to get it back together some year. www.jandjrepairandrestoration |
|
#44
02-06-2010, 11:19 PM
|
||||
|
||||
|
I've spent many day's working with Lenny on his dyno including today with many different combos and it's alway a rewarding experance!
I don't think you could ask for a better Pontiac Man! 
__________________
Carburetor building & modification services Servicing the Pontiac community over 20 years |
|
#45
02-07-2010, 09:42 AM
|
|||
|
|||
|
Thanks for taking the time and effort to document your rebuild here!
It is also a reminder of something missing in the Pontiac hobby...a "how to rebuild your Pontiac" book! There are plenty of "how to rebuild" your small block and big block Chevy books out there that go into a lot of specific assembling detail, with step by step guides, with lots of clear color photos, torque values, and showing what tools to use, etc. SA Design books always seem to be the best with their clarity of description and photos. But...Why is there no step-by-step "how to rebuild your Pontiac" book??? I've looked for one, but haven't found any like that. If there is one like that, please let me know. Sure...you can use a factory Pontiac Service manual as a rebuilding guide. I use it alot to maintain my Pontiac engine. The Chevy has a Service manual too, but that hasn't prevented the publishing of Chevy rebuild books. A step-by-step guide with the color photos and better assembly descriptions with assembly tips included are a bit easier and clearer to use than the service manual. And the factory manual doesn't go into some common modifications and modern updates and procedures that a modern Pontiac rebuilder would desire and benefit from, which could all be covered in a rebuild book. Jim Hand's how to build a Pontiac book has a lot of useful info, but it really isn't a step-by-step detailing of rebuilding an engine. So, I think there is still a need for such a book, as evidenced by the response of Pontiac hobbyists on this thread. I hope this encourages one of the Pontiac engine experts to publish one. |
|
#46
02-07-2010, 02:55 PM
|
|||
|
|||
|
Thanks Guys for the shameless plugs.
Len |
|
#47
02-08-2010, 12:58 AM
|
||||
|
||||
|
Curious when you say Len checked you timing, did you mean he checked the firing order and ensured where the rotor was pointing was indeed #1 cylinder? I know the rotor can be pointed in any direction as long as the firing order is followed CCW but was curious what you meant. I'm learning myself.
__________________
69 Gto, 390 posi gears,th400 w/jim hand converter/406 pontiac/#64 HEADS/ 10:1 compression/ 190 PSI with/ TRW 160 thou domes / hooker headers 1 7/8, PRW 1.5 rockers, 405 Crower Springs, Holley 750 vac with proform upgrade, Performer RPM on points / 284 H Single Pattern Crane |
|
#48
02-08-2010, 01:35 AM
|
||||
|
||||
|
Jim Hand's how to build a Pontiac book has a lot of useful info, but it really isn't a step-by-step detailing of rebuilding an engine. So, I think there is still a need for such a book, as evidenced by the response of Pontiac hobbyists on this thread. I hope this encourages one of the Pontiac engine experts to publish one.
Yep. |
|
#49
02-08-2010, 02:54 AM
|
||||
|
||||
|
Quote:
This is a great thread, pretty good HP numbers for basic build too, not a screamer but the power is right up there with a RA III. 
__________________
'74 Formula car is gone and I will be posting under my old 2004 (newly discovered old account from a work computer) "PONTIAC-ONE" from now on. I totally forgot I had that. R.I.P. "1974formula" 
Last edited by 1974formula; 02-08-2010 at 03:04 AM. Reason: sp |
|
#50
02-08-2010, 03:05 AM
|
||||
|
||||
|
Actually I was quoting the last paragragh in Grand73Am's post.Just don't want to take credit for his post.I have Jim's book and have learned from it,and still refer to it.But it is a little more for the 'advanced' or performance builder.And yes this is a great thread.
|
|
#51
02-08-2010, 08:04 PM
|
||||
|
||||
|
Quote:
There are several ways to set the timing correctly on a new motor. Karl and I followed the method given in the 1969 Pontiac service manual. On page 6.55 of the manual, figure 6 - 97 shows the correct dot to dot alignment for the timing gears (both dots are at the 12 o'clock position) to fire the number one cylinder. If you turn to page 6E-19, figure 6E- 31 shows the distributor installed in the block and illustrates the correct location of the roter to fire the number one cylinder, assuming the dot alignment described above. If all is correct, the timing mark on the harmonic balancer should be indexed with the proper mark on the timing chain cover. We also doublechecked other little things like making sure that the spark plug wires went to the right cylinders before attempting to fire the motor.
__________________
"Pay no attention to the planet Mopar. It is a strange and confusing place." ~Chiphead |
|
#52
02-08-2010, 08:06 PM
|
||||
|
||||
|
Quote:
__________________
"Pay no attention to the planet Mopar. It is a strange and confusing place." ~Chiphead Last edited by Red Coupe; 02-08-2010 at 08:58 PM. |
|
#53
02-08-2010, 10:22 PM
|
||||
|
||||
|
Thanks for the explanation, thats what I thought. I'd like to buy that book, I wonder if PY sells it? When you say harmonic balancer lines up and is correctly indexed do you mean the following:
After the 12oclock and 12 oclock tming chain is installed and #1 piston is at tdc. Timing cover is installed. Does one insert thet harmonic balancer onto end of crank using crank pulley tool and ensure to line up the "indent line" with the "0"(zero) on the Timing cover? Your would then torque the balancer bolt on to the recommended 120 psi I believe. All things being done correctly and distributor correct is that safe to assume I got it right? I believe the crank pulley then goes on right after that, correct? Thanks so much... Kyle
__________________
69 Gto, 390 posi gears,th400 w/jim hand converter/406 pontiac/#64 HEADS/ 10:1 compression/ 190 PSI with/ TRW 160 thou domes / hooker headers 1 7/8, PRW 1.5 rockers, 405 Crower Springs, Holley 750 vac with proform upgrade, Performer RPM on points / 284 H Single Pattern Crane |
|
#54
02-09-2010, 09:50 AM
|
||||
|
||||
|
I picked-up on an item from Nunzi Romano that I'd like to add. Before you install the timing chain, soak the timing chain at least overnight in thin enough engine oil so that all the links get lubed, you may get better break-in and longer life out of it before stretching becomes an issue.
|
|
#55
02-09-2010, 08:07 PM
|
||||
|
||||
|
Quote:
Yes, you can buy the Pontiac service manuals through PY. Yes, you would install the harmonic balancer onto the crank. (This is a slip fit for Pontiacs, no balancer install tool is necessary.) No lineup is necessary because the balancer is keyed to the crankshaft. The balancer attaching bolt is torqued 160 foot pounds. The crank pulley is installed next, as you state.
__________________
"Pay no attention to the planet Mopar. It is a strange and confusing place." ~Chiphead |
|
#56
02-09-2010, 08:18 PM
|
|||
|
|||
|
There was a reference to checking piston to valve clearence , I always use clay for initial assembly because there is no way to know the radial clearance of the valve pocket by using the dial indicator method. if an engine has already been assembled and I'm installing a new cam or changing the ICL then the dial indicator method is appropiate.
Len |
|
#57
02-09-2010, 08:23 PM
|
|||
|
|||
|
Quote:
Jims book was good,had a lot of history,but doesn't cover much on assembly techniques. |
|
#58
02-09-2010, 08:29 PM
|
||||
|
||||
|
I talked to my machine shop, and they are assembling a 400 this weekend. Given some of the comments/questions/suggestions posted in this thread, I'm going to try to get photos of the following operations:
Describe the machining errors that can cause rear main leaks. Steps in degreening a cam. Demonstrate the balancing process, (not requested, but good to know). Rear main seal install, including use of sealants. Oil gallery plugs and freeze plugs install. Dip stick installation. Measuring thrust bearing clearance. Measuring piston to wall clearance. If anyone has more ideas, just let me know.
__________________
"Pay no attention to the planet Mopar. It is a strange and confusing place." ~Chiphead |
|
#59
02-09-2010, 09:43 PM
|
||||
|
||||
|
Quote:
|
|
#60
02-09-2010, 10:05 PM
|
|||
|
|||
|
Quote:
|
| Reply |
|
|
The PY Online Forums is the largest online gathering of Pontiac enthusiasts anywhere in the world. Founded in 1991, it was also the first online forum for people to gather and talk about their Pontiacs. Since then, it has become the mecca of Pontiac technical data and knowledge that no other place can surpass.


 Linear Mode

