| FAQ |
| Members List |
| Social Groups |
| Calendar |
| Search |
| Today's Posts |
 |
|


Menu
| The Body Shop TECH General questions that don't fit in any other forum |


| Reply |
|
|
Thread Tools | Display Modes |
|
|
| The Body Shop TECH General questions that don't fit in any other forum |
| Reply |
|
|
Thread Tools | Display Modes |
|
#21
 02-07-2007, 05:40 AM
|
||||
|
||||
|
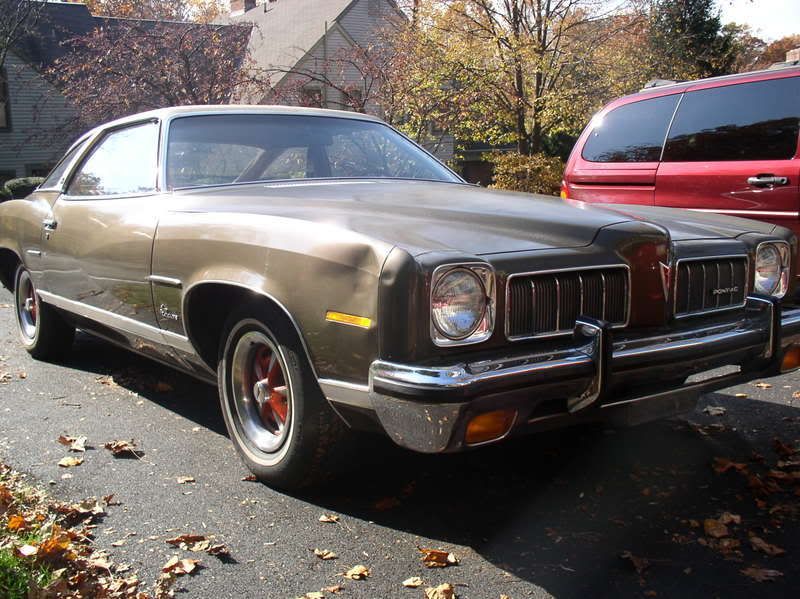
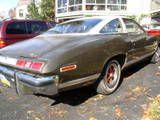
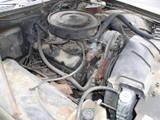
Here's a few pics of my car, and one of the rusty vinyl top.
|
|
#22
02-07-2007, 07:26 AM
|
||||
|
||||
|
Tone,
That looks like a solid project but be ready for a lot more rust than you suspect under that vinyl. It's going to be labor/time intensive and that's where your money will go. I don't know what they'll charge but I'll say this....what I came to believe they would charge for mine is what led me to believe I'd be cheaper buying a welder. Of course, you could go the fiberglass or putty route. I just didn't want to do that.
__________________
Greg Reid Palmetto, Georgia |
|
#23
02-08-2007, 01:55 AM
|
||||
|
||||
|
Ok, so I think the only tool that I NEED is that special molding removal tool....Anyone have one they bought, used, and don't need anymore? I figure for me anyway, it will probably be a one time use. I know some people I can get tools from, like a welder(I hope I don't need it...) ..heat gun, grinder, etc.
I read some posts/threads about removing or replacing a vinyl top, and I want to try it myself. |
|
#24
02-08-2007, 11:29 AM
|
||||
|
||||
|
Quote:
__________________
LEAD, FOLLOW, OR GET THE HE!! OUT OF THE WAY!!! HONEST JERRY'S SPEED AND EQUIPMENT
|
|
#25
02-08-2007, 10:18 PM
|
||||
|
||||
|
Jerry, I'm betting that if Mark pulled that glass out a good portion of the channel would have come out with it...especially since it was surely put in originally with urethane sealant.
Since he didn't want to replace any metal that wouldn't have worked out too well. I agree though that the leak is probably still there or will be soon.
__________________
Greg Reid Palmetto, Georgia |
|
#26
02-09-2007, 02:56 PM
|
|||
|
|||
|
[QUOTE.........Heres what I did,grind off rust,ospho acid,master series primer (from petes ponies),lay fiberglass cloth in wet master series followed by another coat of ms .I was amazed how hard and strong the fiberglass and ms patch is!.......[/QUOTE]
When I google Master Series, I come up blank. Does anyone have a web site address? Thanks. |
|
#27
02-11-2007, 06:53 AM
|
||||
|
||||
|
Do a search on this site. There is a user here that is a sales rep., user name is PetesPonies. Also, I've seen it on eBay.
__________________
Greg Reid Palmetto, Georgia |
|
#28
02-11-2007, 10:32 AM
|
||||
|
||||
|
For Master Series information try www.nomorerust.com Bruce.
__________________
1970 T/A RA3 #'s match. |
|
#29
02-11-2007, 05:32 PM
|
|||
|
|||
|
Thanks!
|
|
#30
02-11-2007, 09:09 PM
|
||||
|
||||
|
I used (and will continue to use) MS during my restoration. Pete was very helpful in answering questions, as well. Two things I learned while using MS:
1. It dries very quickly, so keep that in mind when using it, and 2. Be careful when selecting a secondary container (you're not supposed to apply right out of the can). I thought I'd be smart and use plastic bathroom cups. While the size was good, the MS ate through the cup. I didn't realize this was happening until I picked up the cup and got a big glop of MS on my pants and shoe. The shoes are now yard shoes.  I now use Kraft spreadable cream cheese containers, which work quite well. |
|
#31
02-12-2007, 02:10 PM
|
||||
|
||||
|
I hate to be the bearer of bad news, but that picture you sent of the lower vinyl top does NOT look good at all. I have a terrible feeling that once you get that top off you're going to be asking questions about welders rather than primers.
You may have some major cancer brewing under there, partner. It's not gonna be pretty. Sorry. :P It's really cool to see someone working on a '73 LeMans, though - you'll get lots of attention at shows/cruise-ins since you'll be the only one there! Do a nice job and you won't regret it.  Chris
__________________
69 GTO Hardtop project - started without a clue, will finish only by the grace of the PY Forums and Mr. Dave Wrzesinski (magicV8) - candidate for Father-In-Law Of The Century. We are building a bad-ass, hot-looking, hot-running Pontiac street machine. |
|
#32
02-12-2007, 03:32 PM
|
||||
|
||||
|
Chris, thanks for your concern. There's a welder and a truck full of tools at my workplace, and our mechanic said he'd be glad to help me. So at this point, I'd still like to tear into it myself as long as noone tells me that I will have to take out the windows. I'm pretty sure I can't do windows.....
I also still need that tool for removing the window moulding. Anyone selling theirs??? Thanks, Tone.
__________________
***SOLD*** 73 Lux Lemans. 350 2brl. Single exhaust. TH350 automatic. |
|
#33
02-12-2007, 04:53 PM
|
||||
|
||||
|
There are a number of different tools sold for that job - none of them is magic, however. I removed most of my trim with a flat screwdriver and a stiff putty knife/scraper tool.
Chris
__________________
69 GTO Hardtop project - started without a clue, will finish only by the grace of the PY Forums and Mr. Dave Wrzesinski (magicV8) - candidate for Father-In-Law Of The Century. We are building a bad-ass, hot-looking, hot-running Pontiac street machine. |
|
#34
02-12-2007, 06:24 PM
|
||||
|
||||
|
Tone
You can grind a notch in a old/cheap flat screwdriver to use to remove the trim. I borrowed the tool from someone and the next time I just made my own. I have also used one made out of a stiff wire coat hanger, just bend the last 1/2 inch into an "L" shape and grind a flat point on the tip. Look at the tool offered by the on-line parts retailers and you can see what you need to do to make one, they are only about 10 bucks but more fun to make your own I think. Someone on e-pay sells a cool little set for $9 plus ship, could be junk though. http://cgi.ebay.com/ebaymotors/NEW-4...QQcmdZViewItem Cool car by the way, have fun with it. |
|
#35
02-12-2007, 06:45 PM
|
||||
|
||||
|
Hard to imagine being able to fix that without removing some glass. If you have to break out a welder, definitely remove all glass. The splatter will ruin it.
See that very narrow area below the quarter glass? That looks to be completely gone to me.... Trim removal tool can be found at NAPA for about $7~$8....Pictured below-
__________________
Greg Reid Palmetto, Georgia Last edited by Greg Reid; 03-26-2007 at 07:36 PM. |
|
#36
02-14-2007, 12:26 PM
|
||||
|
||||
|
I agree, remove the glass and you won't regret it. No matter what method you choose, with the glass removed, you can do a more thorough job. With a new vinyl roof installed, you'll be good to go. My 69 had a green vinyl roof originally, but I chose not to replace it. Good luck with your project.
Don't be afraid to tackle a project yourself. Do your research (this is a GREAT Forum) and you'll probably do a better job than paying someone. Just don't be in a rush. Haste makes waste. |
|
#37
02-14-2007, 02:14 PM
|
||||
|
||||
|
Ok, so now that I can just make that tool myself, or get one at NAPA....What am I going to do about the glass? Can I take it all out and put it back in myself too? I automatically assumed that removing the glass is super mega hard and I'd have to call in the pro's.
__________________
***SOLD*** 73 Lux Lemans. 350 2brl. Single exhaust. TH350 automatic. |
|
#38
02-14-2007, 02:51 PM
|
|||
|
|||
|
You should be able to remove the glass (special tool for that to) with the help of a buddy to lift it out. Dave K.
|
|
#39
02-14-2007, 03:02 PM
|
||||
|
||||
|
Quote:
Oh good...more special tools, lol. Can I craft this one myself too?
__________________
***SOLD*** 73 Lux Lemans. 350 2brl. Single exhaust. TH350 automatic. |
|
#40
02-14-2007, 08:50 PM
|
||||
|
||||
|
To remove the glass, some people use a piece of heavy wire with a dowel on each end. Put one guy inside and another outside to slice through the goop. I think a wound guitar string would be good. Myself, I think the storebought tool is much better for this job and it too can be bought for less that $10. I saw one at Northern tools last week.
It's commonly called a "cold knife" or windshield removal tool. I got mine on eBay for $9.
__________________
Greg Reid Palmetto, Georgia |
| Reply |
|
|
The PY Online Forums is the largest online gathering of Pontiac enthusiasts anywhere in the world. Founded in 1991, it was also the first online forum for people to gather and talk about their Pontiacs. Since then, it has become the mecca of Pontiac technical data and knowledge that no other place can surpass.


 Linear Mode

