


| FAQ |
| Members List |
| Social Groups |
| Calendar |
| Search |
| Today's Posts |
|
#241
 02-23-2018, 12:26 AM
|
|||
|
|||
|
So, after more than 12 months of trying to get people to quote me on painting my car (and having approximately zero quotes/estimates/prices come back to me) I have actually had a friend offer to prep & paint it for a decent price ($13k Aussie). It won't be a full bare-metal job though the roof, hood, door jambs, nose cone, and trunk will all be back to bare steel and done in 80-grit.
I have a week to get the glass out of it and finish off sanding the areas that need doing, then it is on a tow truck to the body guy next Saturday (3 March)! STOKED is an understatement for my mood right now! |
|
#242
02-23-2018, 08:32 AM
|
|||
|
|||
|
getting closer....
|
|
#243
02-23-2018, 09:49 AM
|
|||
|
|||
|
Quote:
I’ve been working on mine stripped it all to bare metal and just put two coats of epoxy on it. Are you going to have pictures from each step done?
__________________
Jeff |
|
#244
02-23-2018, 01:00 PM
|
||||
|
||||
|
As of today, $13,000 Aus = $10,169 US.
|
|
#245
02-23-2018, 07:02 PM
|
|||
|
|||
|
I will be taking pics as i am doing stories on ALL the work i am doing to the car for several different magazines, and website - including my own www.bargegarage.com
I will update again once it is painted with a comprehensive post about the process we go through in Australia to legally do a 2-pack paint job. So, next pics it should be wearing its new colour 
|
|
#246
02-28-2018, 10:34 PM
|
||||
|
||||
|
Thanks for the update, MARV!
|
|
#247
03-04-2018, 06:50 PM
|
|||
|
|||
|
Ok, ok, ok. I lied. Here are a few pics from the last half-week. I travelled up to my parent's place to get my barge ready for the paint and panel work. This included pulling the glass, stainless window trim, tail lights and rear bumper out, making power steering lines, and sealing up everywhere I don't want sanding dust to get into!
It was a mildly frustrating time, dealing with some leaky fittings on the steering, and then realised I have a lot of wiring work ahead of me as the car has a bad ground draining my Optima battery overnight... and there is a leaky fitting on the air suspension bleeding the tank out every few hours. I have to pull the air tank out of the boot (trunk) soon to change over from the twin externally-mounted Viair 480C compressors, to the new Accuair ENDO-CVT internal compressor. These are seriously cool pieces of kit that mean you end up with just a plain tank and no exposed wiring or messy valve blocks. You can see more here; http://endo.accuair.com I pulled the front and rear glass, which came easily enough. Despite there being inches of sealant used to glue to screens in, it cleaned up with plenty of elbow grease. As it turns out I only found a couple of small pinholes of rust in the rear screen channel, which is lucky. Unfortunately, pulling the passenger-side chrome window trim off I discovered heavy rust under the gutter, to the point that the whole gutter and side of the roof will have to be remade (no pics as it is difficult to shoot with a gutter in the way).   The bonnet (hood) had to go on for transport, so I used 100mph tape and two ratchet straps to secure it. Thankfully it stuck fast for the entire 80 mile trip (at 70mph ) Luke picked the barge up at 8am on Saturday, trucking it 1.5 hours north to Newcastle and a brand new factory bay where it will score its new paint.  Brendan, my mate who will be handling the paint and body work, was keen to strip the paint off as there were large areas covered with humidity blisters, suggesting plenty of surface rust under the duco. Nearly 8 litres of stripper was required to strip the face of the bonnet (hood) and boot lid (trunk).   My car is the first one in this shed, and Brendan is keen to get the paint off the whole shell. Unfortunately, the rust under the window trim means the original expected finish date of May 1 is now unlikely.  The bonnet (hood) and boot lid (trunk) seems to be in good condition with minimal repairs. There is plenty of surface rust, though, so this will be treated with Anti-Ox before copping epoxy primer.  I have a bit of running around to do this week (on top of magazine deadlines and helping my girlfriend move her disabled mother into a new house) so not much more will happen for a fortnight as Brendan has to move his tools into the shed, too. The plan is we will treat the under-side of the bonnet and boot with Anti-Ox rust-killer, then run over those areas with a wire brush cup... 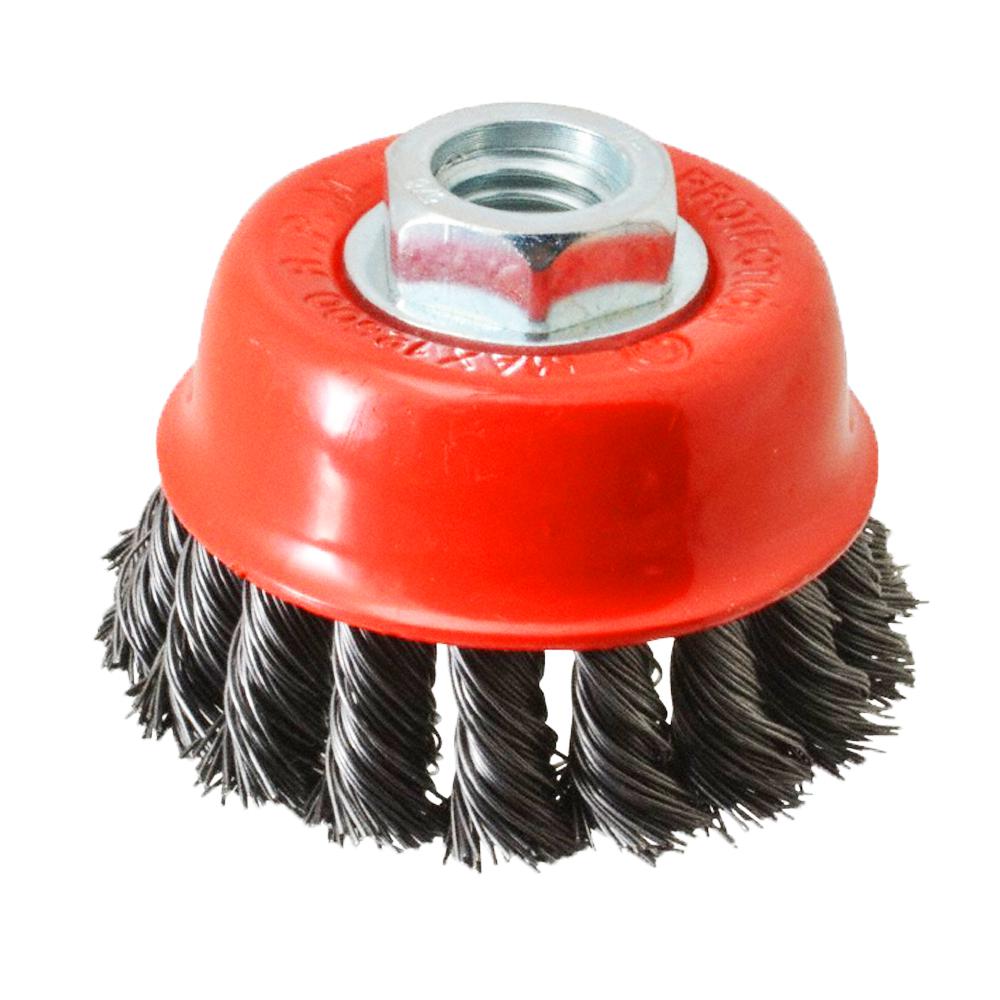 ... then the whole panel will be primed. Brendan will then rub the underside of both panels and squirt on the colour. Once that has had a week to dry (remembering it is the first week of autumn down here), we will seal up the under-side and get the panels smooth as a baby's backside using splines. These are sold by a mate of mine who used to work in the design studio at Holden, leading the bodywork team. They radically cut down the time on making sure your lines are straight, but they also help ensure every wipe of body filler is much thinner and requires less sanding. When using splines for sanding the larger surface area covered also saves bulk time. Here is a video on splines: https://www.youtube.com/watch?v=wfwq3PdZfnQ You may recognise Pete's work from the Efijy concept car. This is Efijy, which Pete did the body work for -  Once we have the bonnet and boot lid primed I will help Brendan strip the rest of the car. We will get the apertures around the door jambs, trunk and inside edge of the front guards primed and in colour. As all the panels opened and closed well, and seemed to line up really well, we don't have to spend a huge amount of time aligning panels. I'm hoping we will have the insides of all the bolt-on panels done by the end of the first week of April (Easter). Then Brendan will fix the rust in the gutter while I strip the trunk, treat it for rust, and coat it under and inside with Bully Liner. Last edited by Marv; 03-04-2018 at 07:17 PM. |
|
#248
03-05-2018, 04:15 PM
|
|||
|
|||
|
Awesome update, Marv! I'm going to be removing the glass and getting my '64 GP for body work within the next couple months, so it was cool to see your progress.
I don't mean to hijack Marv's update, but removing the rain gutter chrome trim and other trim around the windows scares the $#%! out of me. How hard was it for you to remove the rain gutter trim? Any tips on what works best? What tool(s) did you use? |
|
#249
03-05-2018, 10:24 PM
|
|||
|
|||
|
It isn't hard to remove all that trim - just scary to see what is under all that rust-trapping stainless!
 Leave the doors open, or put all your windows down. I would also leave a sheet sitting over the interior and paint work of your car, in case the trim drops off and drops dirt or scratches the duco. The next step is to pull the weather rubber, which might need a little hand from a small pry bar (I think they call it an 8" pry bar) but its basically a flat-head screwdriver with a bigger head and beefier shank. I also have a plastic "trim removal kit" for my modern car that works a charm, too.  After I lifted the door rubbers out of their channel I gave ALL the screws a decent hit with Black Label Inox (PB Blaster should work fine too). I then used an 18v cordless drill with high-quality bits to undo them, going gently. If a screw didn't want to come out straight away I actually tightened it very, very slightly just to break the seat it had. Personally, I love the MIlwaukee Shock drill driver bits - I have struggled with cheap bits in the past and they do more damage than good.  The door seal stainless trim comes off in 2 sections, with around 6-8 screws each side. It should come off the car easily so if it feels stuck give it a wipe down with water or thinners to check for other sneaky screws you may have missed. Once the wide trim is off you can lever off the gutter trim. This is where the 8in pry bar comes in handy once again. If you're worried about scratching the trim, put a piece of masking tape over the head of the screwdriver or pry bar you're using to remove the trim as this will save it scratching. Alternatively, cover the piece you're removing in tape. To remove the gutter start at the windscreen end of the gutter and, working from underneath, use an 8" prybar to lever the gutter trim up and off the gutter itself, working it so its almost rolling into the gutter. Go slowly, about 10in apart slowly working it at a time. Eventually it will start to come off once you're about 3/4 of the way along the roof. In my case, the driver's side came off like a charm, working slowly and gradually to remove it. The passenger side was too rusty and started pulling the whole gutter off the turret!
|
|
#250
03-05-2018, 11:41 PM
|
|||
|
|||
|
Marv,
Thank you so much! Thats great information. I appreciate the detailed explanation so much! |
|
#251
03-06-2018, 01:25 AM
|
|||
|
|||
|
No problemo! I should have taken more pics of how mine came apart but my hands were covered in sealant from the screens!
|
|
#252
04-05-2018, 04:57 AM
|
|||
|
|||
|
Errr, so things have progressed but we've had a slight setback with the doors...
Strip strip strip... [img[https://bargegarage.files.wordpress.com/2018/04/29995834_156271008531396_1961095317_o.jpg?w=748[/img] Oh dear...      We'll fix it but I had been hoping they didn't require THAT much heavy repairs 
|
|
#253
04-05-2018, 04:59 AM
|
||||
|
||||
|
Heck, "That ain't no hill for a stepper"!
|
|
#254
04-05-2018, 10:04 AM
|
|||
|
|||
|
Quote:
__________________
Jeff |
|
#255
04-05-2018, 05:14 PM
|
|||
|
|||
|
Yeah, I have seen some horrors unearthed on other cars but I just couldn't paint this car risking that this stuff was underneath. I didn't want my nice new paint job bubbling up or failing.
What really pushed me to respray the car was the number of humidity blisters popping up on the hood and trunk. That is a guarantee there is surface rust growing under the duco. I am still working on having it all done in time for Summer 2018/19, I just want to ensure it is done right 
|
|
#256
04-08-2018, 06:16 PM
|
|||
|
|||
|
When I said I wanted a 60s Swiss Cheese Pontiac this wasn't what I meant...
  Until we strip the rear guards, this seems to be the worst tin worm in the car. I am leaving it to Brendan to roll up new sections to fix this, which he reckons will be easy. The bonnet is now in primer, and the boot lid is next up once he's finished on the door jambs. Brendan is also stripping the door apertures so he can get them primed, rubbed and painted, before I bring the doors and front guards back from having their inners surfaces media blasted (not the skins, just the edges). The idea is we will be able to prime, rub and paint the inner sides of the doors and guards, then get them back onto the car for good and gapped up. |
|
#257
04-16-2018, 10:55 PM
|
|||
|
|||
|
I've been away working at Australia's version of Drag Week (the main magazine I write for puts it on) and my painter mate sends me these updates...
  Lots more work to come in the next week, plus I have an intake manifold and fuel tank ready to go in, too! |
|
#258
04-21-2018, 10:32 PM
|
|||
|
|||
|
So, I went and did some work on this on Thursday & Friday, racking up 450miles in 2 days. It is not super easy to get to my car as it is 100miles away from my house and it normally takes around an hour to get out of Sydney to the freeway, so you're looking at 2-2.5hrs each way.
Still, Brendan has wire-wheeled the pillars, cowl, door jambs, sills and boot gutter, ready to be sealed up with epoxy after we give it a thorough wipe-down with Anti-Ox rust-killer and metal conditioner. Brendan also almost finished the roof repair off on Friday night and it is nearly ready for priming once we hit it with the orbital and 80 grit. Interestingly, he actually welded the gutter on to the previously posted repaired roof structure, then added the top part of the roof skin over the top.   I whizzed back the boot lid and the stripped front guard. I paint stripped the other front guard but ran out of paint stripper before I could do the other door (the last hanging panel with the old blue paint). I want to do that last door and both rear guards in the next couple of weeks as I want to see the horrors under the paint on the rear guards.    I wire-wheeled the boot floor to spray it with Bully Liner (http://www.carbuilders.com.au/bullyliner) and discovered it is in far worse shape than I originally thought. Brendan is now going to cut it out and weld in some flat 1.2mm sheet steel, which I'll hopefully spray with the Bully Liner next weekend, before fitting my new custom fuel tank by Shaun's Custom Alloy. I'll have to cut an access panel in the boot floor to get to the VE fuel pump and get on to plumbing the EFI fuel system.  Hopefully the boot gutter and door jambs are primed this week, plus the doors repaired and primed too. That would mean we could have colour down next week and doors back on the following weekend as Ryan at United Speed Shop powdercoated my door hinges last week. |
|
#259
04-22-2018, 08:55 PM
|
|||
|
|||
|
Finally got my custom-made fuel tank
It runs a G8 GXP "deadhead" fuel cradle that houses the lift pump, regulator and fuel return all in one unit. Shaun's Custom Alloy built the tank out of stainless steel and included several baffles to ensure the pump won't run dry. The new tank is slightly smaller than the original tank (seen behind in this pic) but I don't need 130L of fuel capacity if I'm honest. We have a few more fuel stations out here (known as "servos", pronounced "serrr-vohs") than what Mad Max/The Road Warrior would have you believe I am going to swap the 180deg push-lock fitting with a 90deg barb I already have. Because it is an MRA unit I just to connect the 90deg barb to the stock 3/8" fuel feed line that runs to the front, and patch a fuel filter somewhere in there too. Once up the front I am going to bend the fuel line up the firewall and run it into a Continental Flex Fuel sensor so I can run E85 ethanol if I want (it helps with emissions testing), and then run it straight into the back of the fuel rail. This tank isn't quite done yet- I am going to have it powdercoated, plus I need to get an O-ring for the pump lid, some rubber for the top of the tank, and to make new straps to hold it in. Should be an easy job from here, hopefully! |
|
#260
04-23-2018, 05:40 PM
|
|||
|
|||
|
So I got these pics from Brendan last night. It looks like some pro sculptor back home in the USA has wiped bog over some old damage, and then just continued up to the top of the guard. No word yet on how the left hand side is but we're expecting much the same. More quality time with the hammer & dolly is required...
    PS: sorry for the potato pics |
| Reply |
|
|
The PY Online Forums is the largest online gathering of Pontiac enthusiasts anywhere in the world. Founded in 1991, it was also the first online forum for people to gather and talk about their Pontiacs. Since then, it has become the mecca of Pontiac technical data and knowledge that no other place can surpass.


 Linear Mode

