


| FAQ |
| Members List |
| Social Groups |
| Calendar |
| Search |
| Today's Posts |
|
#161
 07-20-2014, 06:29 PM
|
||||
|
||||
|
Well we made better progress today. The window is aligned and the body side molding is on and looking good.
The window alignment went well. Several recommended that the best way was to loosen all the adjusting bolts, raise the window with someone inside the car with a 7/16" ratchet. Once the window is up tighten all the bolts and you have a good starting point. This is exactly what we did and it got the window real close. It needed just a couple of adjustments after this initial step, and by following the Fisher Body manual directions it moved right into place. All told it only took about one hour to get the window adjusted perfectly. It was no surprise the window had issues as several of the bolts were very loose and the down stop bumper was missing. The body side molding also went well. I purchased the molding from the 78TA website and it is a repop of the factory applied molding with 3M adhesive. A nice product. I closely followed the dimensions taken from an original molding car. The back molding is mitered to the wheel opening which I believe is the original factory termination. Around the door gaps, instead of doing a ninety degree cut I followed the vertical angle of the opening. I used j-channel panel molding with rare earth magnets as a straight edge and that worked extremely well. Once it was in place it was taped to the car to prevent any movement. All the pieces then got cut to fit and taped in place for a mock up. I cut it with a Craftsman tubing and hose cutter. 3M adhesion promoter/primer was then applied to the car where the molding went. The vinyl covering was then started to be peeled back and we slowly peeled it as the molding was being applied. I am extremely happy how it looks. A huge improvement over the dealer applied black universal molding. Here's more than a few pictures. J-Channel with rare earth magnets 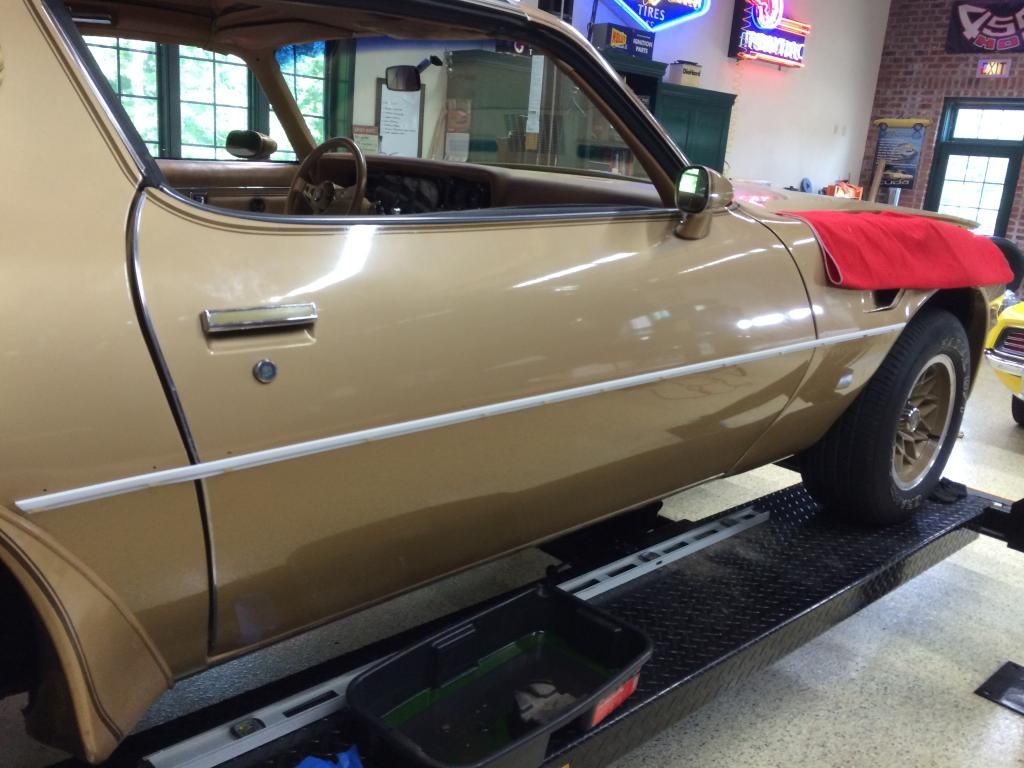 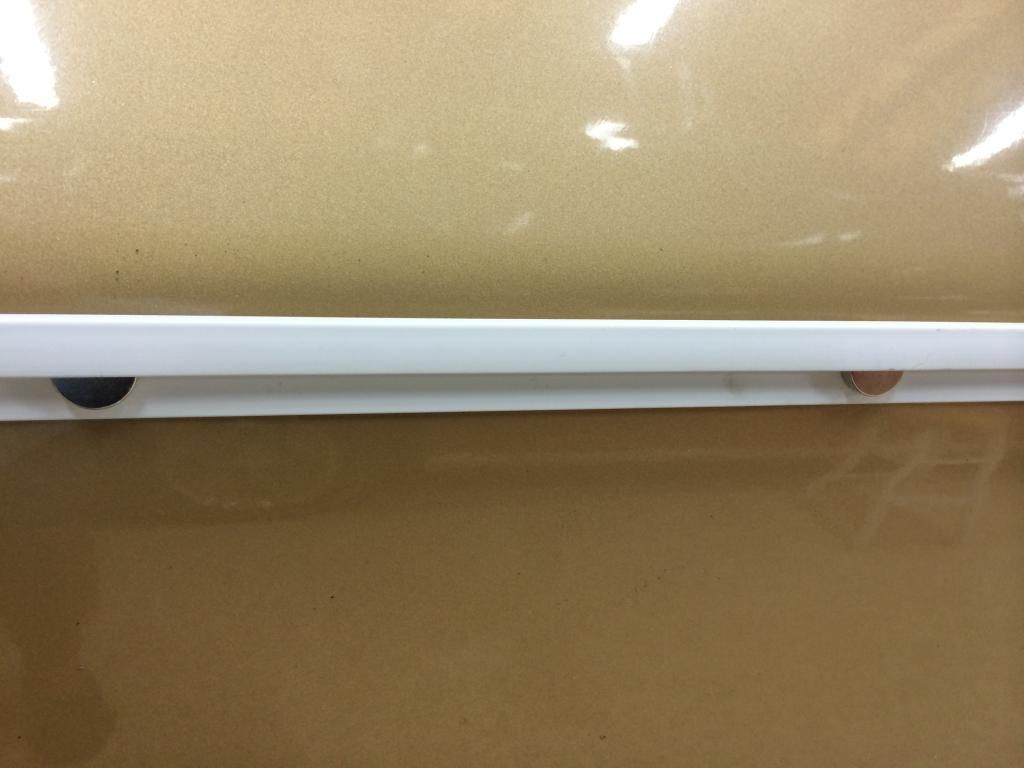 The Molding and Adhesion Promoter 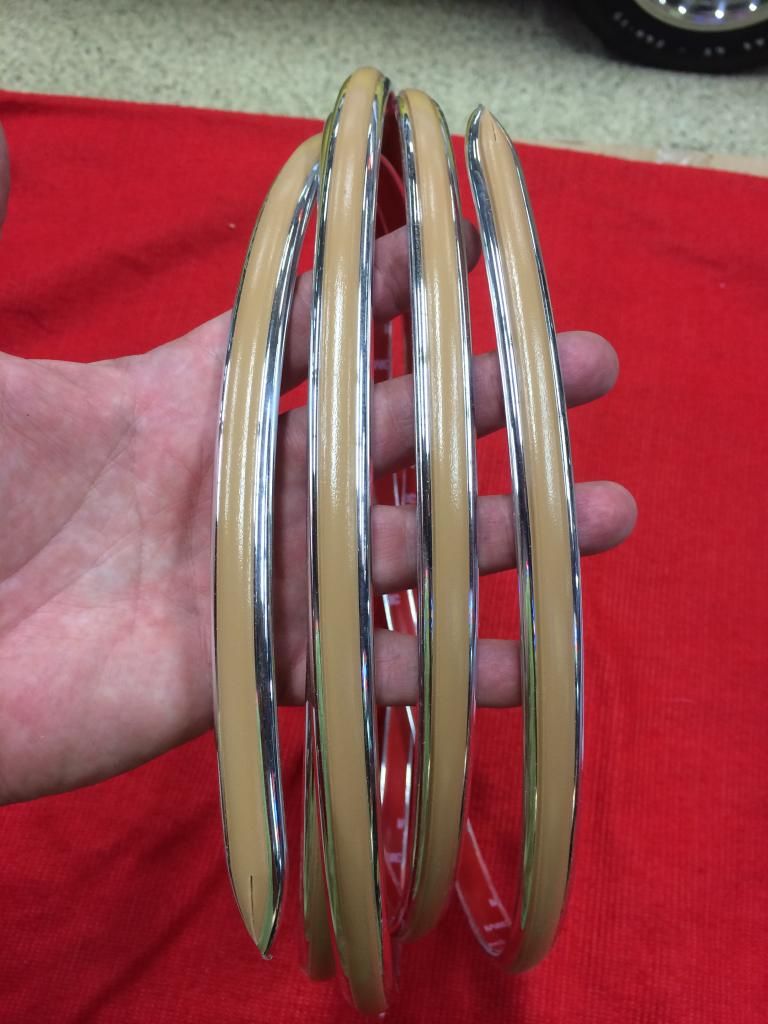  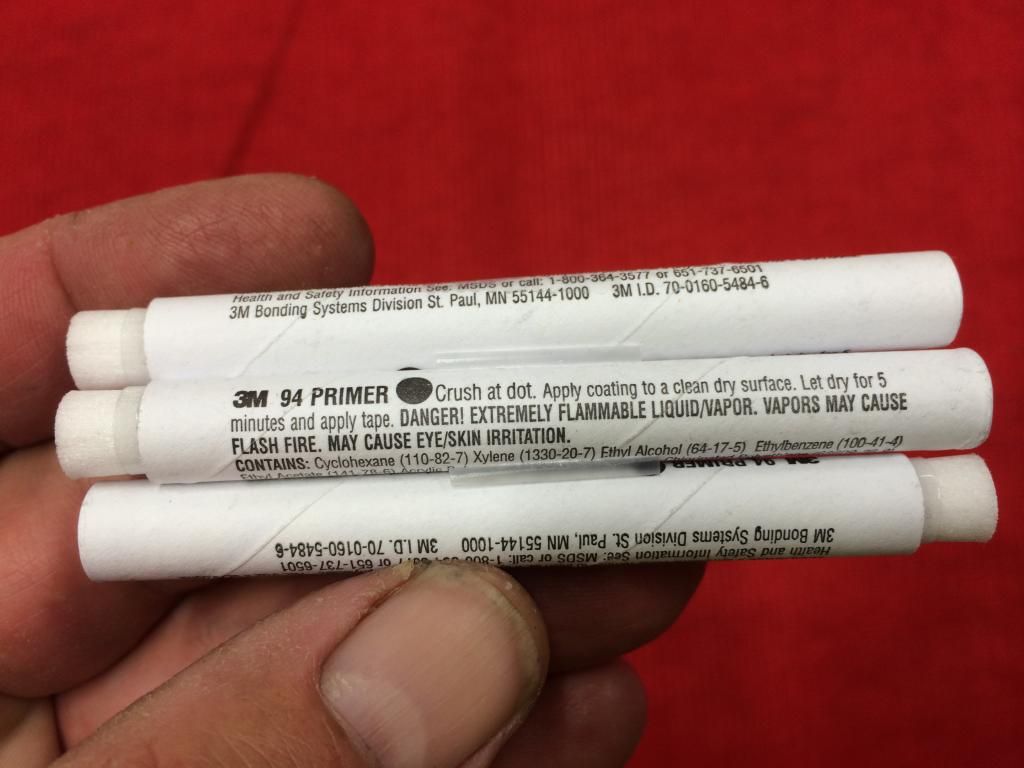 Fitting the Molding 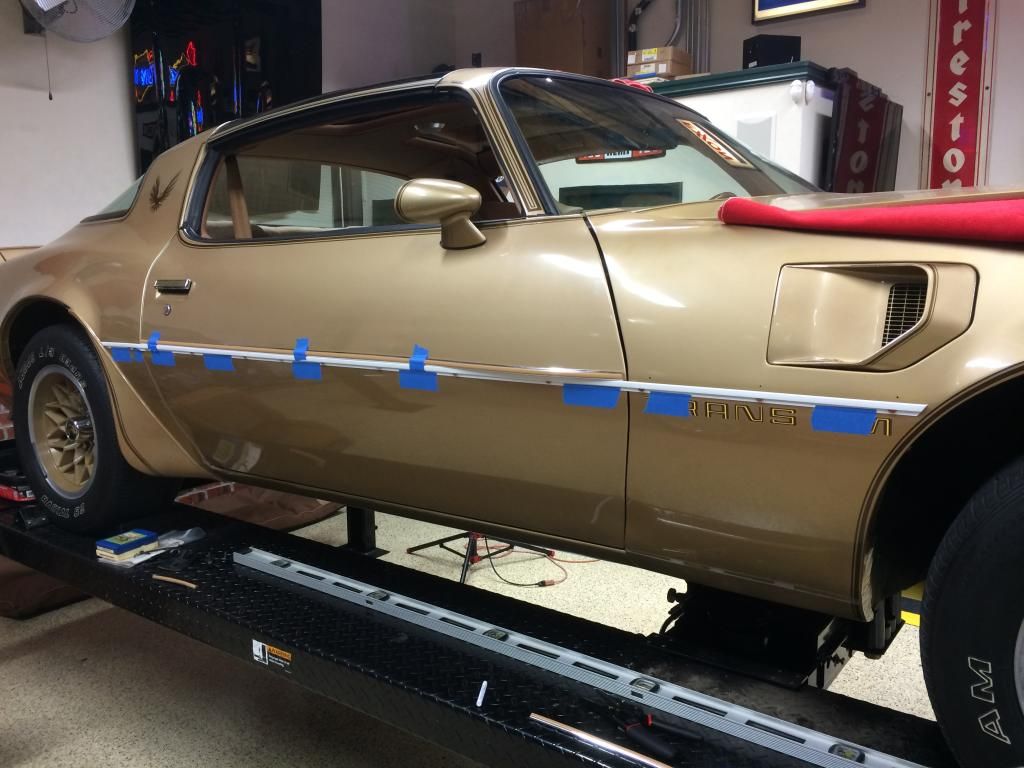 Applying the Molding 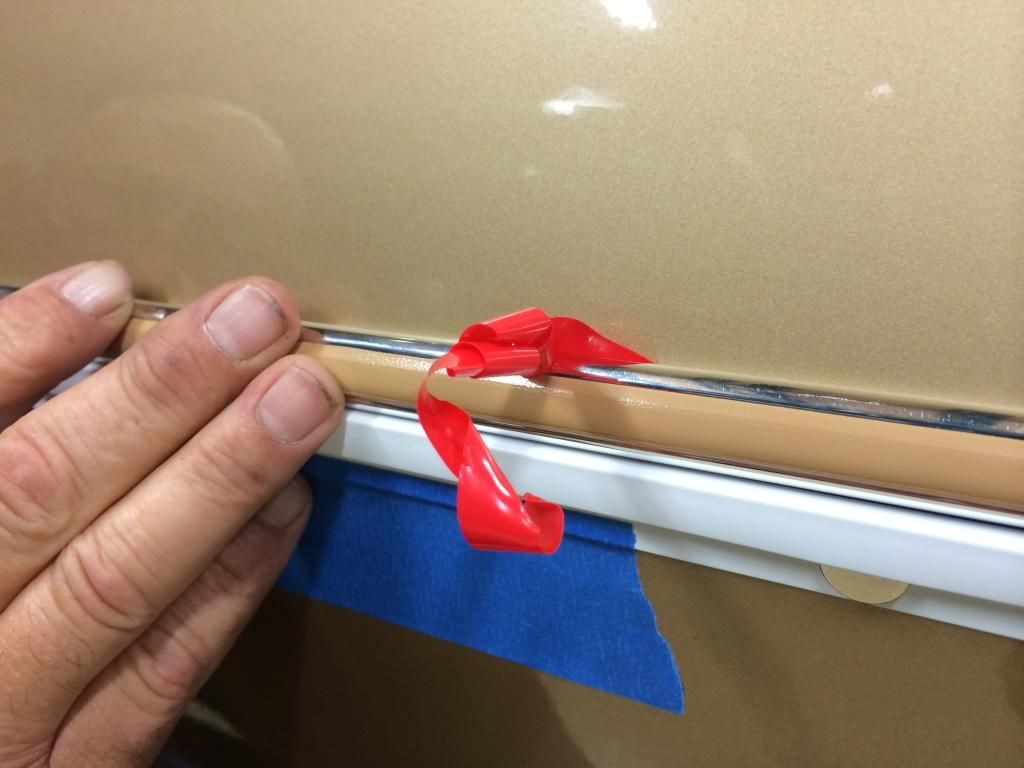 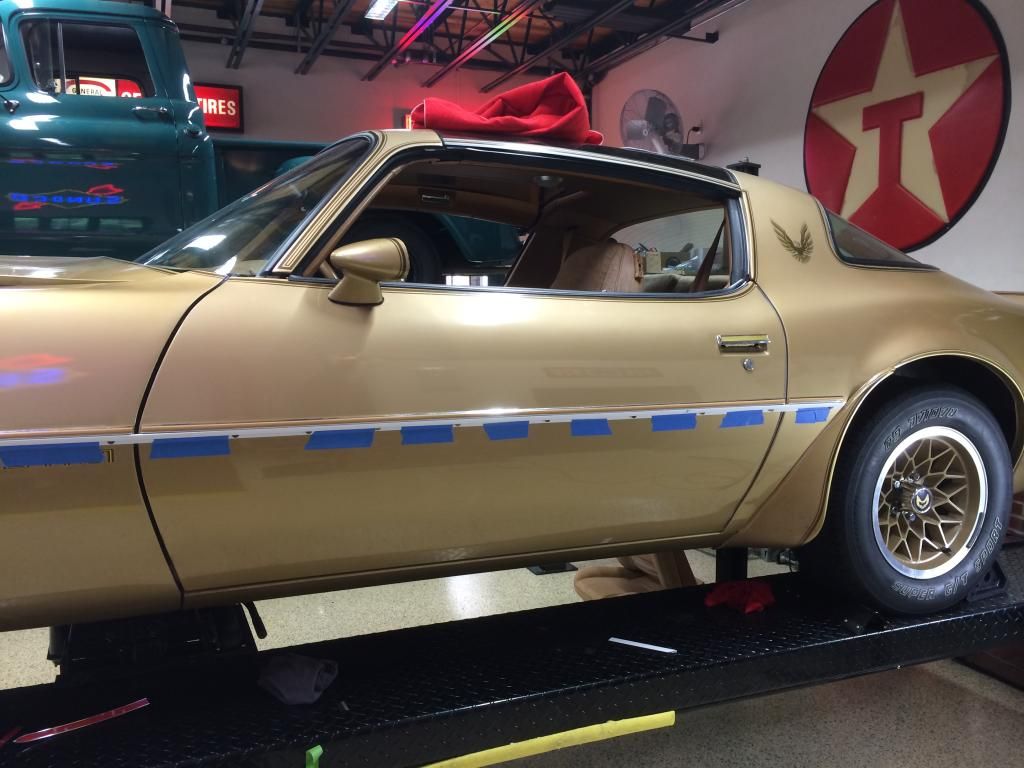 Finished Job 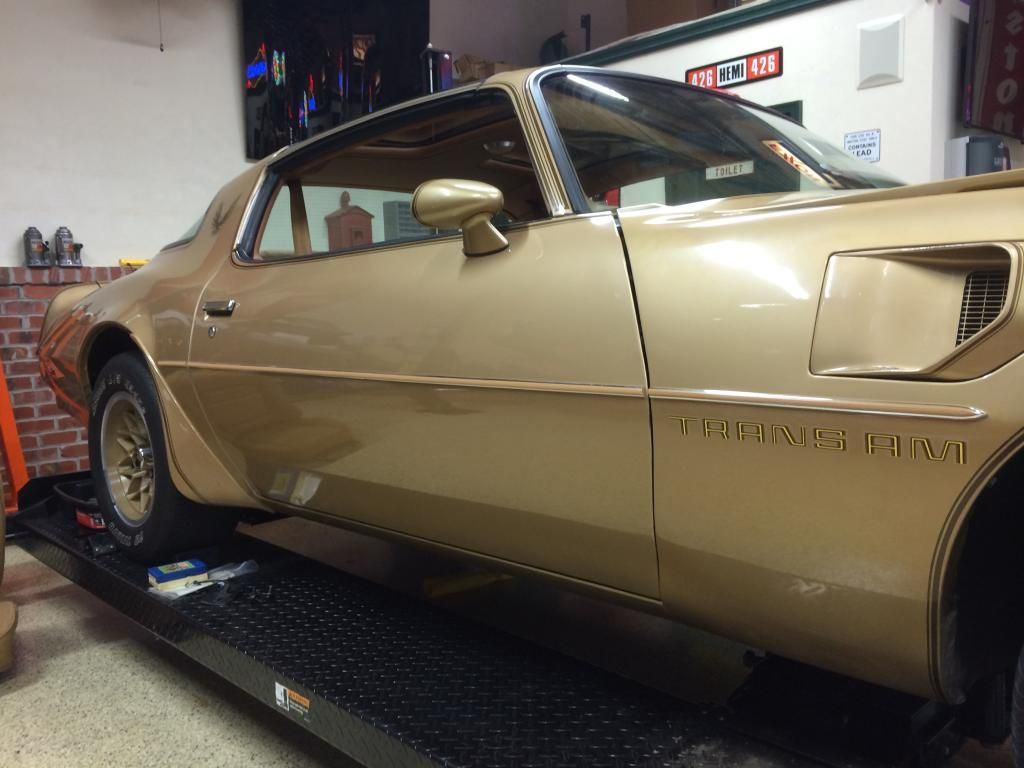  Before 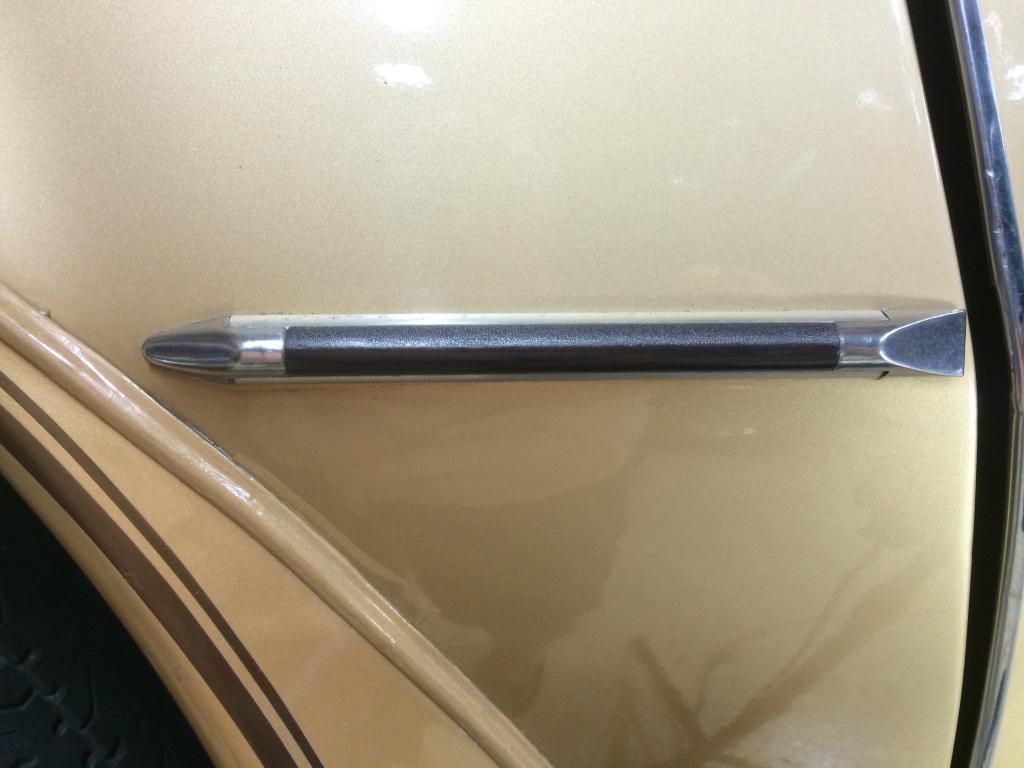  
|
| The Following User Says Thank You to Bentwheelbob For This Useful Post: | ||
|
#162
07-20-2014, 07:44 PM
|
||||
|
||||
|
Damn Bob, that looks 10x better! I don't even mind it now!
Your finger looks like it healed nicely too. 
__________________
Some guys they just give up living And start dying little by little, piece by piece, Some guys come home from work and wash up, And go racin' in the street. Bruce Springsteen - Racing In The Street - 1978 |
|
#163
07-20-2014, 08:14 PM
|
||||
|
||||
|
Nice Work!
|
|
#164
07-22-2014, 11:27 PM
|
||||
|
||||
|
Well the work continues on the Gold Car. The gauge lenses came in and now all we are waiting on is restored bezel from Randy Combs. That has drug on longer than expected, but he assures me it has now shipped. On the gauge lenses, I used the one I needed for the center dash gauges, but the original I polished for the Tach and Speedo was better than the repop. It was very wavy and had lots of distortion as compared to the original which was flat as glass.
The passenger door panel also got pulled so that the door lock and latch mechanisms could be lubricated. As it turned out, the passenger door also did not have a lower window stop bumper. It's a bit puzzling that neither door had the bumper. I could understand that the rubber deteriorated, but the fact that neither door had any remnants of the stop or bolt makes me think that they were not installed at the factory. Regardless, I had one more old sway bar bushing, so now the doors have a matched set. The front park lamp assemblies were loose, so we removed the center spoiler section to access them and remedy the problem. That went fine, both assemblies were missing the lower mounting nuts and the top nuts were loose. Like most things I do though it was two steps forward and one step backward. The removal of the spoiler revealed that both spoiler connectors were busted. One was busted on the mounting hole area and the other one had the vertical part broken off. New ones are on their way and fortunately the solar gold spray paint came this week so I can get them painted before installation. This weekend I hope to get started on the underbody clean up. I am going to try to get the exhaust cut of this week and then this weekend move one of the lifts outside to the driveway. Once I get it pressure washed with hot water I'll have a better idea how much work there is to do in removing the undercoating. Here's a few pictures. Sway Bar Window Stop 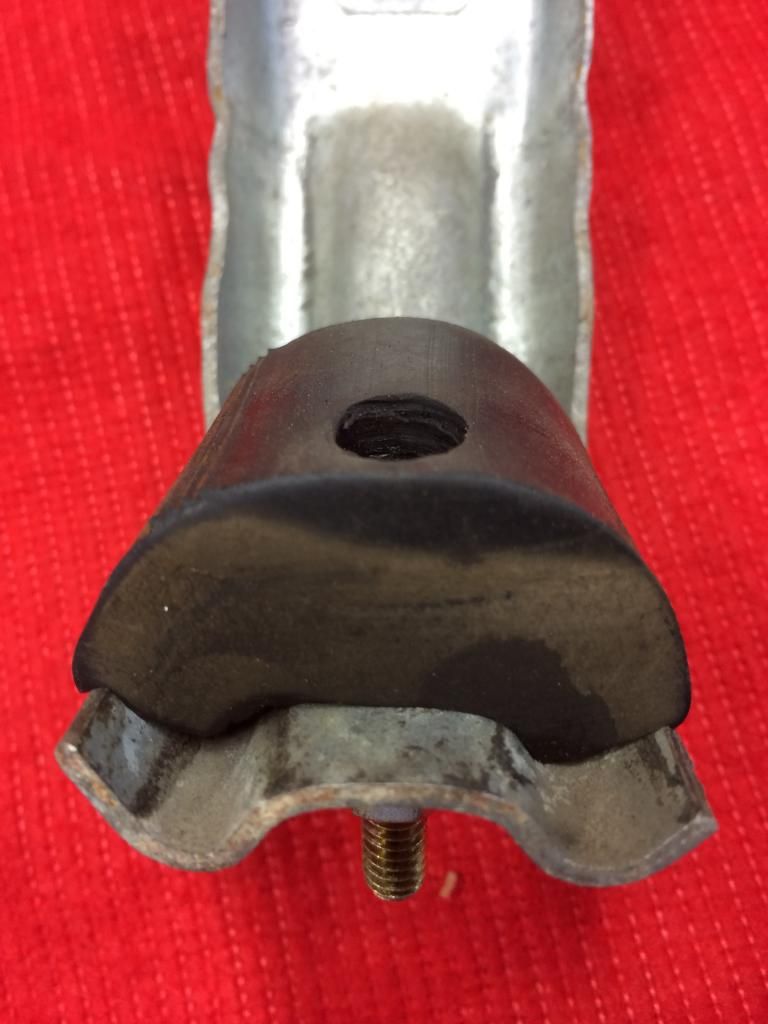 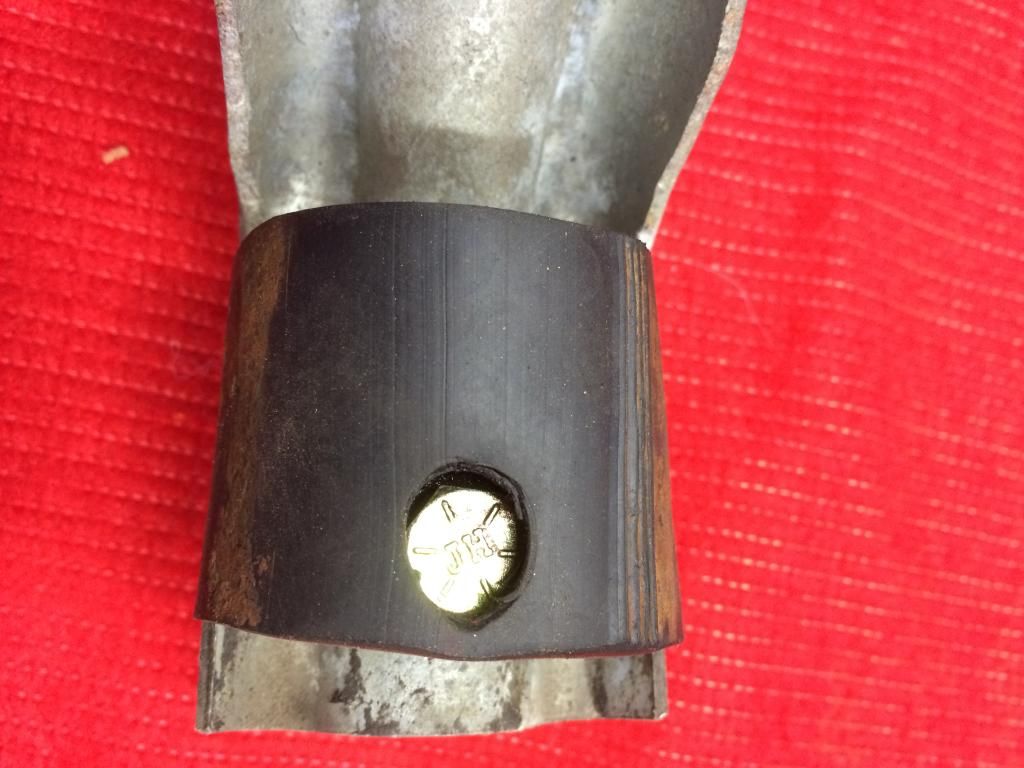 Spoiler Connectors 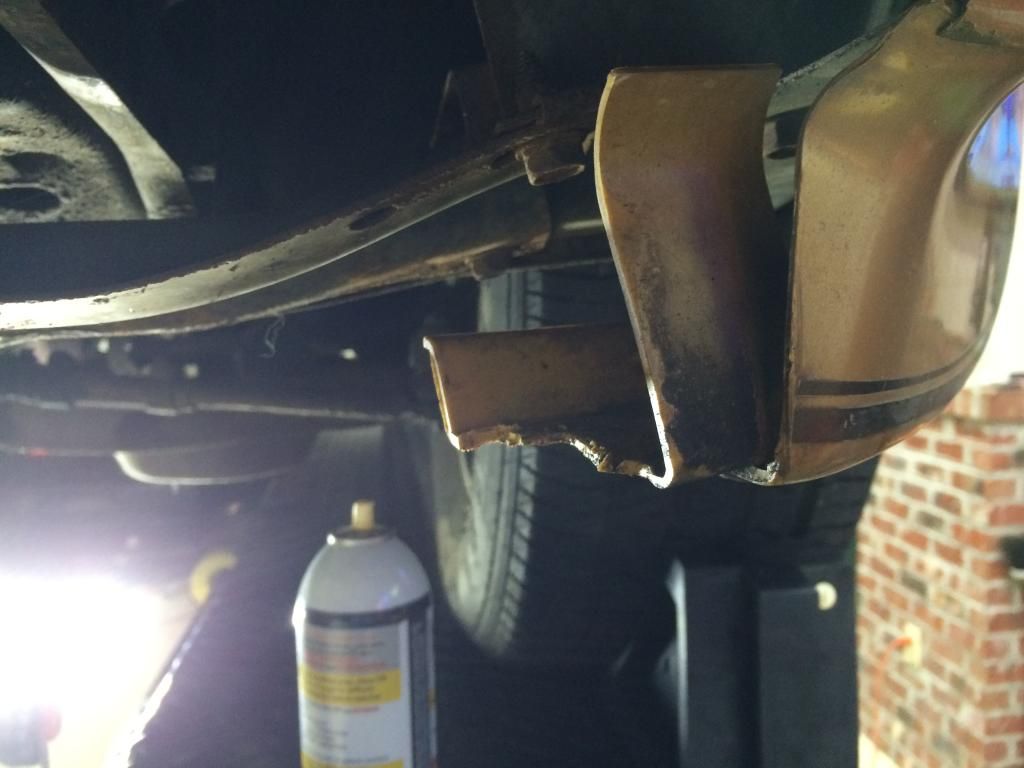 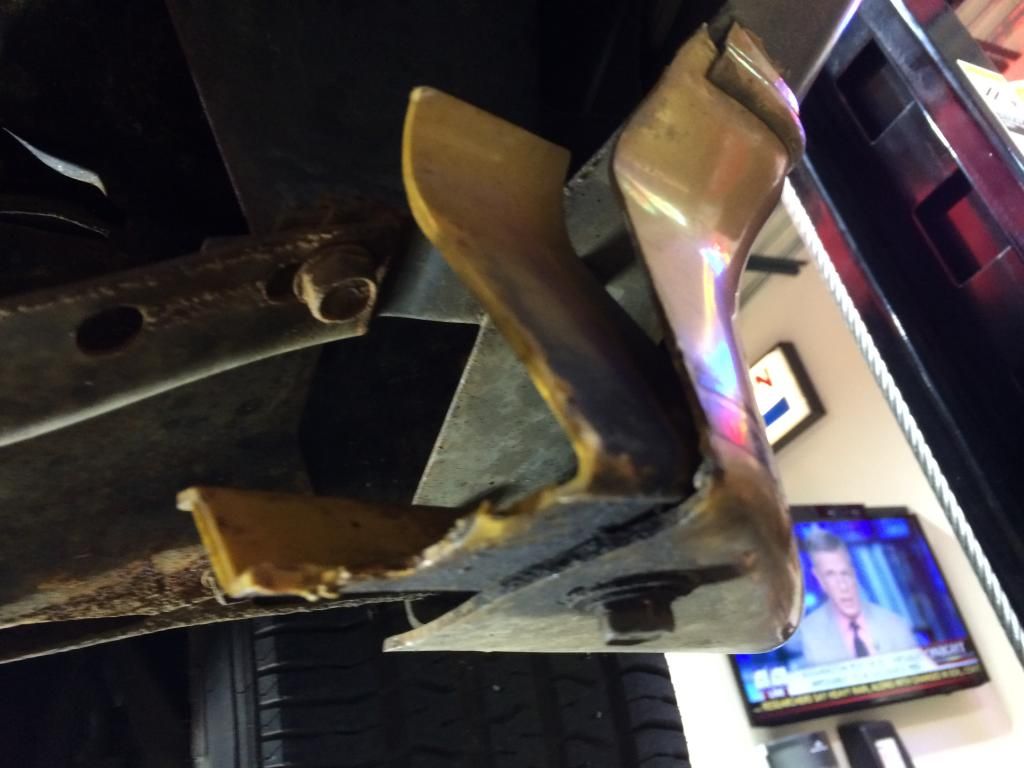 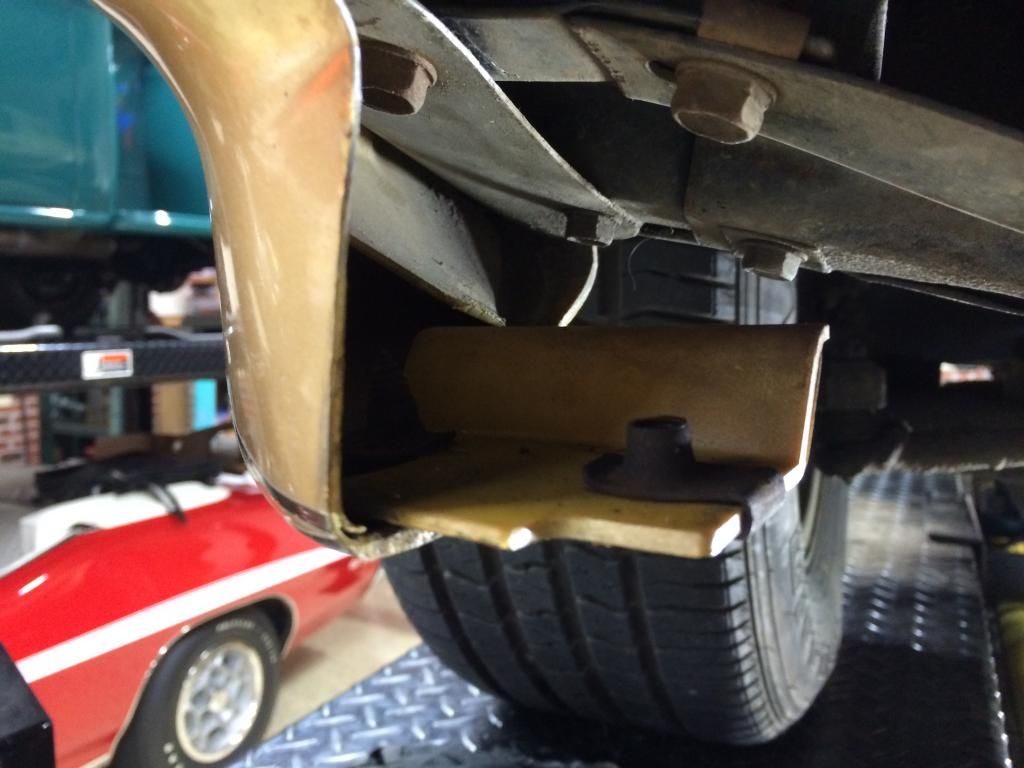 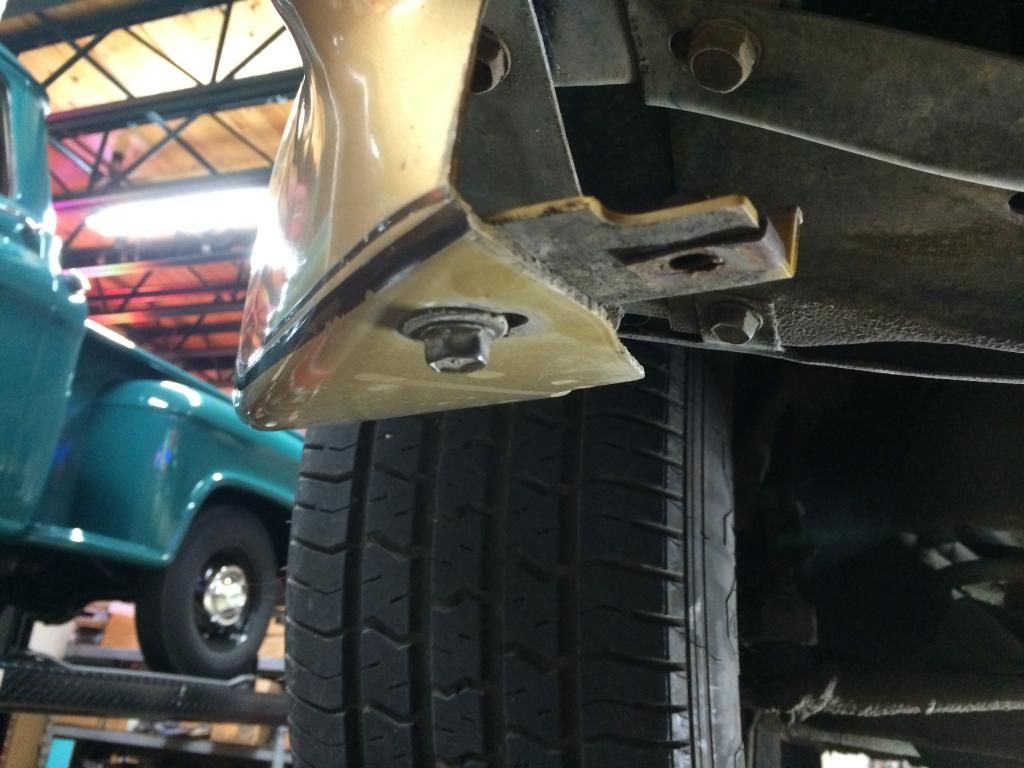
|
|
#165
07-23-2014, 12:20 AM
|
||||
|
||||
|
Looks great tttttt
|
|
#166
07-24-2014, 10:47 PM
|
||||
|
||||
|
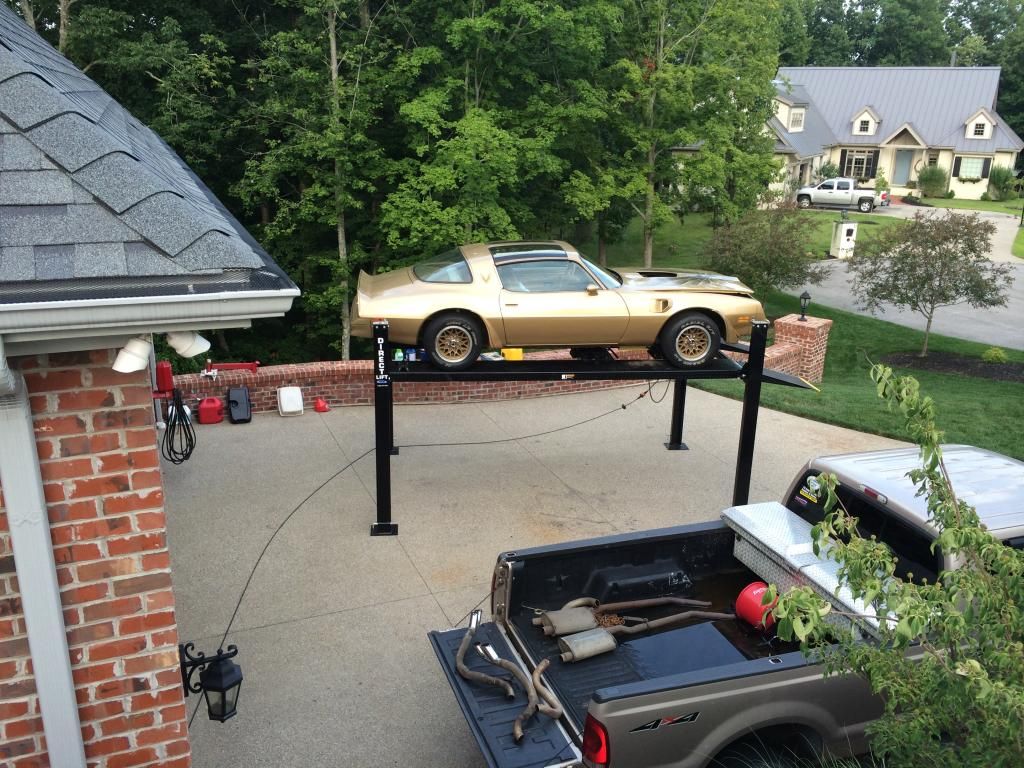
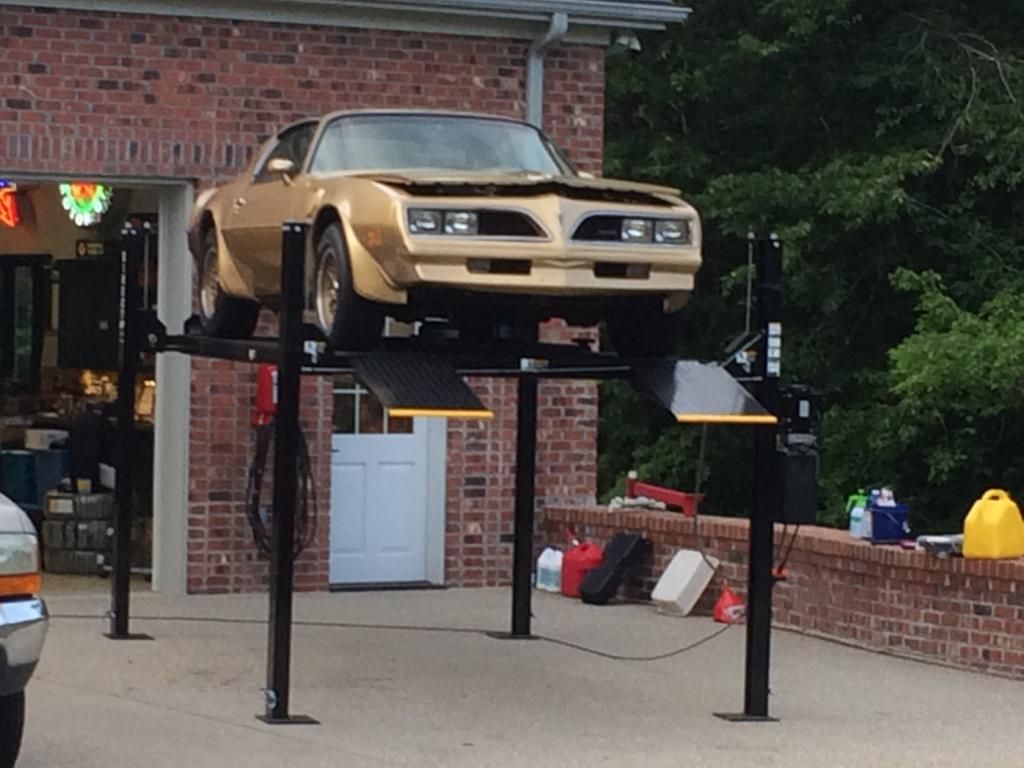
Things keep moving forward. This weekend the plan is to drag a lift into the driveway and start cleaning the underside of the car. I'm not looking forward to it, but it must be done. I'm lucky to have a lift to work off of, and I have 140 degree water plumbed to the garage for the pressure washer. MPD is coming over and we are planning to spray it down a couple times with an industrial degreaser call Tornado 50, and after that start in with Kerosene or Diesel fuel to soften the undercoating. Then it's scrappers, abrasive pads, rags and elbow grease. Does anyone have an opinion on kerosene vs. diesel fuel for softening undercoating?
Tonight we got the exhaust system cut away. Although the exhaust system was not original, it looked like the muffler hangers were and they have been saved. I've got them soaking in a 5 gallon bucket of Purple Stuff to clean them up and I plan to try to reuse them. The radiator has also finally been refilled with coolant and I was happy to see that there no leaks from the heater core or any of the hoses. Here's a few pictures of the underside of the car and of the hangers. Let me know - kerosene or diesel. 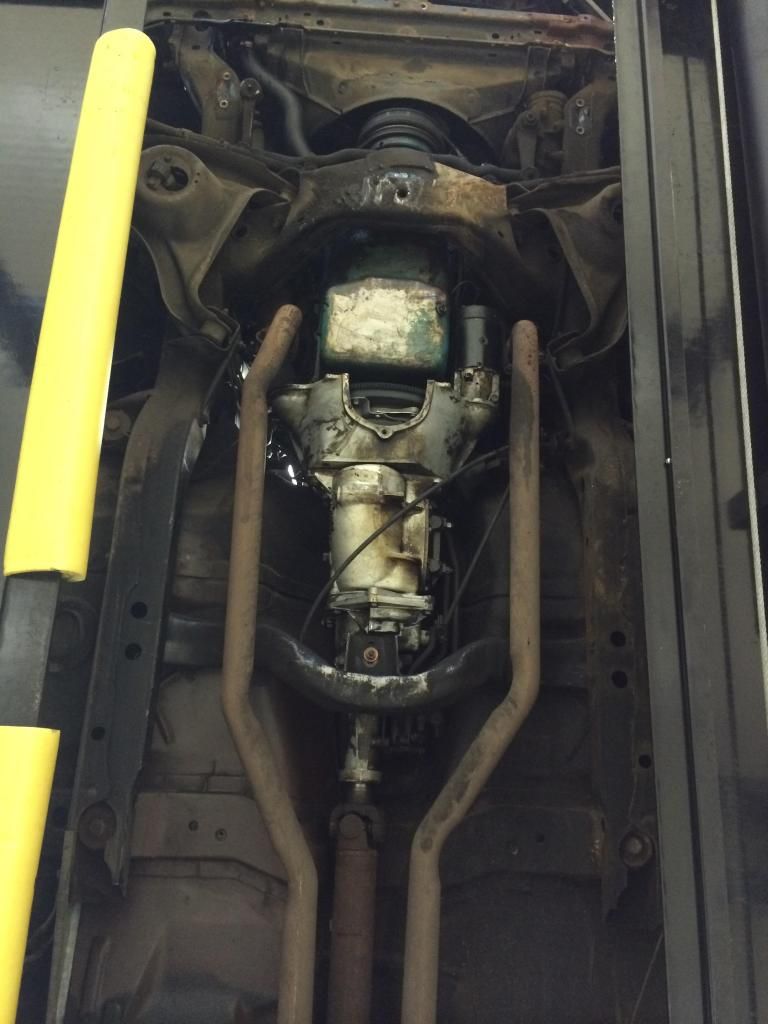 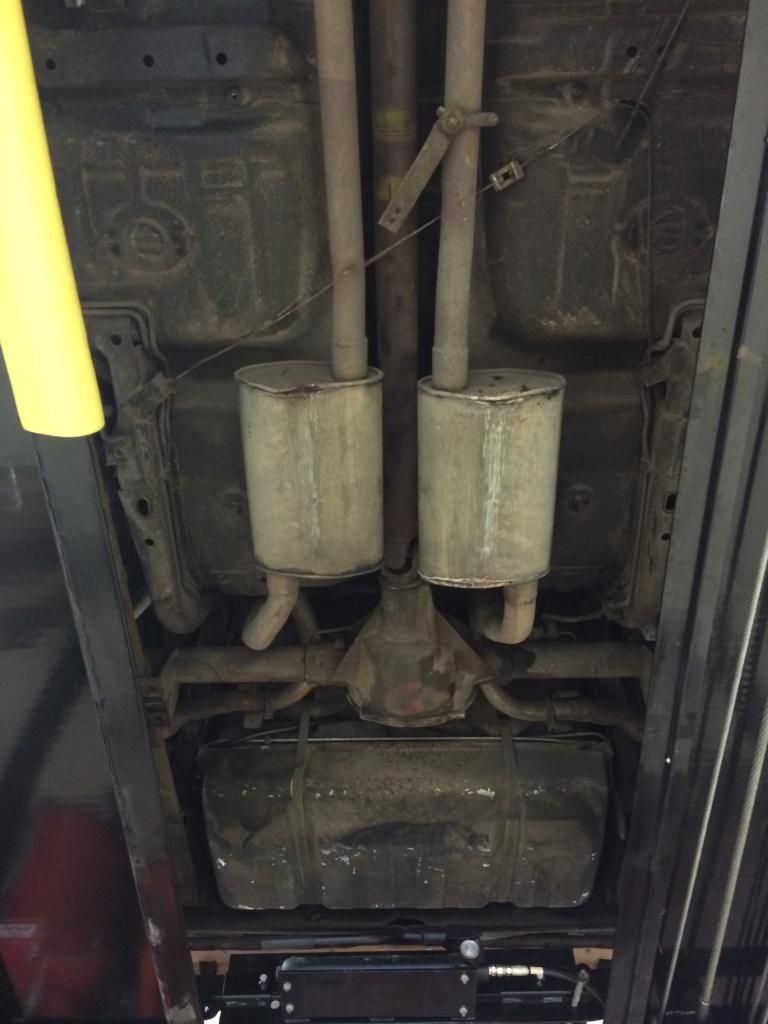  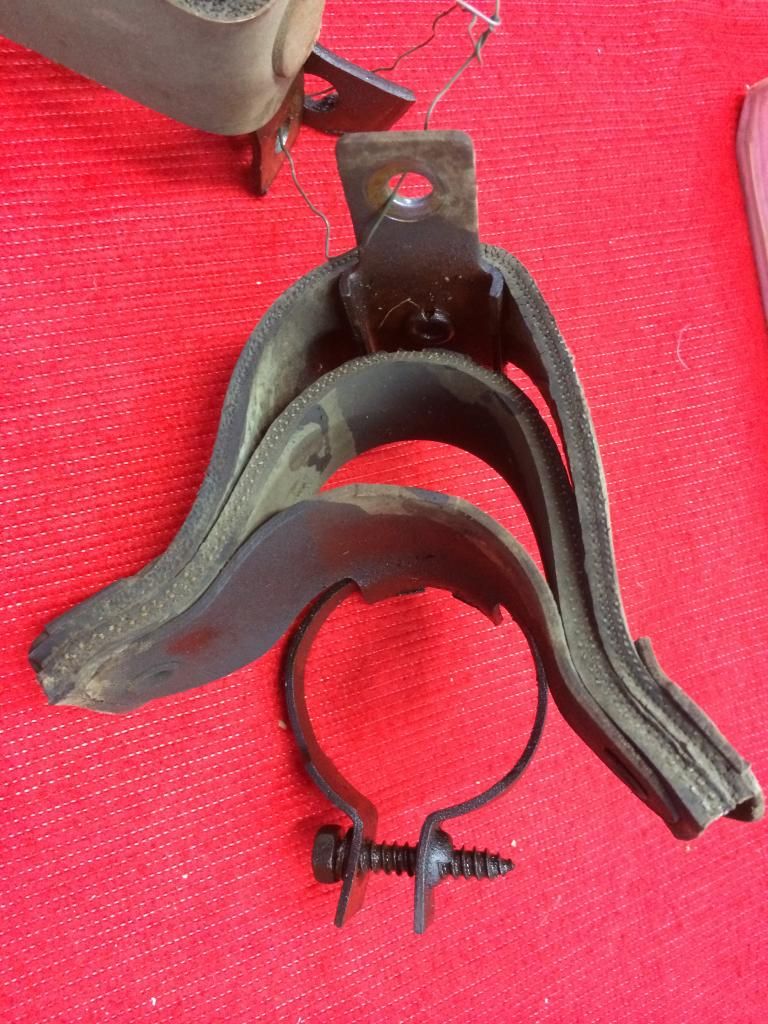 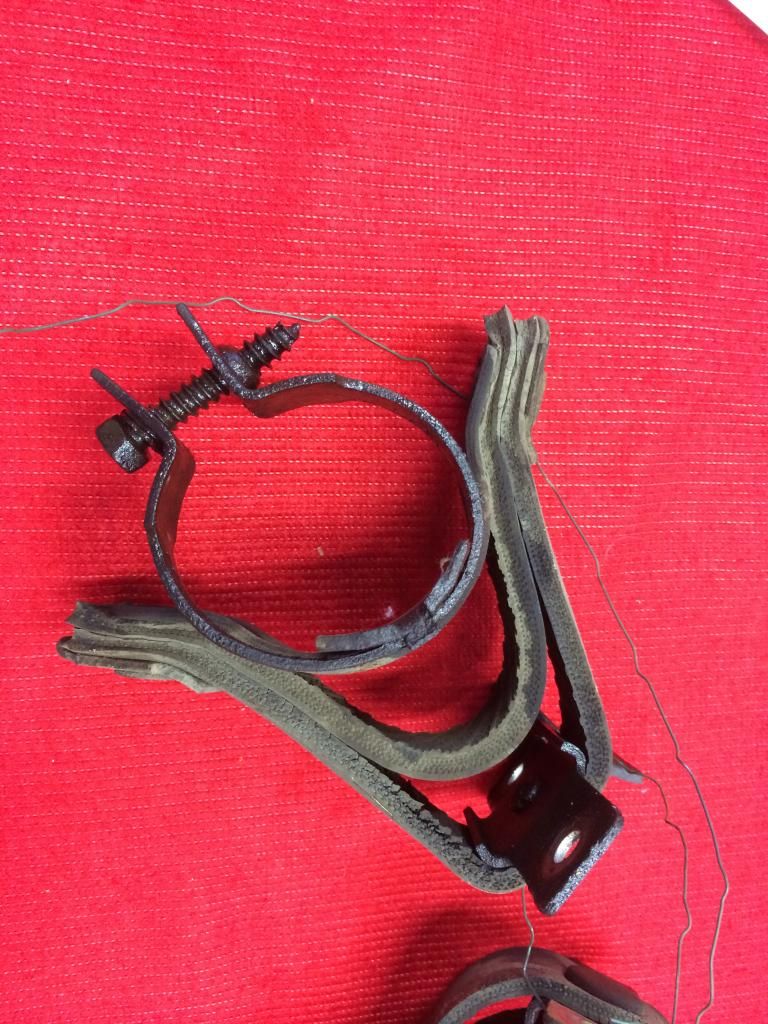
|
|
#167
07-24-2014, 11:17 PM
|
||||
|
||||
|
Do I see the pickup for a vintage ZT-1 aftermarket cruise control on your exhaust pipe?
__________________
 Eye Candy......garage band? https://www.youtube.com/watch?v=QUPcHxHRx3s Go full screen & turn it UP! |
|
#168
07-24-2014, 11:24 PM
|
||||
|
||||
|
There is some unidentified object on there. Not sure what the heck it is. I thought maybe it was something the muffler guy rigged up in association with the ebrake cable. I'll post a better picture tomorrow. What exactly do you think it is ?
|
|
#169
07-25-2014, 12:58 AM
|
||||
|
||||
|
If it IS what I think it is.......there were 4 small magnets that you attatched at 90 degree intervals to your driveshaft.
The strap on the muffler clamp "read" the magnets and driveshaft speed was used for input to the speed control...
__________________
Eye Candy......garage band? https://www.youtube.com/watch?v=QUPcHxHRx3s Go full screen & turn it UP! |
|
#170
07-25-2014, 03:04 AM
|
||||
|
||||
|
Back in the '80s we used to sell two types of undercoat that was popular then:
1. Rubberized 2. Tar or Petroleum Based Which are you removing? Here in Texas it was common to see the rubberized used due to the Petro based "melting" off of the undercarriages onto driveways in the 100+ degree summer heat. IIRC - Up in North climes seemed that the Petro based was most common. Lots of info and opinions here: Kerosene or Diesel Fuel to Remove Rubber or Tar Undercoat? |
|
#171
07-25-2014, 11:48 AM
|
||||
|
||||
|
Have you been following this '78 Martini Blue Thread? It's from same general Pacific NW Geo area as your Y88 and is said to be original low mile "under her skirts" one repaint topside by original owner. See post #6 for images as posted here: http://forums.maxperformanceinc.com/...d.php?t=757727
Q: Why does it matter? A: See the images below for floorboards, etc. Note not all virgin untouched, but still a decent reference for you from another '78 Van Nuys build, perhaps? Driveshaft Center View http://forums.maxperformanceinc.com/...3&d=1405819451 |
|
#172
07-25-2014, 09:56 PM
|
||||
|
||||
|
So I got a little head start this evening and the Hot Rod Garage now smells like a Flying J. That means I went with diesel fuel as a solvent. The lift has been moved to the driveway and the Gold Car is in place. I have sprayed the underside of the car with a healthy coating of diesel fuel which will hopefully speed things up tomorrow. I put the diesel in a Hot Shot sprayer and I think that was a mistake. I got a healthy coating applied, but it atomized it so much that there was a lot of drift which contributes to the truck stop smell. I think I'll revert to a small pump sprayer tomorrow with an adjustable nozzle. This will be an adventure...
|
|
#173
07-26-2014, 07:40 PM
|
||||
|
||||
|
that lift is moveable??? is it kinda scarey??? I thought they all had to be bolted down.
|
|
#174
07-26-2014, 08:19 PM
|
||||
|
||||
|
Also: What are using to protect the driveway from the removed contaminants?
|
|
#175
07-26-2014, 09:18 PM
|
||||
|
||||
|
Quote:
Quote:
|
|
#176
07-26-2014, 09:41 PM
|
||||
|
||||
|
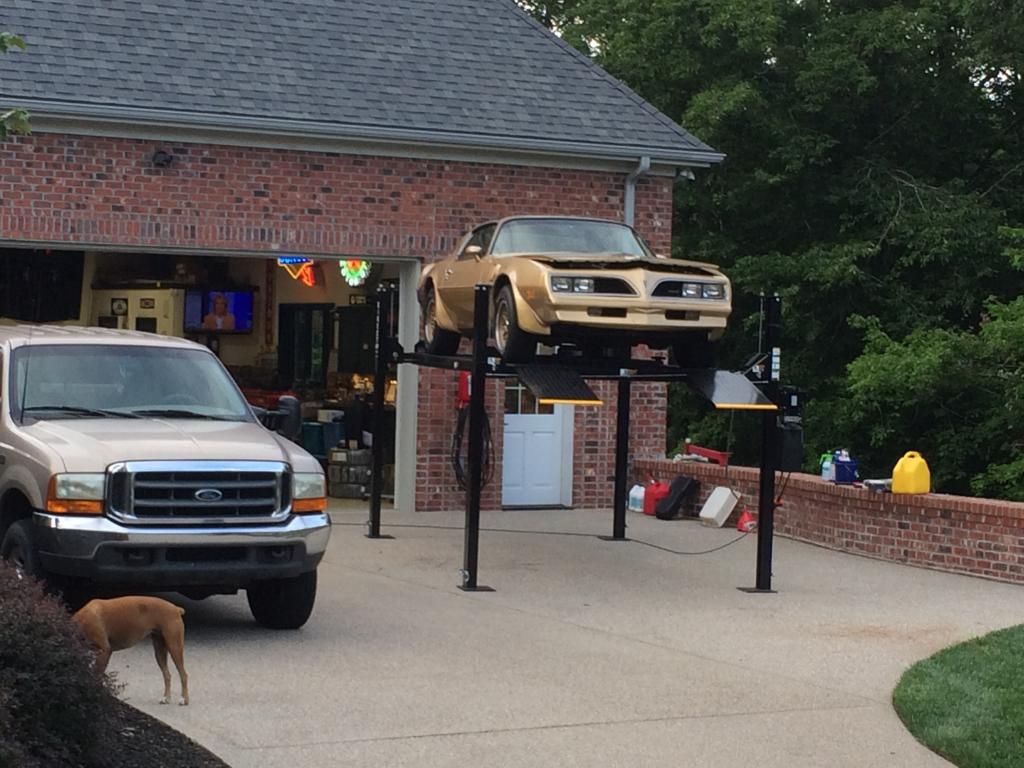
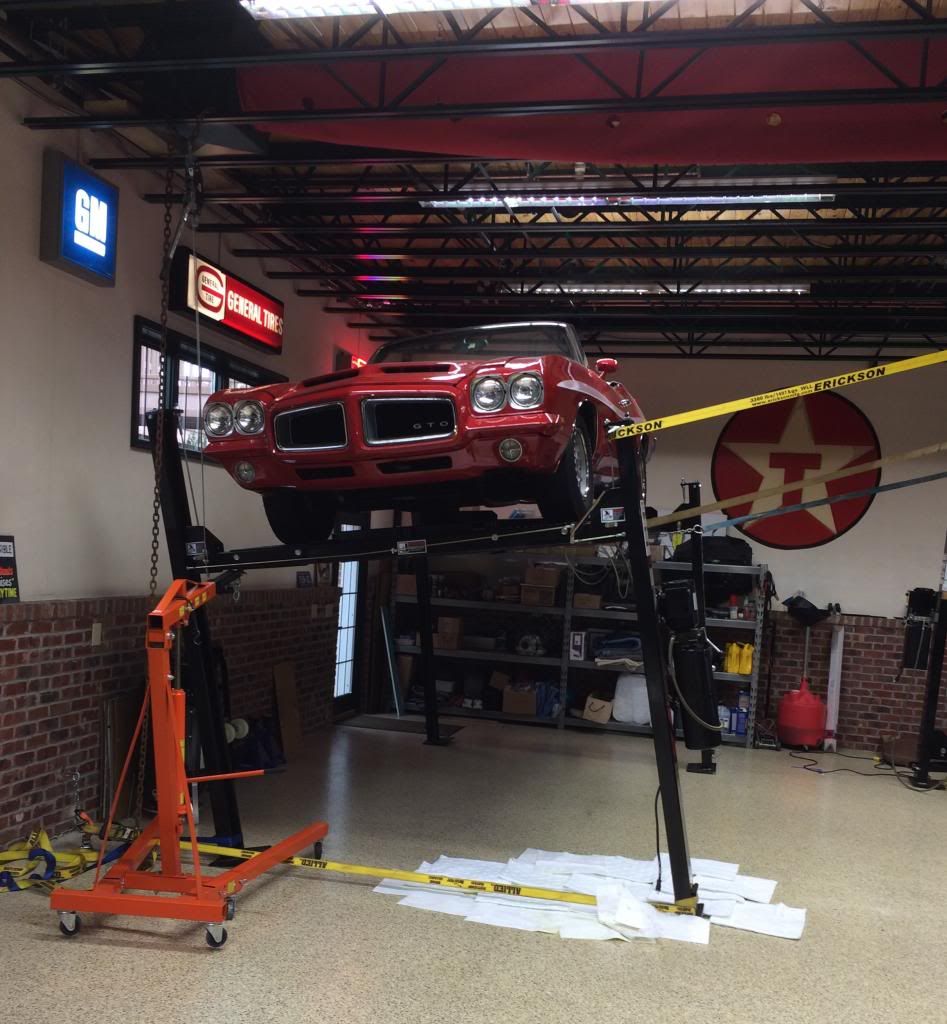
So the undercoating has been eradicated, and it happened one day ahead of schedule. I thought it would take all weekend to get the underbody cleaned, but we got it done in one day. Actually I cheated a little and got it positioned last night as posted earlier and the overnight soak with diesel certainly helped.
I'm really pleased with how it went and how it turned out. We used only diesel fuel as a solvent, plastic scrapers and a pressure washer. The process went like this - soak with diesel from a pump sprayer for thirty minutes, pressure wash, soak with diesel, scrap and clean with a rag, pressure wash and repeat. We started at about 9:00am and finished about 6:00pm. Clean up took a couple more hours to degrease the lift and driveway, and get everything back in the garage. There are still two or three places where there are dime sized blobs that are coked on, but those will be dealt with. The key was the hot water for the pressure washer. I keep the water heaters cranked up to 145 degrees and that helped so much. Here's a few pictures. I'm the good looking one.  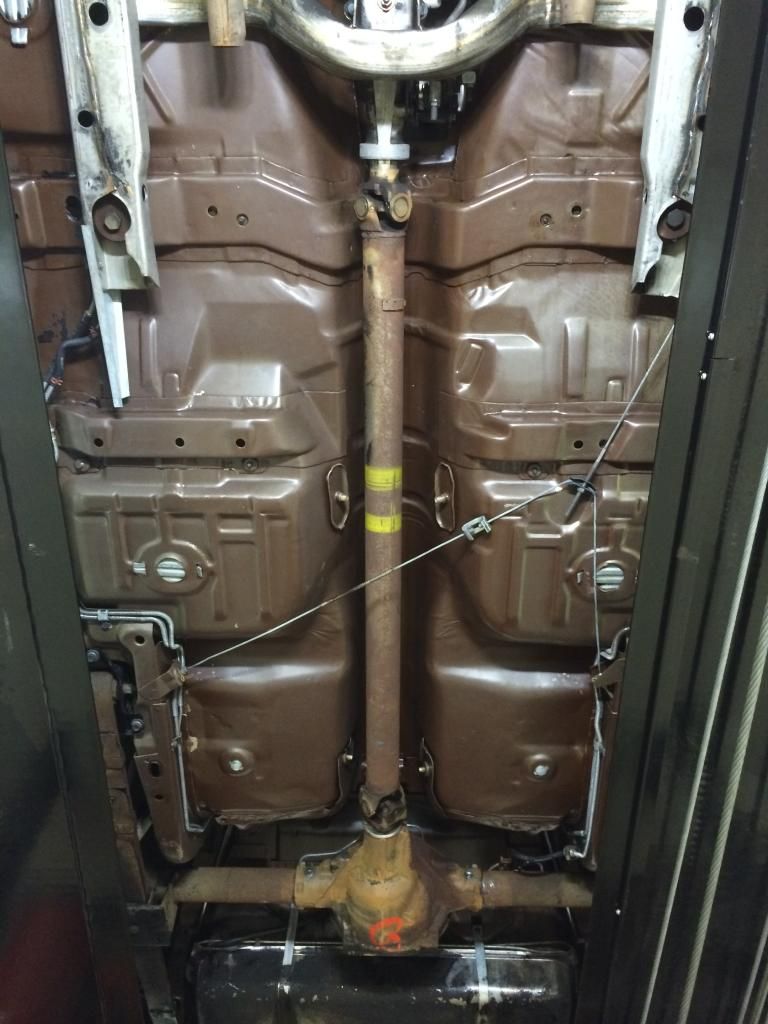 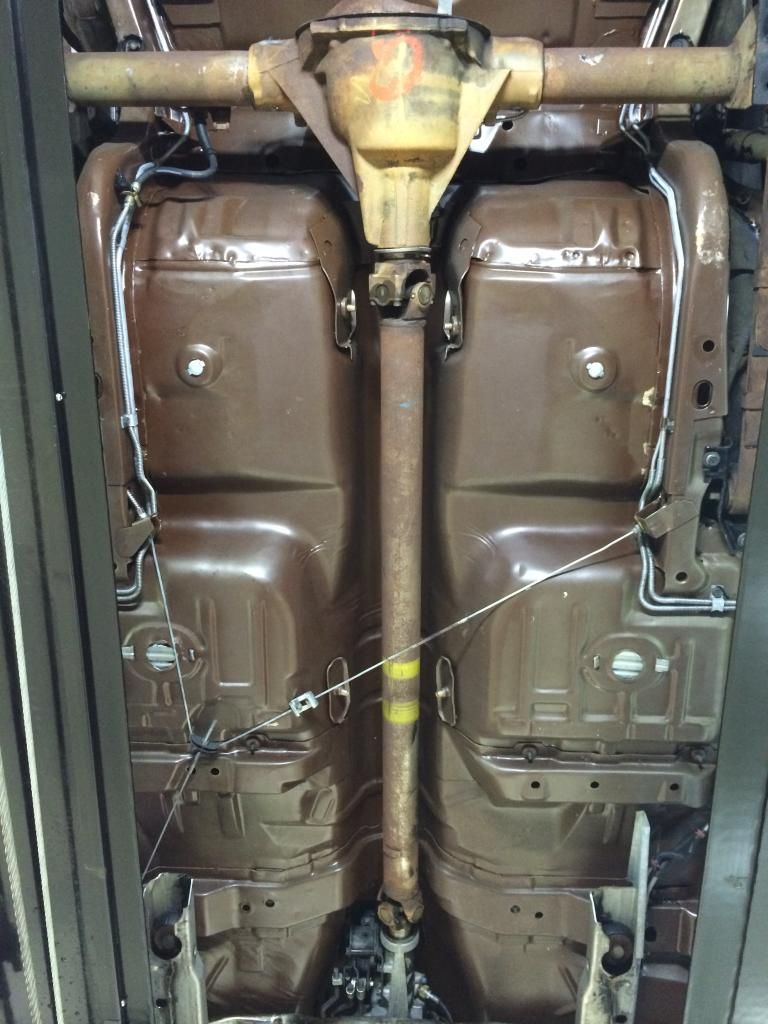 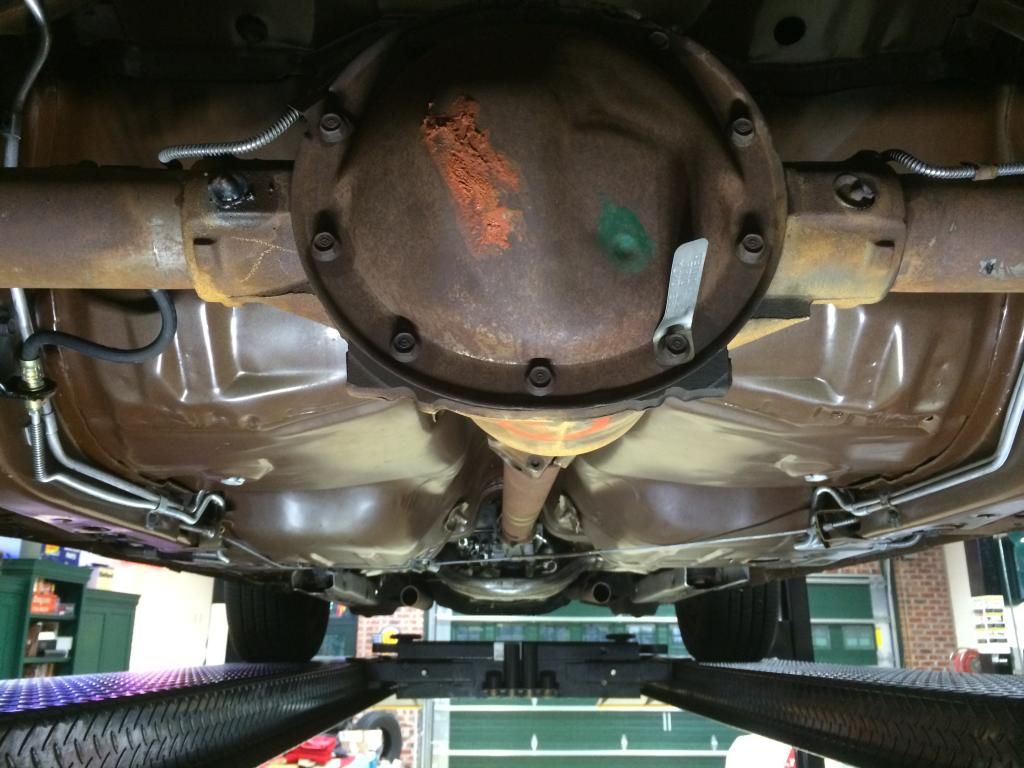 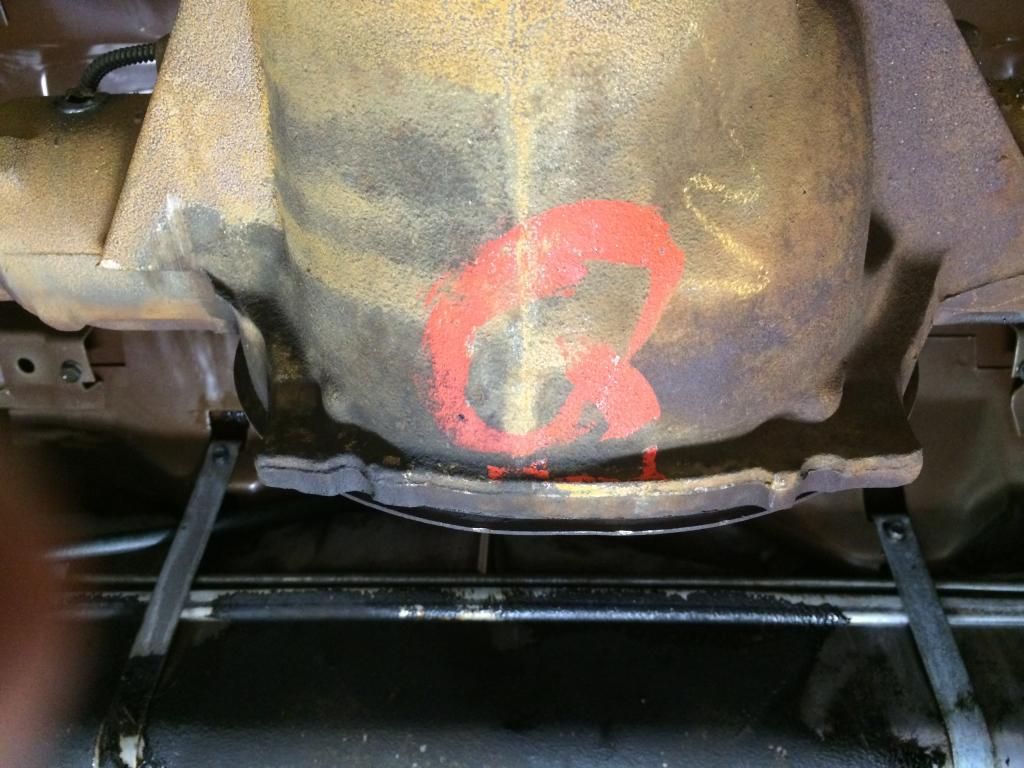 Before 
|
| The Following User Says Thank You to Bentwheelbob For This Useful Post: | ||
|
#177
07-26-2014, 11:27 PM
|
||||
|
||||
|
Amazing!!, Sweet Job!! I clear coat them after, but if dry, will be fine. I love being able to move the lift around, mine rolls better with a car on it though, otherwise the 'posts" drag...
__________________
"The Future Belongs to those who are STILL Willing to get their Hands Dirty" .. my Grandfather |
|
#178
07-27-2014, 12:13 AM
|
||||
|
||||
|
Damn, you two do great work! Sano Results!

|
|
#179
07-27-2014, 08:14 AM
|
||||
|
||||
|
Quote:
On the lower right?  I thought you were a lot taller? Car is looking great. 
__________________
John Wallace - johnta1 Pontiac Power RULES !!! www.wallaceracing.com Winner of Top Class at Pontiac Nationals, 2004 Cordova Winner of Quick 16 At Ames 2004 Pontiac Tripower Nats KRE's MR-1 - 1st 5 second Pontiac block ever! "Every man has a right to his own opinion, but no man has a right to be wrong in his facts." "People demand freedom of speech to make up for the freedom of thought which they avoid." Socrates |
|
#180
07-27-2014, 08:37 AM
|
||||
|
||||
|
Amazing improvement! Dirty job, but well worth the effort.
__________________
'79 SE T/A 400/4spd '12 ZL1 Camaro |
| Reply |
|
|
The PY Online Forums is the largest online gathering of Pontiac enthusiasts anywhere in the world. Founded in 1991, it was also the first online forum for people to gather and talk about their Pontiacs. Since then, it has become the mecca of Pontiac technical data and knowledge that no other place can surpass.


 Linear Mode

