


| FAQ |
| Members List |
| Social Groups |
| Calendar |
| Search |
| Today's Posts |
|
#1
 05-21-2007, 11:10 PM
|
||||
|
||||
|
Not sure if I have the right bezel or not, this is my first pontiac build.....I cant seem to install it, do I need to drop the steering column? Can anyone explain the process of how the bezel meets the gauges and bolts to the dash?
I also think I have an aftermarket tach, any ideas on mounting this in the factory location since it looks smaller then the bezel hole? Any help is much appreciated, ive redone some interiors but nothing that compares to a pontiac like this....not that theres a lot to it, but theres gotta be some tricks. Heres my dash setup/bezel...just assure me this is the right bezel, and everything looks good and there! 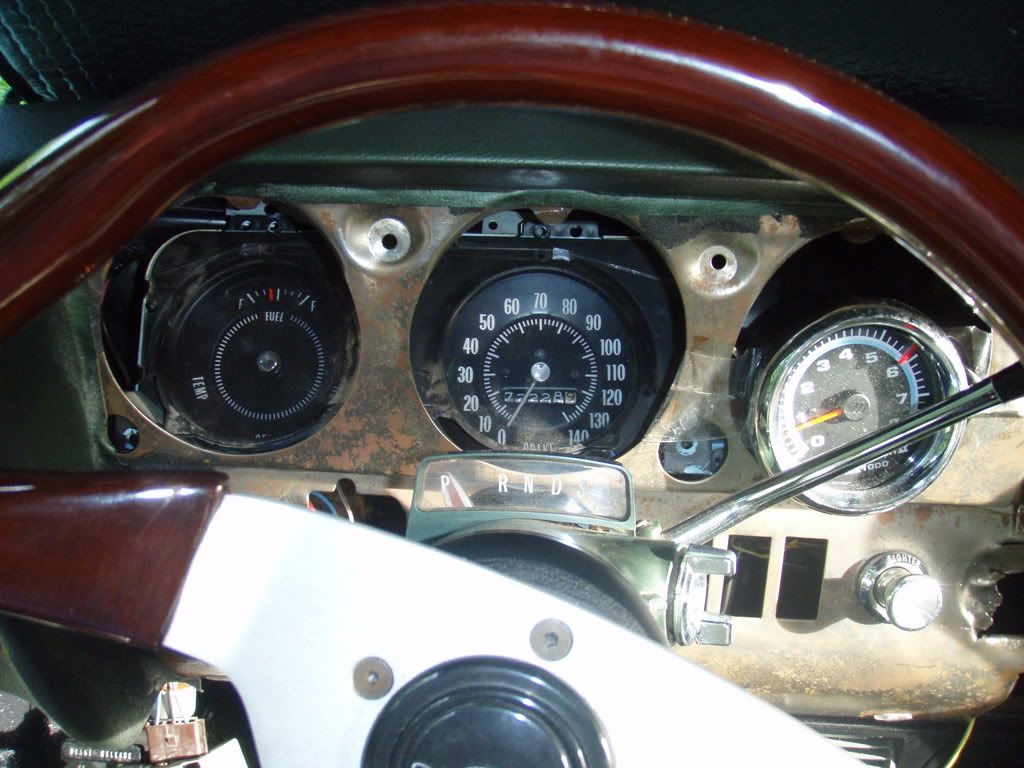 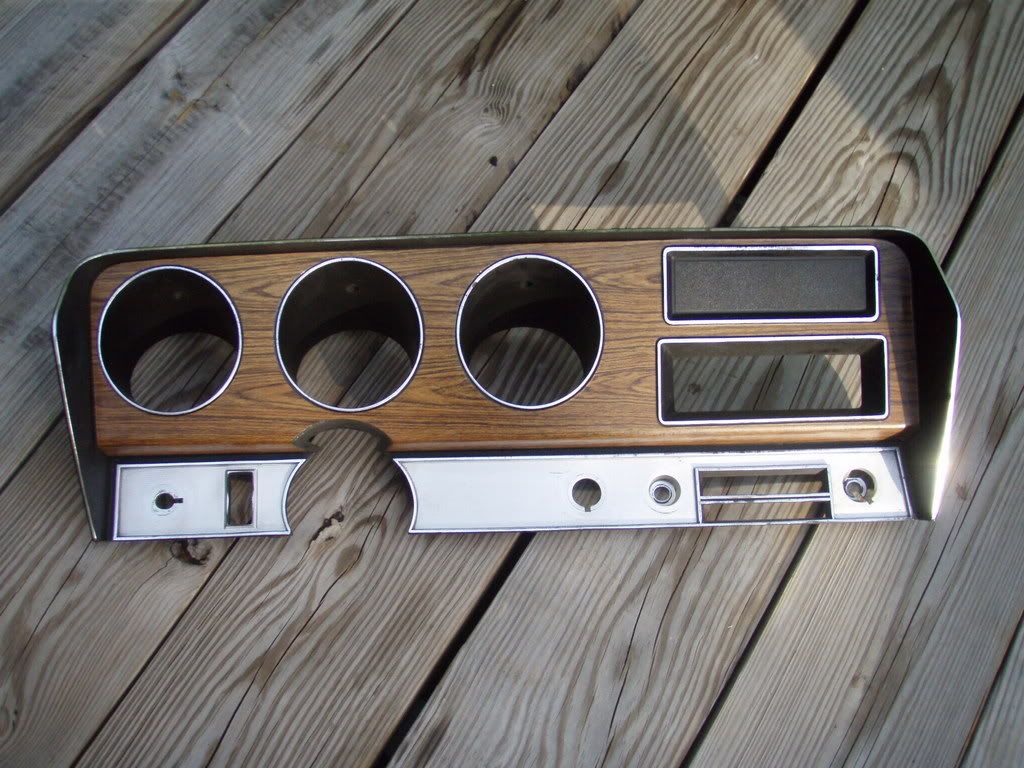
__________________
1970 LeMans 462 E-heads, 400 trans, Moser 12 bolt rear with 3.73s, Pypes 3" X system/violator mufflers, BMR handling package with 275 Mickey Ts out back 94 TransAm couple bolt-ons 03 F150 SuperCrew Fx4 88 Mustang LX T-Top 5-speed |
|
#2
05-22-2007, 02:03 AM
|
|||
|
|||
|
I don't know what level of function or correctness you're looking for, so I'll just point out a few things and you pick out what you need from there.
If you have a 70 with a/c - the dash bezel (woodgrained piece) you picture is a nice "non-a/c" unit from a 1972 model. Air conditioned cars have a center vent above the climate controls, your bezel has the block off for a non-air car. 70 and 71 non-air block off panel has PONTIAC molded on it. The blank ones came from 72 models. It will fit and you can use it if it fits your needs. The gauge cluster mounts to the back of the bezel - not behind the dash structure as pictured. Then the bezel assy mounts into the dash by studs on the back and etc... Dash has to come out to install all that stuff right. Best to assemble everything for the dash before installing into Car - EXCEPT the radio and glovebox. Steering column lowered from dash. Best to have front seats out for room to work. I'm taking for granted that you have the right dashpad with vents at each end. |
|
#3
05-22-2007, 07:35 AM
|
||||
|
||||
|
What BVZ said. If you want to use that after market tach I would find a block off plate for the right gauge hole and mount the tach to that. Any car that didn't come with a tach or clock would have that plate, so it shouldn’t be to difficult to find one here or on ebay. I have personally never done it, but I wouldn't want to damage the dash bezel, it looks like a nice one. The other option would be to get a factory tach, they do make repo's.
It also looks like your radio hole is cut out in the dash, if you plan on using an after market radio I would get a different bezel and not cut this one up. |
|
#4
05-22-2007, 10:13 AM
|
||||
|
||||
|
wow thanks for the info, not happy that I have to take apart the dash to install this bezel, but whatever I gotta do what I gotta do.
I Believe the car was an original AC car, but it is long gone, and it looks like most of the parts are gone from it as well. Im not necessarily going for a correct look, I just want the interior too look finished and nicer. Yes it looks like the last owner hacked up the factory radio position, there is already a CD player with radio installed in the glove box, so I do have the original radio from the car that may end up going back in with some fabrication.....As for the block off plate at the top of the bezel, I was debating having a couple switches later on when the project is more complete. any thoughts?
__________________
1970 LeMans 462 E-heads, 400 trans, Moser 12 bolt rear with 3.73s, Pypes 3" X system/violator mufflers, BMR handling package with 275 Mickey Ts out back 94 TransAm couple bolt-ons 03 F150 SuperCrew Fx4 88 Mustang LX T-Top 5-speed |
|
#5
06-01-2007, 06:52 PM
|
||||
|
||||
|
is there any write ups or any sort of website that i could get good solid info on taking the dash apart.
i have taken a dash apart on a 88 mustang, but this seems like a whole new ball game. this dash bezel should be a fine fit even if its from a 72? thanks guys.
__________________
1970 LeMans 462 E-heads, 400 trans, Moser 12 bolt rear with 3.73s, Pypes 3" X system/violator mufflers, BMR handling package with 275 Mickey Ts out back 94 TransAm couple bolt-ons 03 F150 SuperCrew Fx4 88 Mustang LX T-Top 5-speed |
|
#6
06-01-2007, 11:29 PM
|
||||
|
||||
|
Quote:
Step 1 - Drop your lower AC ducts if you have them. I believe it's 3 phillips screws on the pass side. Other half should just pull off with main duct. Step 2 - On each side of the dash on the underneath lower half, there is a bolt to unscrew. Remove these. Step 3 - Open glove box, remove phillips screws, removing glove box door and inside box. Step 4 - Look up, inside where you just removed the glove box and there are 3 or 4 studs with speed nuts on them, loosen those...you don't have to remove as it is slotted and will slide out of position when loosened. Step 5 - Remove 4 nuts from the back side of the AC/heater controls that holds it to the dash. Remove radio first if one is there to access this panel. Top nuts can be a bi*ch. Remove unit as a whole so you don't have to unplugg any of the vacuum lines. Step 6 - Remove phillips screws inside the 3 instument pods. Use stubby phillips screwdriver. Step 7 - Reach up and push the tab on the top side of the speedometer cable where it attaches to the cluster and remove speedo cable from the instrument cluster. Step 8 - Remove lower dash panel surround (around ash tray) Step 9 - Remove radio knobs and you need to pull out the head light knob too. Don't yank it! There is a little button you need to push from the back side to release the knob. You probably won't be able to see it, but you will just have to feel around for it. Push it in and it will release the knob. Unplug cigarette lighter wire. Step 10 - Remove two nuts on either side of the steering column and lower column. Let wheel rest on seat if seat is installed, if no seat get something to support column, it won't reach floor boards. I am doing this from memory, so hopefully I haven't forgotten something, but now you are ready to pull dash away from the firewall. When you pull away, it will still be attached by the wiring harness. Pull the top of the dash away and remove nuts on top that attach to the instrument cluster. You should have everything free to remove the dash. Hope this helps, good luck.
__________________
Pat Brown |
|
#7
06-03-2007, 09:00 AM
|
||||
|
||||
|
nice job PB, what he said to a tee. I will add if you decide to move or remove your dash pad, handle ot very gently. they are old and will want to crack if not supported with care. a restored pad costs around $700.00 + ship. good luck

__________________
 70 GTO 400/4SPD-13.97@102.31 70 GTO 400/4SPD-13.97@102.31
|
|
#8
06-03-2007, 09:05 AM
|
||||
|
||||
|
Smellmygas,
I sent you a private message. John
__________________
1972 GTO Hardtop - 400, M22, Cardinal Red now Nocturne Blue Treasurer 2008 GTOAA International Meet |
|
#9
06-03-2007, 04:31 PM
|
||||
|
||||
|
thanks for the write up PB
 I shall give this attempt this week sometime when its not raining. johnmilza- sorry i am not interested in selling the bezel, im gonna stick with what i got for now.
__________________
1970 LeMans 462 E-heads, 400 trans, Moser 12 bolt rear with 3.73s, Pypes 3" X system/violator mufflers, BMR handling package with 275 Mickey Ts out back 94 TransAm couple bolt-ons 03 F150 SuperCrew Fx4 88 Mustang LX T-Top 5-speed |
|
#10
06-03-2007, 08:05 PM
|
||||
|
||||
|
Not to bad considering how bad your memory is Pat...lol
I have a few things i will add. You really should remove the dash and set it face down on something soft to work on it, trying to do it while its still in the car is not the best idea you end up with more damage or potential for damage. Be careful not to push to hard on it from the back side while making the change. Also when you install the new bezel be careful not to over tighten the "tin nuts" that that hold the bezel to the dash pad ..in a few places it is very easy to crack the bezel. The first time i ever did this, which was so long ago i dont like to think about it...lol (1986!) it only took me about 12 hours...lol I am much faster now getting it done in something like 3 or 4 depending on what im changing. Good luck! |
|
#11
06-03-2007, 09:29 PM
|
||||
|
||||
|
If you unbolt the bulkhead at the firewall and pull the 2 bolts inside that hold the fuse box in, it`s a lot easier to pull the dash. In other words, pull the dash with the dash harness together.

|
|
#12
06-20-2007, 04:45 PM
|
||||
|
||||
|
all the acessories are off the dash, im down to 4 bolts as i think, till i pull the dash off....the 2 around the steering column, and the 2 sides under the dash vents, all bolts are loose but it doesnt seem to move at all, im waiting for someone to help me guide the dash off safely....but shouldnt it be loose right now? there are still the ac ducts attached at the very top in the middle, should i take them off before removing the dash? Are there no bolts on the top of the dash? Do i have to pull the dash up and then out?
sorry just dont want to mess up the dash when pulling it out. can anyone chime in?
__________________
1970 LeMans 462 E-heads, 400 trans, Moser 12 bolt rear with 3.73s, Pypes 3" X system/violator mufflers, BMR handling package with 275 Mickey Ts out back 94 TransAm couple bolt-ons 03 F150 SuperCrew Fx4 88 Mustang LX T-Top 5-speed |
|
#13
06-24-2007, 11:16 AM
|
||||
|
||||
|
never mind...done project....thanks for the help guys, it helped out a lot when removing the dash.
heres the finished product 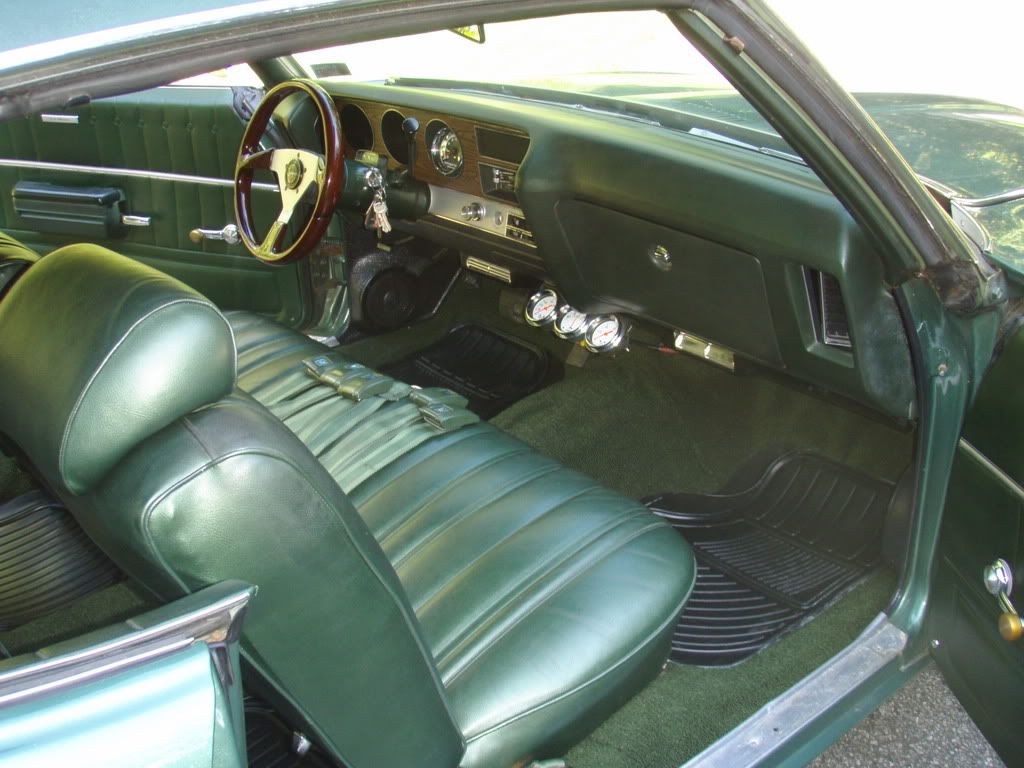
__________________
1970 LeMans 462 E-heads, 400 trans, Moser 12 bolt rear with 3.73s, Pypes 3" X system/violator mufflers, BMR handling package with 275 Mickey Ts out back 94 TransAm couple bolt-ons 03 F150 SuperCrew Fx4 88 Mustang LX T-Top 5-speed |
|
#14
06-24-2007, 04:10 PM
|
||||
|
||||
|
Hey...nice work! Looks good.
__________________
Pat Brown |
| Reply |
|
|
The PY Online Forums is the largest online gathering of Pontiac enthusiasts anywhere in the world. Founded in 1991, it was also the first online forum for people to gather and talk about their Pontiacs. Since then, it has become the mecca of Pontiac technical data and knowledge that no other place can surpass.


 Linear Mode

