


| FAQ |
| Members List |
| Social Groups |
| Calendar |
| Search |
| Today's Posts |
|
#1
 01-14-2018, 03:57 AM
|
|||
|
|||
|
Old thread I've just rescued.
After a few requests and much interest in one of my early pages on another forum of how to fit the accessory brackets for the Oldsmobile engines in Firebird I've decided to upgrade the photos with more accurate photos, details and include fasteners used hopefully to save someone a lot of time in the future. this is the setup used for both the '77-'79 403 and also the '77 350 Olds in F-bodies. As you will see I don't have an engine or head to assemble to at present but should still be clear enough. Starting from the very beginning, the timing cover. 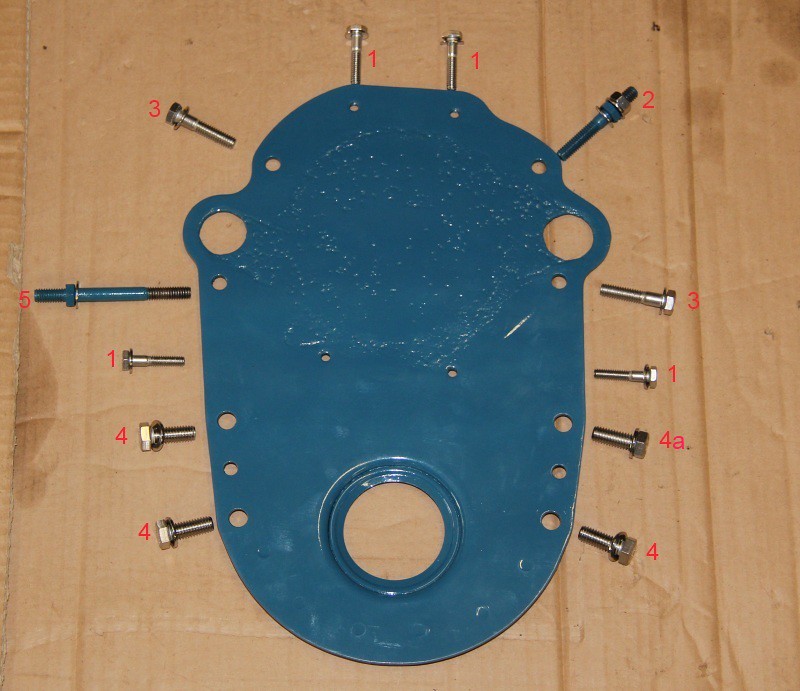 Timing Cover bolt arrangement by Aus78Formula, on Flickr Timing Cover bolt arrangement by Aus78Formula, on FlickrTiming Cover Fasteners list: 1. 1/4" UNC x 1.25 + flat washers. 2. 5/16" UNC x 1.5" accessory stud with 5/8" extension for alternator black bracket + 2x flat washers + 5/16" nut. 3. 5/16" UNC x 1.5" + flat washers. (Some other applications may use studs #2 for either of the #3 bolts) 4. 3/8" UNC x 1" + flat washers. 4a. This bolt is shown the same as #4 in photo, holds the Timing tag, originally uses an accessory stud 3/8" UNC x 1" x 1.5" extension + flat washer. For originality only, no accessories use this stud in Firebirds. 5. 5/16" UNC x 2.5" accessory stud with 5/8" extension + flat washer used by cars with AIR pump bracket. Add the water pump showing correct arrangement of bolts and studs fitted, Timing tag and stud not shown.  Water pump to timing cover bolt arrangement by Aus78Formula, on Flickr Water pump to timing cover bolt arrangement by Aus78Formula, on Flickr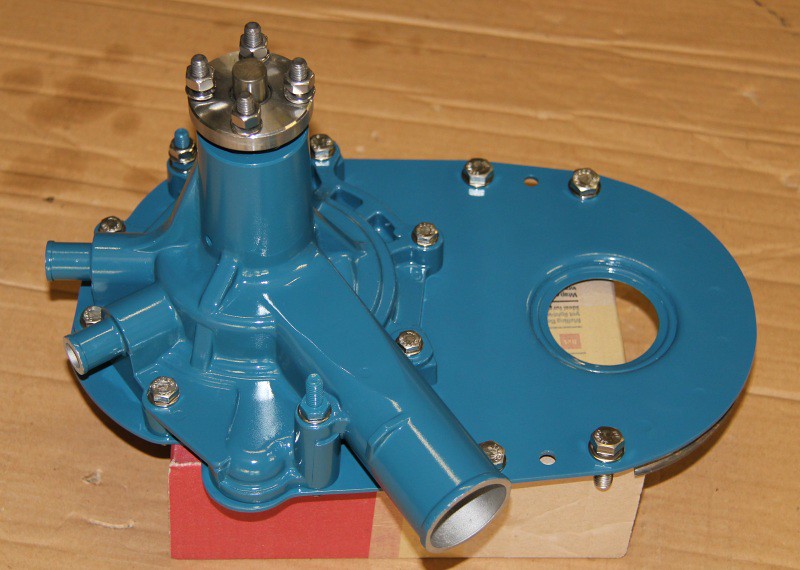 Water pump to timing cover bolt arrangement2 by Aus78Formula, on Flickr Water pump to timing cover bolt arrangement2 by Aus78Formula, on FlickrThe very first part of the brackets is to mount the alloy alternator bracket into the front of the head. Line up the other holes to make sure it's straight before locking up. Do not add a washer or it will foul the Power Steering pump added later. 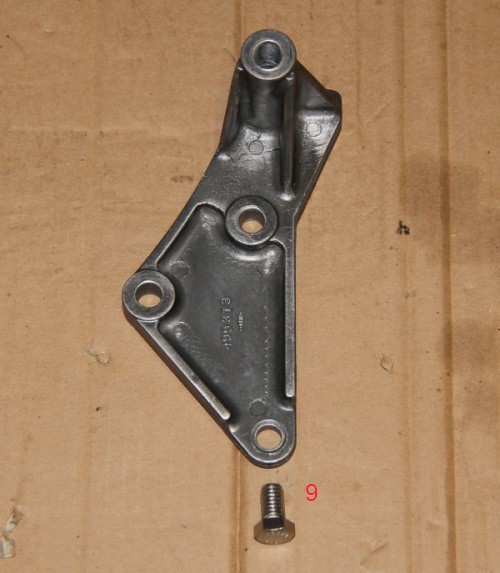 Alternator alloy bracket 499313 by Aus78Formula, on Flickr Alternator alloy bracket 499313 by Aus78Formula, on FlickrAlloy Alternator bracket #499313 fasteners: 9. 3/8" UNC x 5/8" long, no washers. Next is the steel alternator bracket, it swings off the stud on the water pump shown earlier. 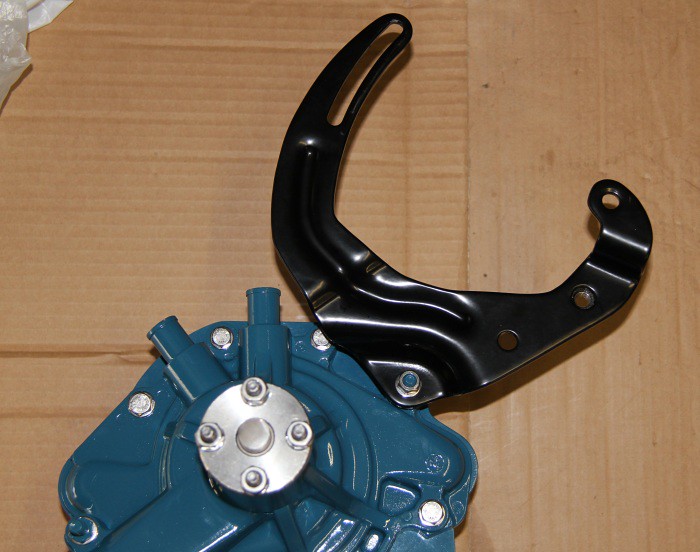 alternator water pump stud by Aus78Formula, on Flickr alternator water pump stud by Aus78Formula, on FlickrHere's the fasteners required for further assembly of this bracket. 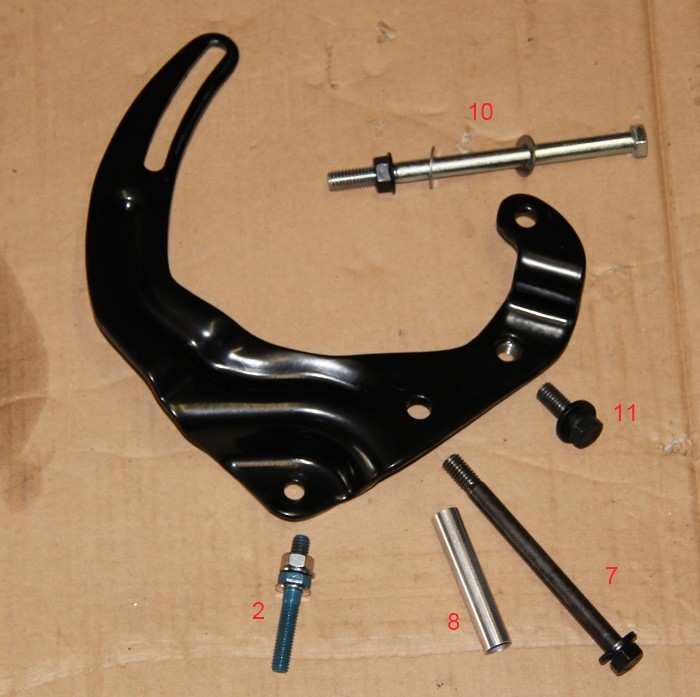 Alternator bracket bolt arrangement by Aus78Formula, on Flickr Alternator bracket bolt arrangement by Aus78Formula, on FlickrBlack alternator bracket fasteners: 2. 5/16" UNC x 1.5" accessory stud with 5/8" extension for alternator black bracket + 2x flat washers + 5/16" nut. 7. 3/8" UNC x 4.5" long + heavy flat washer. (passes through tube spacer #8 and all brackets into head) 8. Tube spacer 3/8" I.D. x 2.5" long. 10. Alternator bolt 3/8" UNC x 5.25" long + flat washers + 3/8" nut. (Factory uses 3" long threaded into alloy bracket, usually stripped out so longer bolt and nut used) 11. 3/8" UNC x 1" + heavy flat washer. (Threads into captive nut on bracket) Next is the Power Steering pump assembly, I'll add a few quick pics of how it is setup. 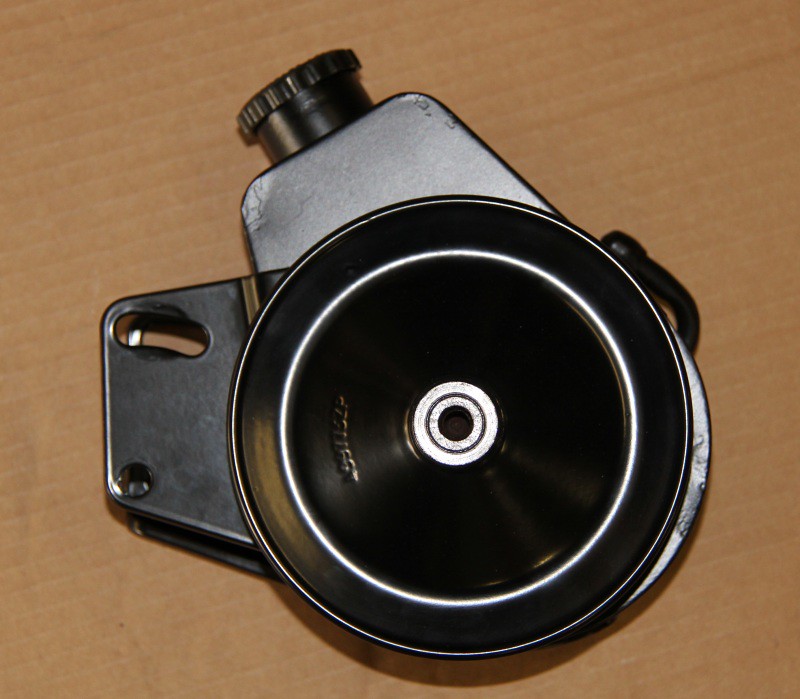 power steering assembly1 by Aus78Formula, on Flickr power steering assembly1 by Aus78Formula, on Flickr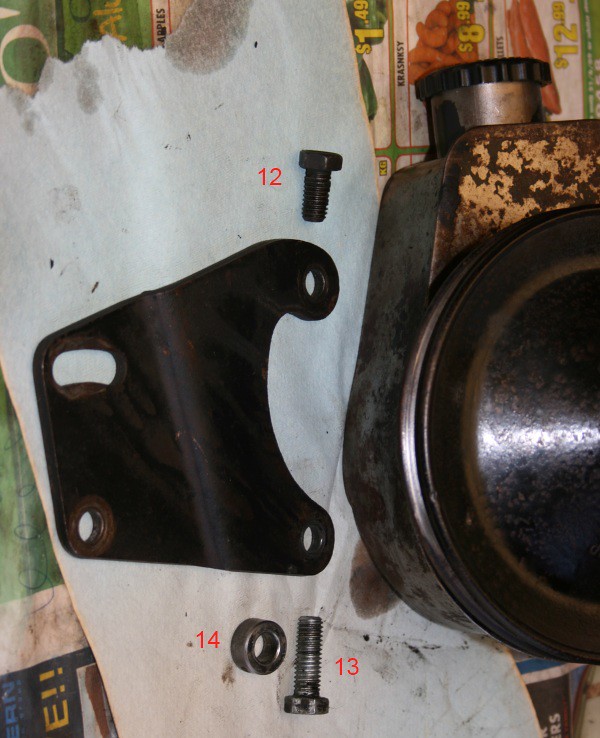 power steering front bracket bolts by Aus78Formula, on Flickr power steering front bracket bolts by Aus78Formula, on FlickrFront PS bracket fasteners: 12. 3/8" UNC x 3/4 long. 13. 3/8" UNC x 1" long. 14. 3/8 I.D. spacer x 3/8" thick. 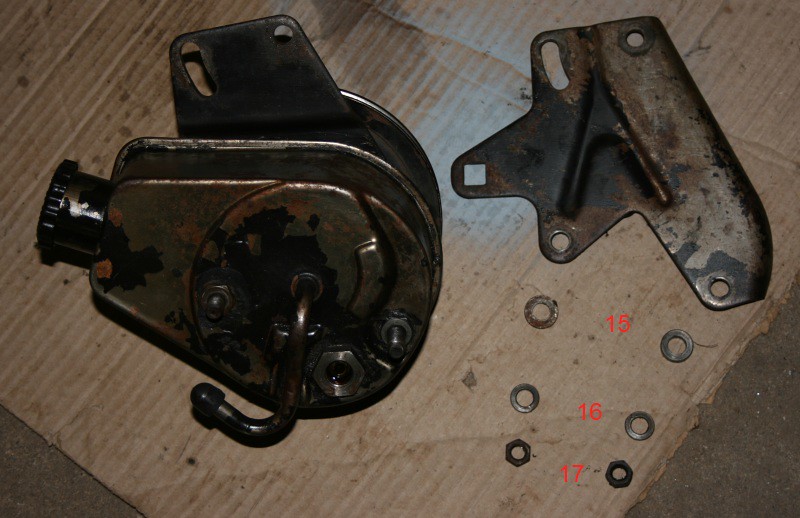 power steering rear bracket bolts2 by Aus78Formula, on Flickr power steering rear bracket bolts2 by Aus78Formula, on FlickrRear PS bracket fasteners: 15. 3/8" flat washers. 16. 3/8" spring washers. 17. 3/8" UNC nuts. 17a. Not shown is 1/4" thick spacer to fit the lower 3/8" stud, will be obvious when you mount plate against the rear which one needs it. ( * The half-height (3/16" thick) 3/8" UNC nuts are parts of the PS pump, one on each stud.) You should end up with something like this as a complete PS unit: 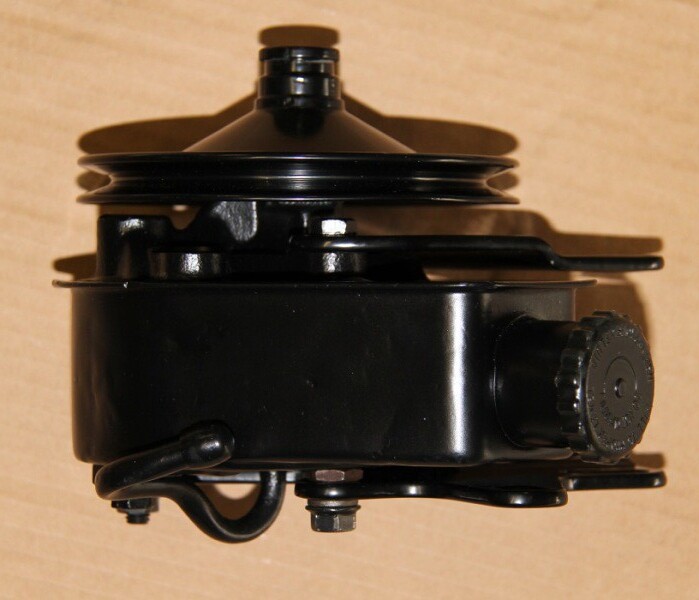 power steering assembly2 by Aus78Formula, on Flickr power steering assembly2 by Aus78Formula, on Flickr power steering assembly3 by Aus78Formula, on Flickr power steering assembly3 by Aus78Formula, on Flickr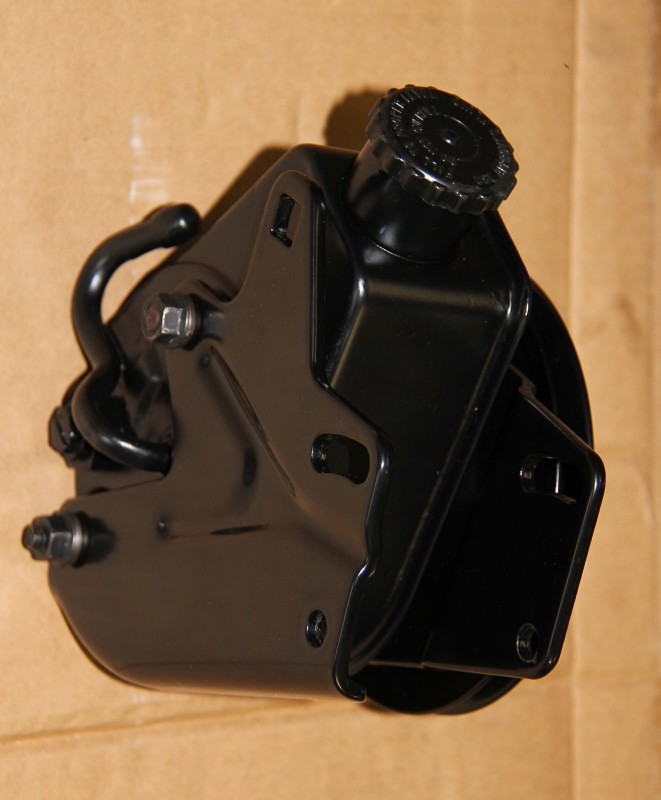 power steering assembly4 by Aus78Formula, on Flickr power steering assembly4 by Aus78Formula, on Flickr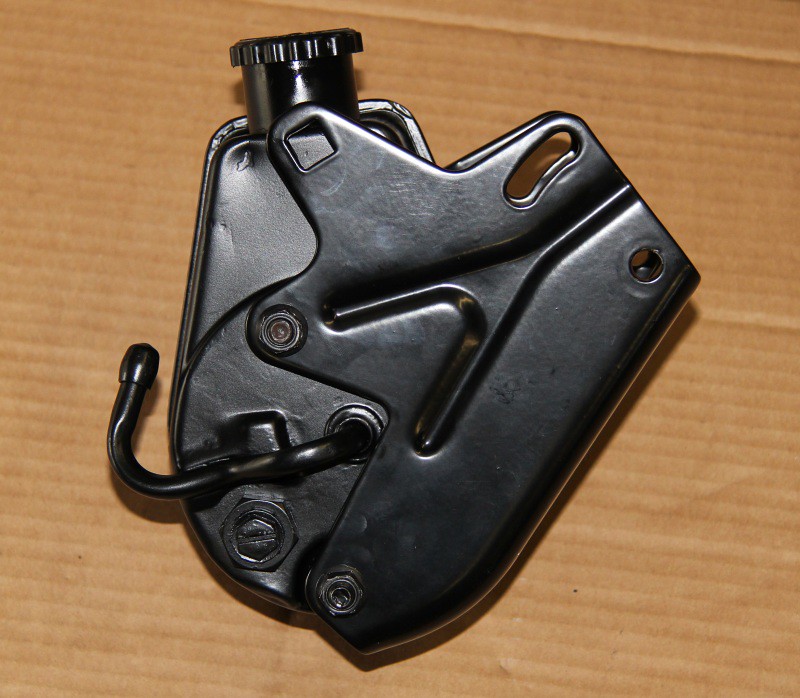 power steering assembly5 by Aus78Formula, on Flickr power steering assembly5 by Aus78Formula, on FlickrNext you slide the PS unit in between the existing alternator brackets using fasteners below and those with the back steel U bracket above. 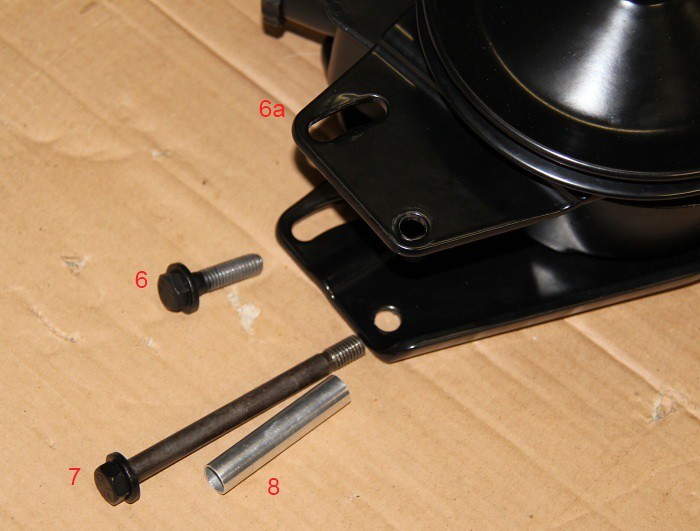 power steering rear bracket bolts by Aus78Formula, on Flickr power steering rear bracket bolts by Aus78Formula, on FlickrPS rear bracket fasteners: 6. 3/8" UNC x 1.5" long + heavy washer. (Rear PS bracket threads into head) 6a. Not shown in pic but should be #11, 3/8" UNC x 1" + heavy flat washer. (Threads into captive nut on black alternator bracket from front PS bracket) 7. 3/8" UNC x 4.5" long + heavy flat washer. (passes through tube spacer #8 and all brackets into head, both standard holes shown) 8. Tube spacer 3/8" I.D. x 2.5" long. [img width=800 height=527]https://farm5.staticflickr.com/4714/39660529381_286728e5ac_b.jpg[/img]Olds Fbody powersteering alternator brackets by Aus78Formula, on Flickr Finally, fit the alternator to complete accessory brackets. 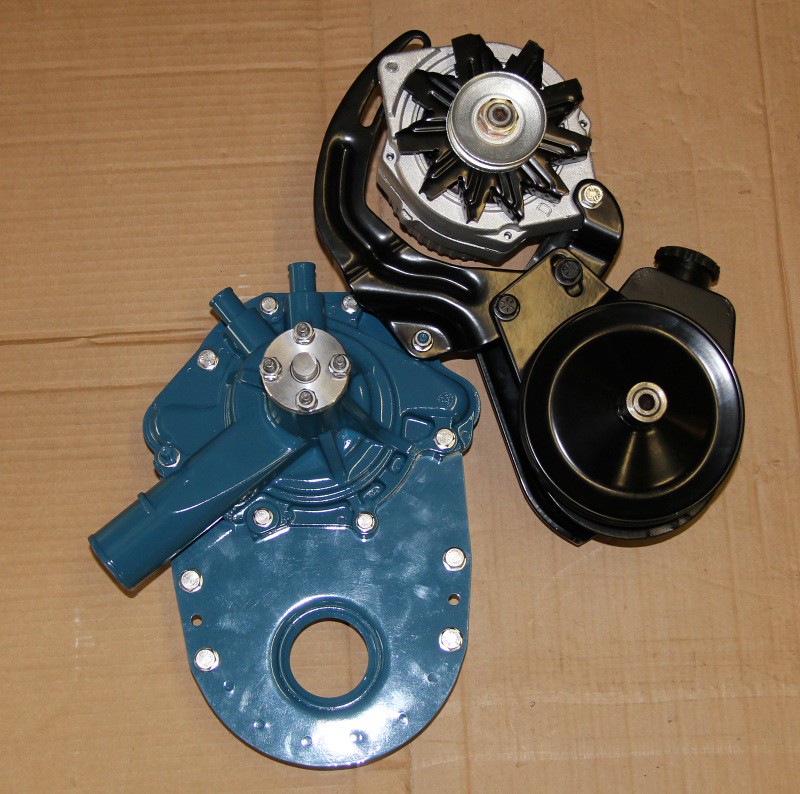 Alternator powersteering bracket setup1 by Aus78Formula, on Flickr Alternator powersteering bracket setup1 by Aus78Formula, on Flickr[img width=800 height=508]https://farm5.staticflickr.com/4765/38763315755_d0359f7262_b.jpg[/img]Alternator powersteering bracket setup7 by Aus78Formula, on Flickr 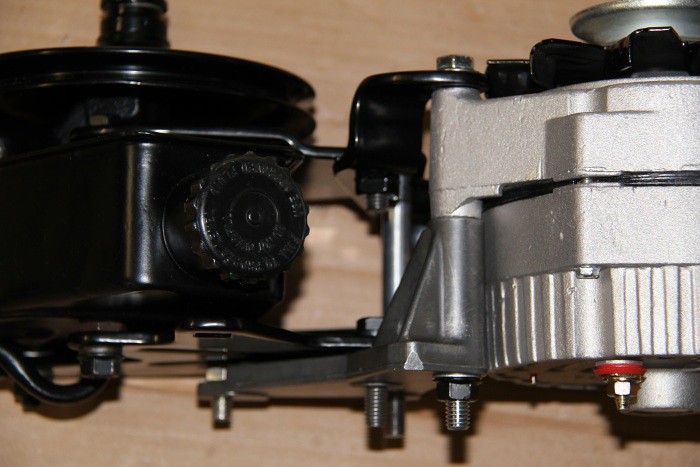 Alternator powersteering bracket setup9 by Aus78Formula, on Flickr Alternator powersteering bracket setup9 by Aus78Formula, on Flickr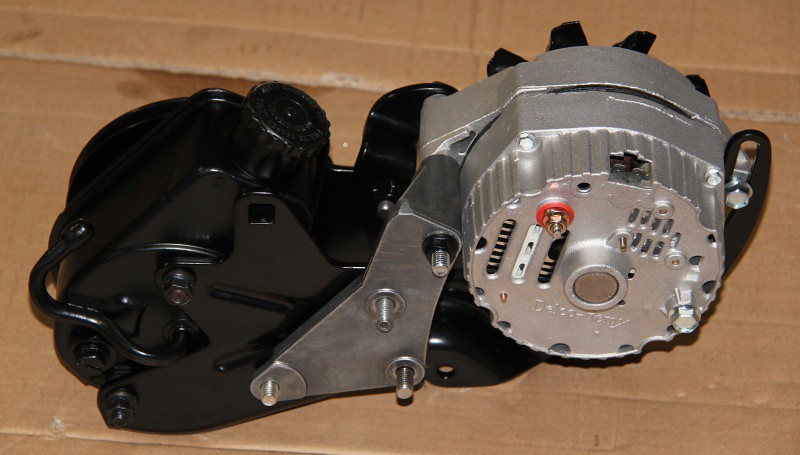 Alternator powersteering bracket setup8 by Aus78Formula, on Flickr Alternator powersteering bracket setup8 by Aus78Formula, on FlickrThe 3x bolts coming through the base of the alloy bracket thread into the head. 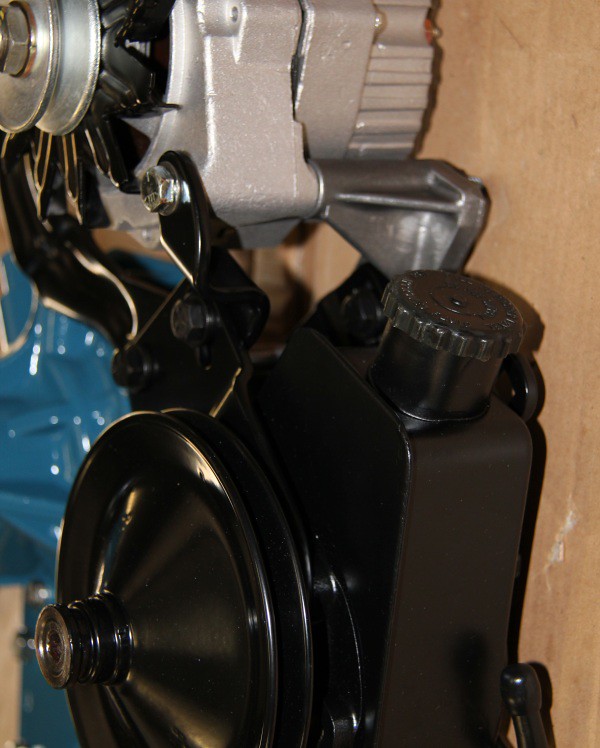 Alternator powersteering bracket setup6 by Aus78Formula, on Flickr Alternator powersteering bracket setup6 by Aus78Formula, on Flickr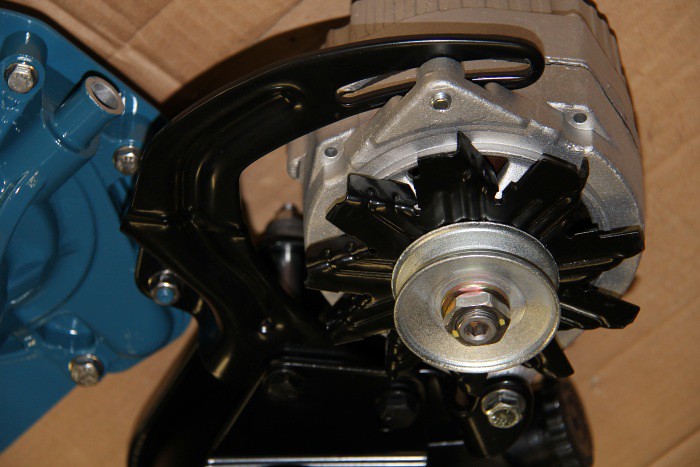 Alternator powersteering bracket setup5 by Aus78Formula, on Flickr Alternator powersteering bracket setup5 by Aus78Formula, on Flickr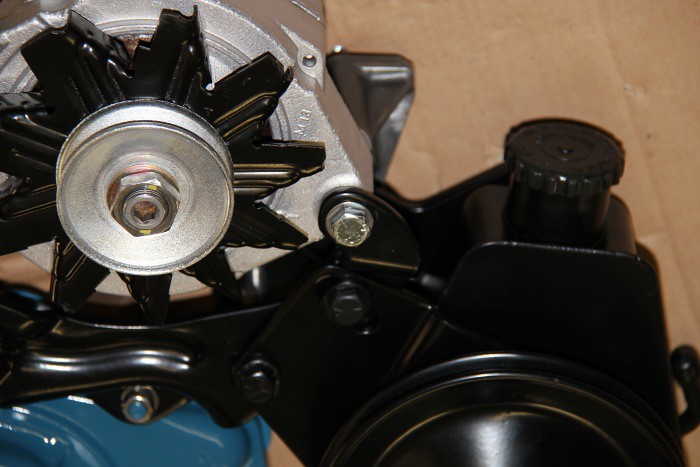 Alternator powersteering bracket setup4 by Aus78Formula, on Flickr Alternator powersteering bracket setup4 by Aus78Formula, on Flickr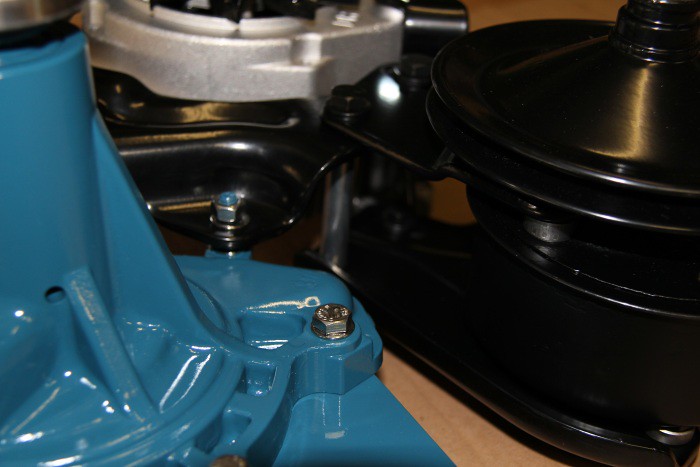 Alternator powersteering bracket setup3 by Aus78Formula, on Flickr Alternator powersteering bracket setup3 by Aus78Formula, on Flickr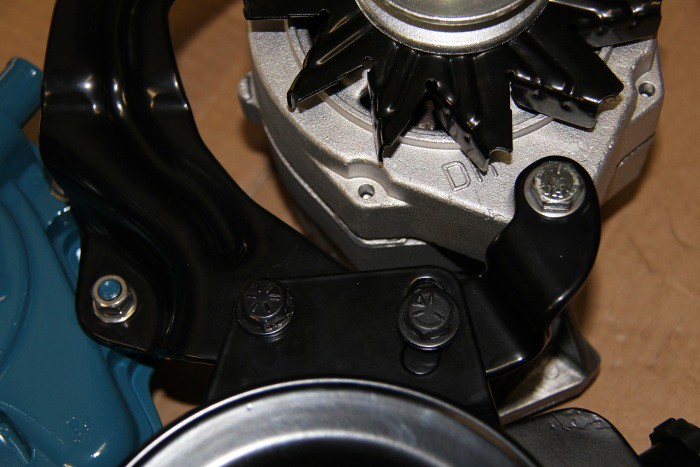 Alternator powersteering bracket setup2 by Aus78Formula, on Flickr Alternator powersteering bracket setup2 by Aus78Formula, on FlickrHopefully, that helped someone, 1/2hr to do, 6hrs to explain with uploaded photos and measuring bolts! |
|
#2
01-14-2018, 10:07 AM
|
|||
|
|||
|
Nice to have this great reference up again. Thanks for going to the trouble Ben!
__________________
Steve F. |
|
#3
01-21-2018, 02:38 PM
|
||||
|
||||
|
Is that factory correct hardware or stuff from hardware store?
|
|
#4
01-21-2018, 06:37 PM
|
|||
|
|||
|
Have a guess. It's a mockup.
|
| The Following User Says Thank You to Aus78Formula For This Useful Post: | ||
|
#5
01-28-2018, 04:19 PM
|
||||
|
||||
|
Thanks Aus78Formula for bringing this forward. It should be a sticky. I'll be needing to view it again after I rebuild my engine next month.
__________________
1966 GTO Vert automatic. 1969 CR Judge Ram Air III 4sp Pattern Car. 1969 GTO standard 350HP TH-400. 2006 GTO Phantom Black 6spd. 1972 Formula 455HO Ram Air. 1976 LE Trans Am 50th Anniversary Edition with T top. 1976 Formula 350. 1977 Grand Prix Model J 350. 1978 Trans am 400 Pontiac. 1979 Trans am 403 Olds. 1968 Olds 442. 1971 TR6. |
| Reply |
|
|
The PY Online Forums is the largest online gathering of Pontiac enthusiasts anywhere in the world. Founded in 1991, it was also the first online forum for people to gather and talk about their Pontiacs. Since then, it has become the mecca of Pontiac technical data and knowledge that no other place can surpass.


 Linear Mode

