


| FAQ |
| Members List |
| Social Groups |
| Calendar |
| Search |
| Today's Posts |
|
#661
 08-09-2008, 11:02 AM
|
||||
|
||||
|
I picked up an extra set of 15x7 honeycomb wheels for my BFG radials. (from earlier posts you know I will be using the Polyglas GT's for show). Found these on ebay reasonably cheap and only about 25 miles away.
The problem with these wheels is that the internal steel supporting cone that runs from the mounting flange of the wheel to the center cap mounting point is usually mangled from years of abuse from tire machines, pried off center caps, really high curbs, etc. The normally pentagon shaped flange is commonly trapazoidal from the years of bad treatment. There is no way to access and repair the cone if it is damaged...unless you get creative. Here is the set and the ovaled out center caps areas: 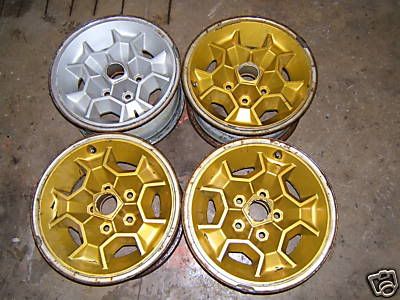 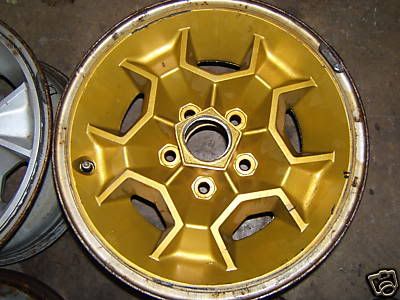 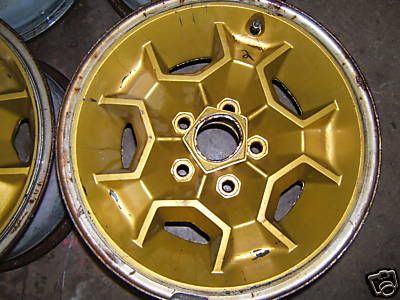
|
|
#662
08-09-2008, 11:03 AM
|
||||
|
||||
|
I "thunk" to myself, well what do you use to make a dented tube round again?...and a lightbulb went off. Use a muffler tailpipe expander!
I borrowed my buddy's 30 year-old piece of iron hardware and plunked it in the center hole, gave a few whacks with a dead blow hammer and voila! Perfectly round again. It didn't even hurt the inner center cap mounting lip on the cone. It just moved everything back into place. 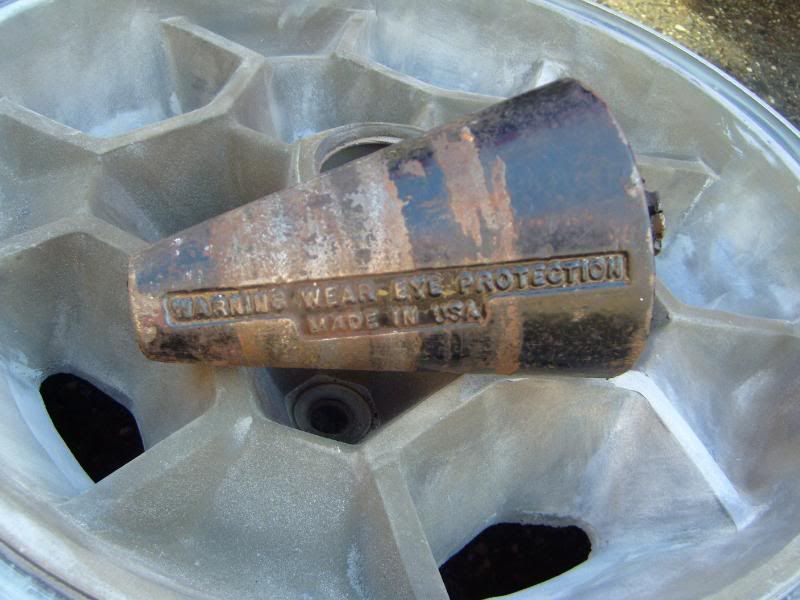 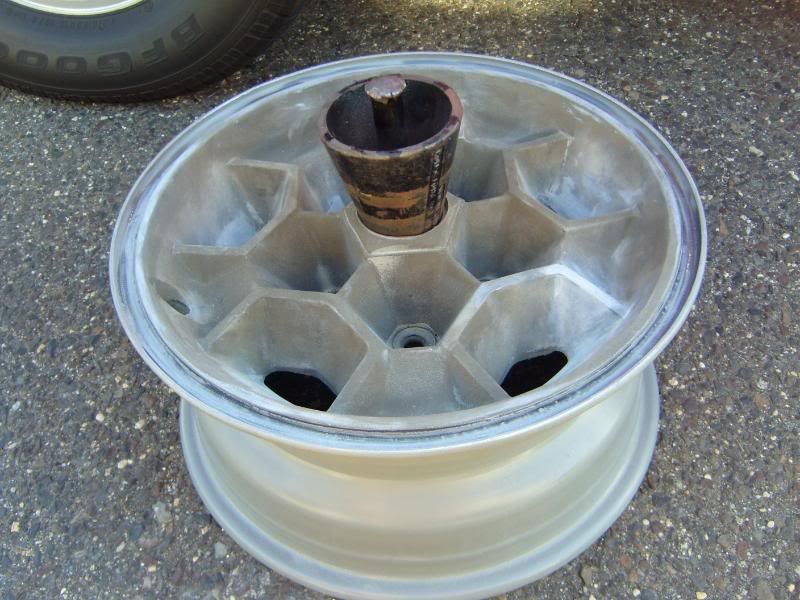 and the result: 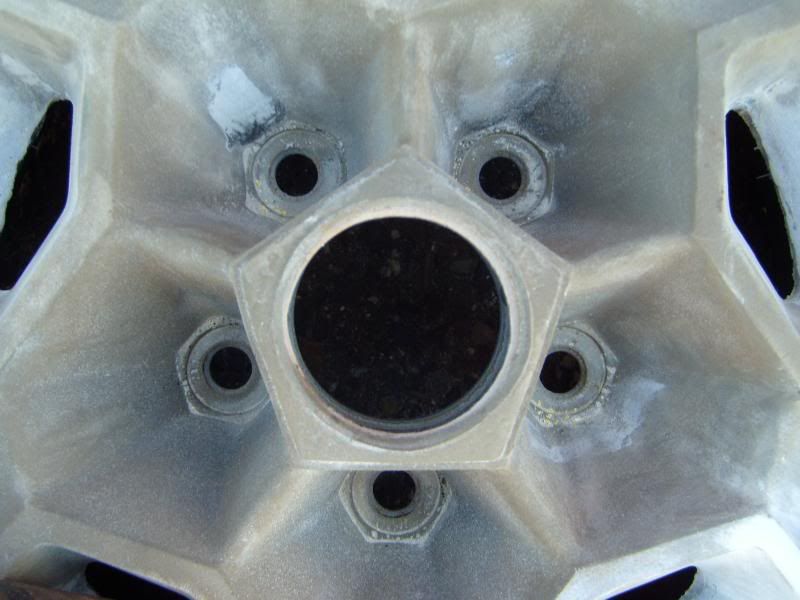
|
|
#663
08-09-2008, 06:10 PM
|
||||
|
||||
|
[QUOTE=njsteve;3379080]I "thunk" to myself, well what do you use to make a dented tube round again?...and a lightbulb went off. Use a muffler tailpipe expander!
It doesn't surprise me any Steve, if anyone can find a way to fix, repair or ? it's you. Another great job.
__________________
1974 400 4 speed |
|
#664
08-11-2008, 08:57 AM
|
||||
|
||||
|
the funny thing is i've never heard of such a tool (who has....except steve) AND how many of us have buddys that have one (excpet steve)....
so steve, how much are you renting that tool for now that everyone with these wheels is going to want to use it ? :-) |
|
#665
08-11-2008, 08:18 PM
|
||||
|
||||
|
It pays to have old friends that are old-time mechanics (older than me, that is).
Finished the bodywork and paint on the rims over the weekend. It really sucks having to pay $50 a can for OEM brand paint since they are the only ones that make the Honeycomb silver paint in a spray can. I'm sorry but the R&D cost can't be that massive for a paint that comes from an original factory paint code. Ouch! Maybe it has little bitty pieces of real diamonds in it that make it so sparkly...or maybe they're owned by Exxon/Mobil. (Note my sarcasm here) Anyway, the wheels came out reasonably well. I will be swapping the center caps from my other set when I use the radials, since the NOS center caps cost about $90 apiece now and no one repros them. Bigger ouch! 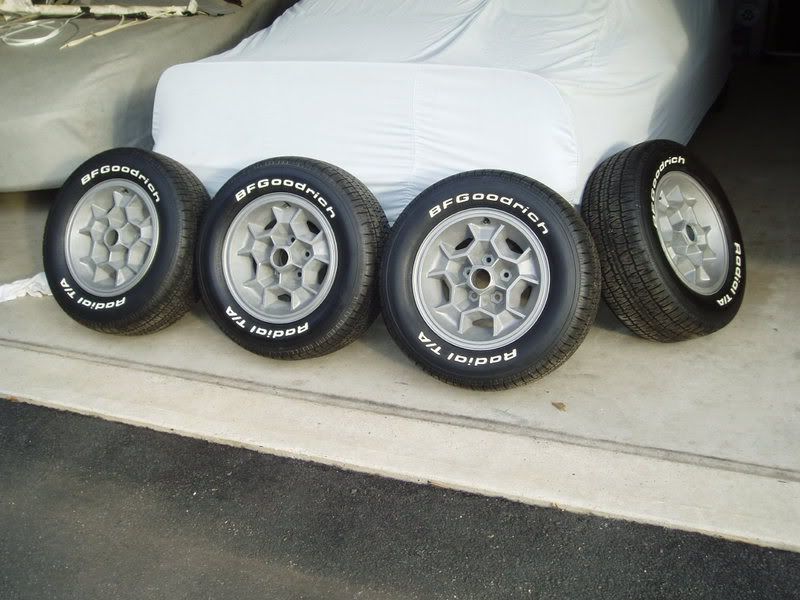
|
|
#666
08-13-2008, 12:27 PM
|
|||
|
|||
|
Quote:
|
|
#667
08-25-2008, 05:30 PM
|
||||
|
||||
|
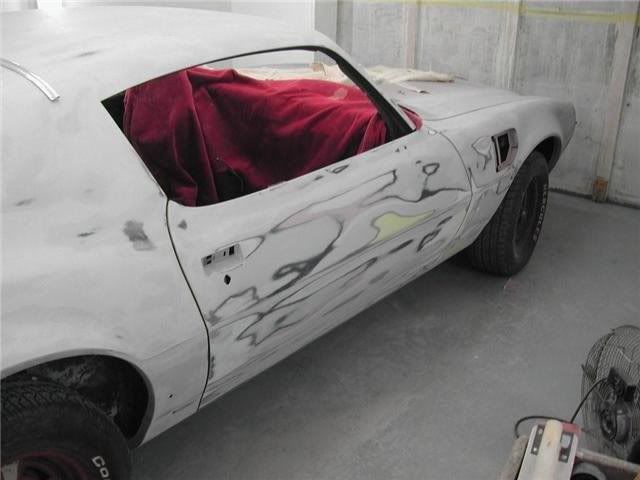
Some recent progress on the block sanding front.
It kinda looks like a 1970's van mural in progress. I think I see a shark, and a cloud, and a pteradactyl... 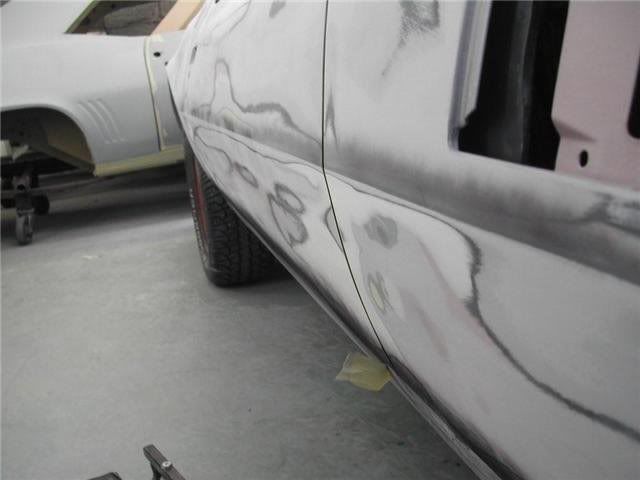 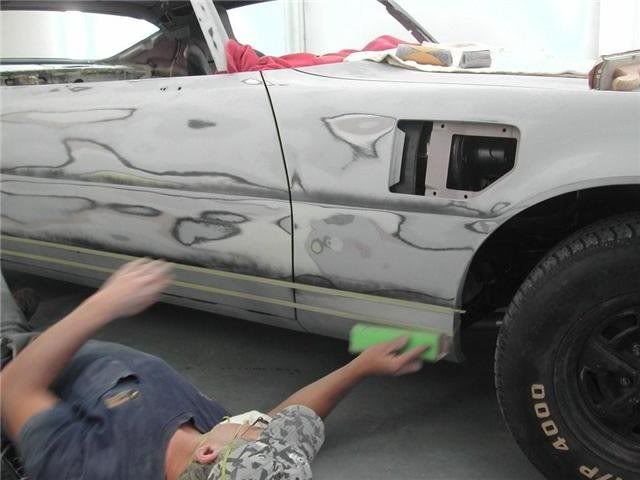 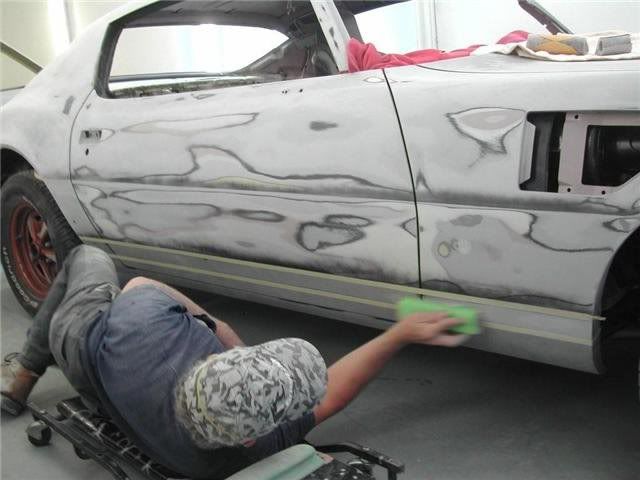 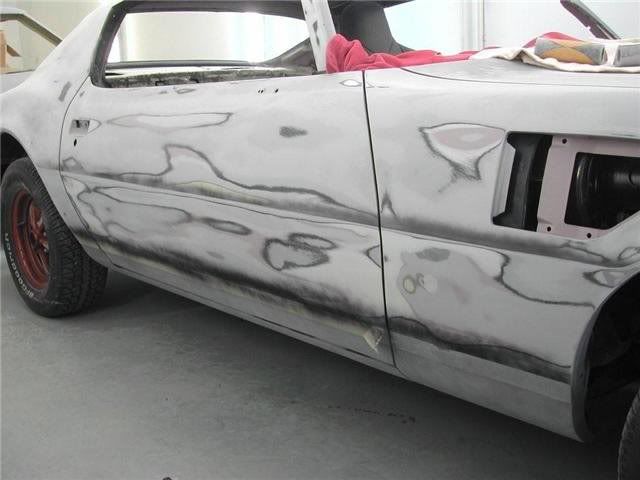
|
|
#668
08-25-2008, 05:38 PM
|
||||
|
||||
|
I see a lake with mountains in the background. We need more happy trees!
 That will be one straight body when they are done Steve! Rims came out great - there's hope now for the 6 or 8 out of round center ones I have!
__________________
Some guys they just give up living And start dying little by little, piece by piece, Some guys come home from work and wash up, And go racin' in the street. Bruce Springsteen - Racing In The Street - 1978 |
|
#669
08-25-2008, 09:12 PM
|
||||
|
||||
|
What is he doing with the masking tape? I can sorta guess, but would like to know for sure. Maybe I need to learn this "trick".
__________________
keith k 70 Trans Am RA III / T400 / Lucerne Blue / Bright Blue 70 Trans Am RA III / M20 / Lucerne Blue / Sandalwood 70 Formula RA III / M21 / Lucerne Blue / Bright Blue |
|
#670
08-25-2008, 09:34 PM
|
||||
|
||||
|
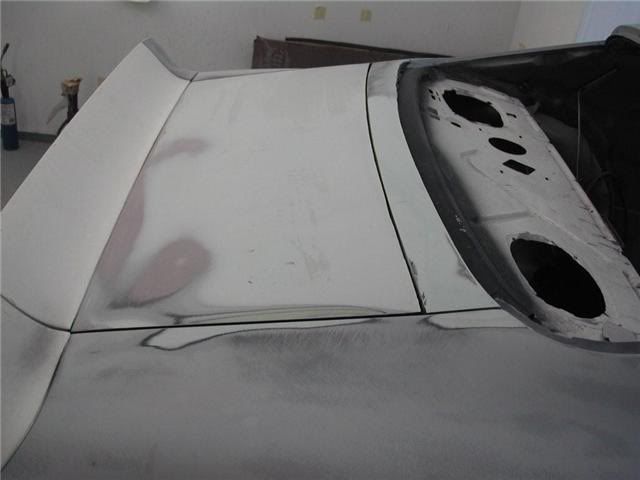
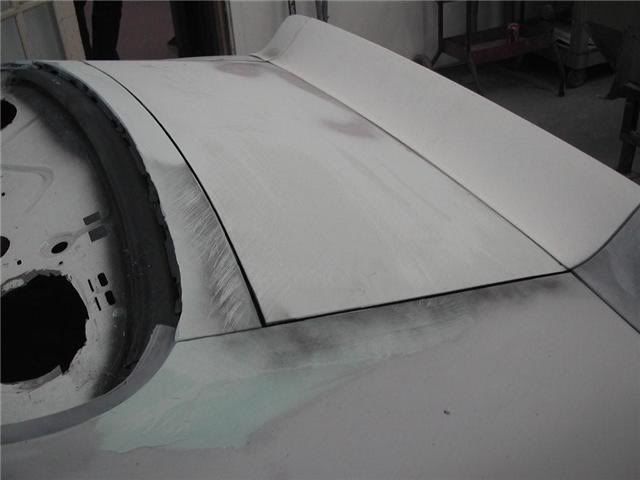
That is the way to get the body lines crisp and straight: by putting the masking tape on the body line and sanding up to it. You do that from above the body line and then again from below it.
|
|
#671
08-26-2008, 07:23 AM
|
||||
|
||||
|
Exactly, good practice too. And allows one to keep sanding level down the entire length of the car.
If you look closely at some 'other' re-paints or semi-pro restos on 2nd gens, the mid-door line disappears or becomes uneven. Anyone who's done a 2nd gen will tell you what a challenge that body line is. That line actually starts forward of the front wheel opening by the way, and runs all the way to the rear.
__________________
. 1970 GTO Judge Tribute Pro-Tour Project 535 IA2 http://forums.maxperformanceinc.com/...d.php?t=760624 1971 Trans Am 463, 315cfm E-head Sniper XFlow EFI, TKO600 extreme, 9", GW suspension, Baer brakes, pro tour car https://forums.maxperformanceinc.com...ght=procharger Theme Song: http://www.youtube.com/watch?v=7zKAS...ature=youtu.be |
|
#672
08-26-2008, 09:15 PM
|
||||
|
||||
|
Hmmm... thanks. I am practicing/teaching myself body and paint work by doing my '88 Mustang this summer. Hoping to be confident enough to do my birds next. I'm learning a lot, but it's also a fairly simple shape with none of the complex surfacing a second gen bird has....
__________________
keith k 70 Trans Am RA III / T400 / Lucerne Blue / Bright Blue 70 Trans Am RA III / M20 / Lucerne Blue / Sandalwood 70 Formula RA III / M21 / Lucerne Blue / Bright Blue |
|
#673
08-26-2008, 09:48 PM
|
|||
|
|||
|
Quote:
|
|
#674
08-26-2008, 09:52 PM
|
||||
|
||||
|
No problemo. Like the old saying goes: I'm from the government and I'm here to help. ;-)
|
|
#675
08-26-2008, 09:56 PM
|
||||
|
||||
|
makes my neck sore just looking at that guy sanding in that position...
great pics though, can't wait to see it in paint.
__________________
'72 Formula 455HO TH400, Revere Silver, black deluxe '74 Trans Am SD 4 speed, Admiralty Blue, blue deluxe |
|
#676
08-26-2008, 10:59 PM
|
||||
|
||||
|
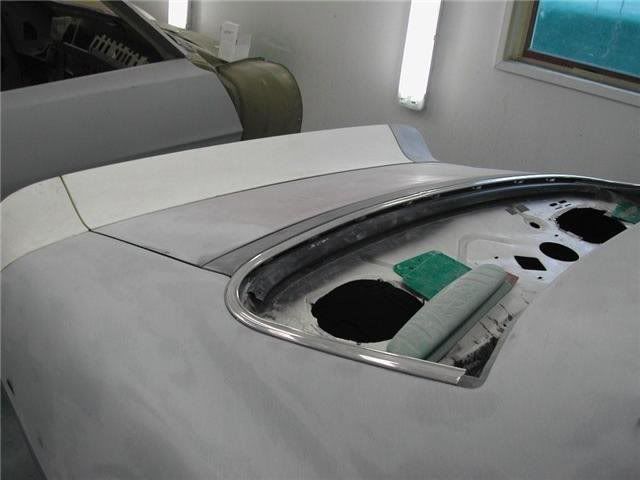
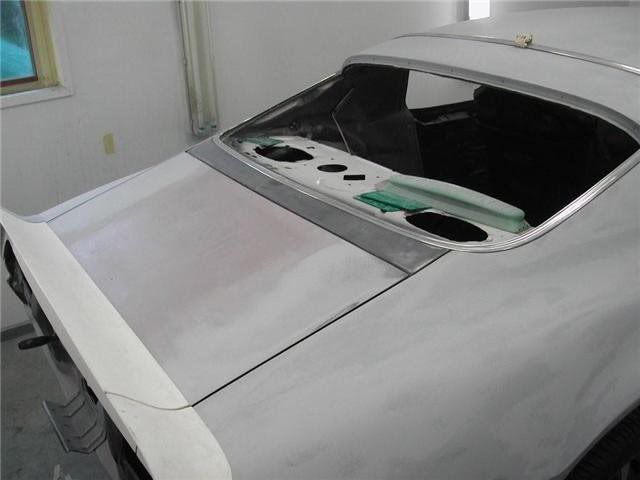
The bodyshop guys finished blocking the passenger side and are now working on the rear deck lid, spoiler and filler panel.
|
|
#677
08-31-2008, 03:37 PM
|
||||
|
||||
|
Hey Steve, I was looking at one of your pictures (below) and was wondering if you had painted your steering shaft to look like bare steel or did you just clean it and put it back on. It seems some say it should be black and others say it should be bare steel look. When I cleaned mine it had no evidence it was ever black so, I restored it to look like bare steel. My picture shows bare steel after cleaned up and pic after restored. Just curious...
Thanks, Bub
__________________
1974 400 4 speed Last edited by TransAmRIP; 08-31-2008 at 03:45 PM. |
|
#678
08-31-2008, 10:18 PM
|
||||
|
||||
|
I just cleaned it up and left it natural metal with a little oil on it to protect it from rust. It never had any paint on it. I have tried my best to keep all the original finishes on the parts that didn't need refinishing. I have been striving to do more of a preservation of existing componentry from the underside and suspension areas, than a restoration. The body and paint, of course, needed the full restoration efforts.
|
|
#679
08-31-2008, 10:28 PM
|
||||
|
||||
|
Quote:
Bub
__________________
1974 400 4 speed |
|
#680
09-03-2008, 04:53 PM
|
||||
|
||||
|
A few progress shots of the rear window filler panel getting massaged into place. It's kind of a tricky piece since it forms the bottom of the rear window channel. It's a big water leaker if you get it wrong. It's also impossible to remove without cracking the rear window glass once the glass is installed.
|
| Reply |
|
|
The PY Online Forums is the largest online gathering of Pontiac enthusiasts anywhere in the world. Founded in 1991, it was also the first online forum for people to gather and talk about their Pontiacs. Since then, it has become the mecca of Pontiac technical data and knowledge that no other place can surpass.


 Linear Mode

