


| FAQ |
| Members List |
| Social Groups |
| Calendar |
| Search |
| Today's Posts |
|
#141
 08-24-2015, 06:57 PM
|
||||
|
||||
|
Good job on the pump.
 Not sure if I would 'pack grease' in it though? The pump sits in the oil, so it doesn't need primed. (if it has oil in pan anyway) I would think the grease would be too thick to pump through the oil passages until the oil is pumped there? (I've never packed a pump with grease) Now pre-oiling using the oil pump shaft and drill, yes I have done that.
__________________
John Wallace - johnta1 Pontiac Power RULES !!! www.wallaceracing.com Winner of Top Class at Pontiac Nationals, 2004 Cordova Winner of Quick 16 At Ames 2004 Pontiac Tripower Nats KRE's MR-1 - 1st 5 second Pontiac block ever! "Every man has a right to his own opinion, but no man has a right to be wrong in his facts." "People demand freedom of speech to make up for the freedom of thought which they avoid." Socrates |
|
#142
08-24-2015, 07:04 PM
|
||||
|
||||
|
Lubriplate actually, not really grease. And it is just enough to get the gears sticky enough to get some suction going. I spend a lot of time priming prior to start up as well. Can't ever be too careful when it comes to pre-oiling.
|
|
#143
08-24-2015, 07:06 PM
|
||||
|
||||
|
Quote:
__________________
"Hammer to fit, paint to match" |
|
#144
08-25-2015, 12:15 AM
|
|||
|
|||
|
Vaseline works very good to prime your pumps. Best way is to get the Vaseline hot so it melts & then pour in in the top of your pump so it fills it all the way up. Let it cool so it goes back to a soft solid & then bolt it on so the vaseline doesn't run back out. That way you know as so as you start your engine it will pump the vaseline through the engine as a liquid as it will melt & be a liquid as soon as you start the engine. The vaseline has a very low melting point. The heat from your engine right at start up is more then enough heat to melt it right away. Then the oil is right behind it when you start it. You will be pumping oil in the engine in less then 5 sec's.
|
|
#145
08-25-2015, 05:24 PM
|
||||
|
||||
|
Got the block update this morning. It needs a little cleaning up of the .030 bore, so it will be bored to .040. The machinist said, "yeah you could leave it at the existing .030, hone it, and slap it together, but if it was mine I'd make it perfect at .040 and start from there."
Since I have to order a set of forged pistons anyway, I went for the .040 (same price as the .030). $312 for http://www.summitracing.com/parts/slp-l2359nf40 |
|
#146
08-27-2015, 03:54 PM
|
||||
|
||||
|
Look what showed up today! Oooooh shiny new parts!

|
|
#147
08-28-2015, 11:35 AM
|
||||
|
||||
|
Stopped by the shop to drop off the pistons and rings. The block has been bored and is awaiting the final honing to size.
 
|
|
#148
08-28-2015, 08:16 PM
|
||||
|
||||
|
You never did waste time on a project.

__________________
Some guys they just give up living And start dying little by little, piece by piece, Some guys come home from work and wash up, And go racin' in the street. Bruce Springsteen - Racing In The Street - 1978 |
|
#149
08-30-2015, 11:00 AM
|
||||
|
||||
|
Yeah, my fingers get itchy when I don't have something greasy to play with. The survivor SD455 is no fun because I have been forbidden to tinker with it, mechanically. So after this chapter, I think Gramma's car will probably be able to outrun the SD. Time will tell!
|
|
#150
08-31-2015, 06:35 PM
|
||||
|
||||
|
Rods are refinished and awaiting the crank to come back from cutting. Then the reciprocating assembly goes for balancing.
 And the block is finished and home: 
|
|
#151
08-31-2015, 06:36 PM
|
||||
|
||||
|
Here's something interesting. There are stamped letters next to the bores. Are these for selective fit piston assemblies? "S", "M", and "L" for small, medium, and large? The 350 block in Gramma's car had similar stampings on the deck surface as well, only they were the letter "P" next to each bore. The machinist said he has seen these on other Pontiac blocks over the years.
  
Last edited by njsteve; 08-31-2015 at 06:41 PM. |
|
#152
08-31-2015, 07:54 PM
|
||||
|
||||
|
Here you go Steve...
|
|
#153
08-31-2015, 07:57 PM
|
||||
|
||||
|
Nice! Thanks for the info. You'd think they would have done some less destructive method of noting the size requirement than stamping into the sealing surface of the block. I know that Mopar used different color paint daubs on the outside of the block.
Last edited by njsteve; 08-31-2015 at 08:02 PM. |
|
#154
09-02-2015, 01:29 PM
|
||||
|
||||
|
Visited Roger's Automotive again today to drop off a spare flexplate in case they need it for the balancing process. Gotta love that Safest Rust Remover/Evaporust stuff. Two hours of soaking cleaned up the rusty flywheel nicely. (I degreased it completely first).
Before: 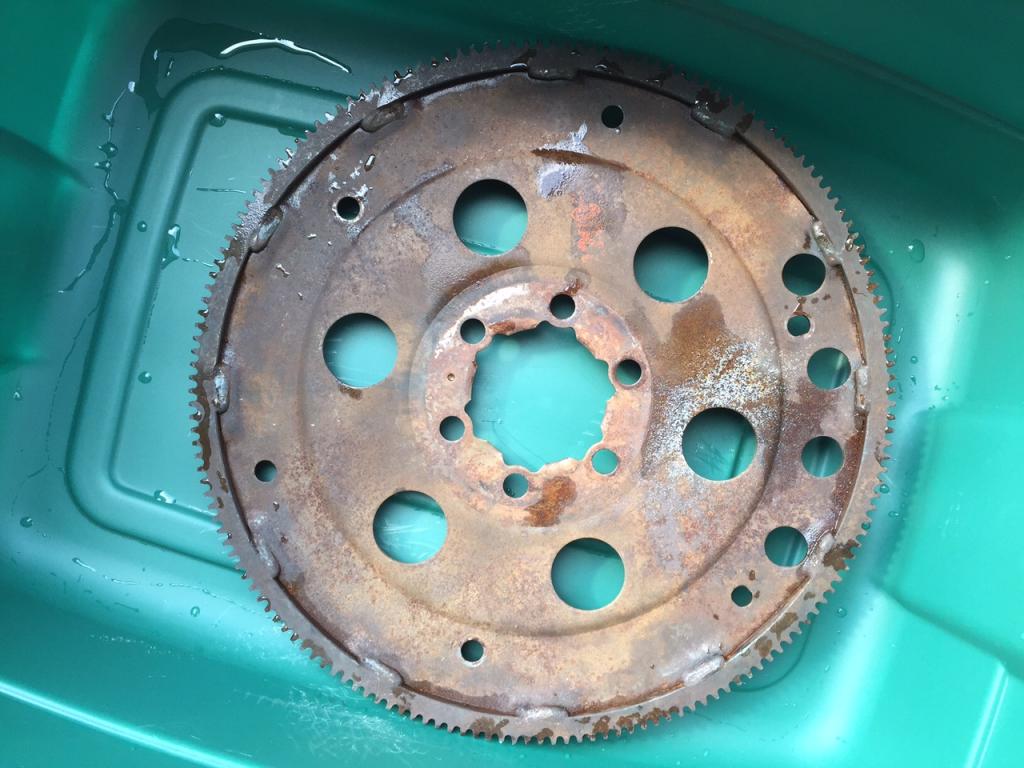 After: 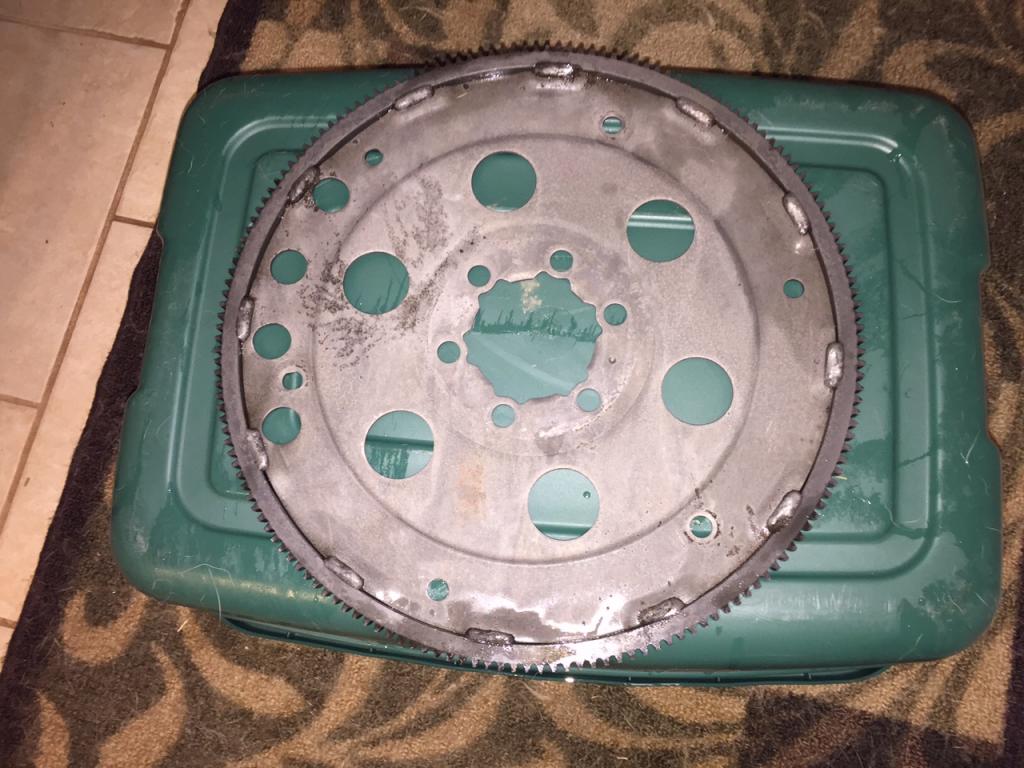 The balancing of the rods and pistons are done but they are waiting on the crank to get back from being ground. Good news was that both the rods and the pistons had less than a gram variance between each individual piece. So very little had to be done to them. |
|
#155
09-04-2015, 06:14 PM
|
||||
|
||||
|
Since we will be adding a bunch of horsepower to the car I figured it was time to install a tachometer to keep an eye on things.
I did not want to change the dash in Gramma's car by installing a Rally gauge setup with tach because that would require a complete dash wiring harness change along with a ton of other items. So I decided to go with an old school tach I had sitting on a shelf in the garage. I have had this particular Sun Super Tach II for at least 30 years and it has been in over a half dozen cars of mine in that timespan. I also did not want to drill a hole anywhere in that pristine dash. And of course there is not enough room on the column for the old school hose clamp over the bracket installation as the turn signal lever is in the way. In addition, the majority of the lower column moves due to the functioning back-drive linkage that locks the shifter in place when the key is removed. So I pulled the dash fascia and located some existing mounting screws. I then use some bodyshop hammers, a vise, and an anvil to hand-make a mounting bracket that extends out under the dash overhang. I located a vintage flat mount Sun tachometer bracket on ebay for $11 and drilled a couple holes in my handmade bracket and voila, the tach sits very nicely in view. It doesn't block anything behind it other than an idiot light or two, and it looks rather 1970's nostalgic. My Franken-bracket: 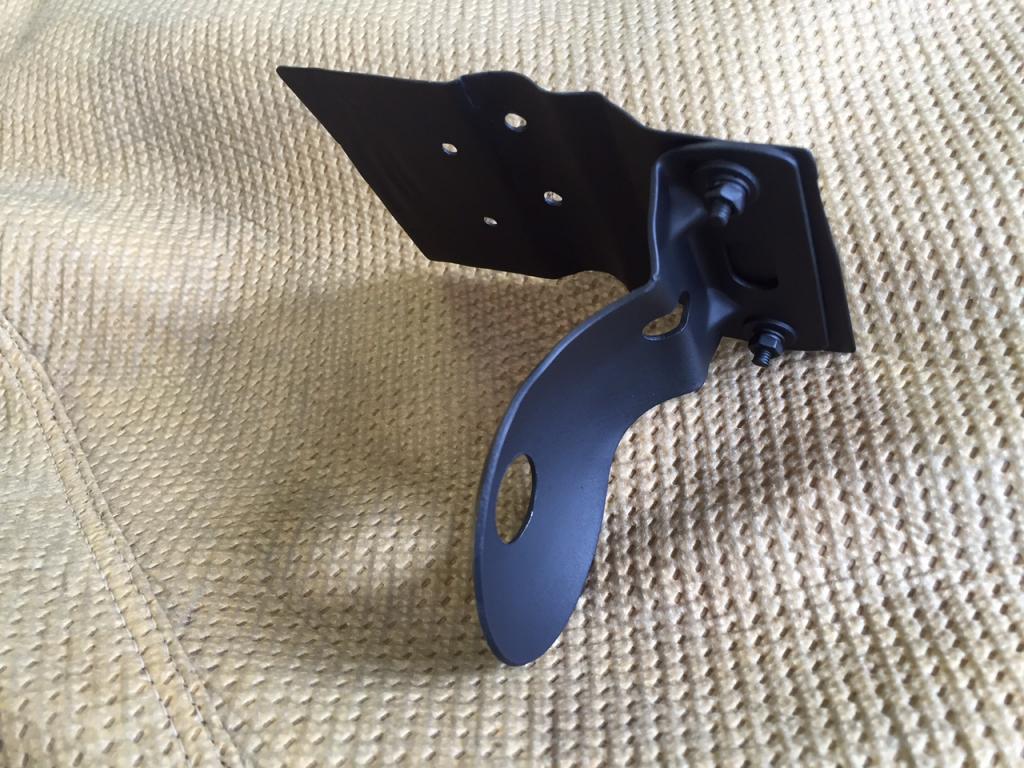 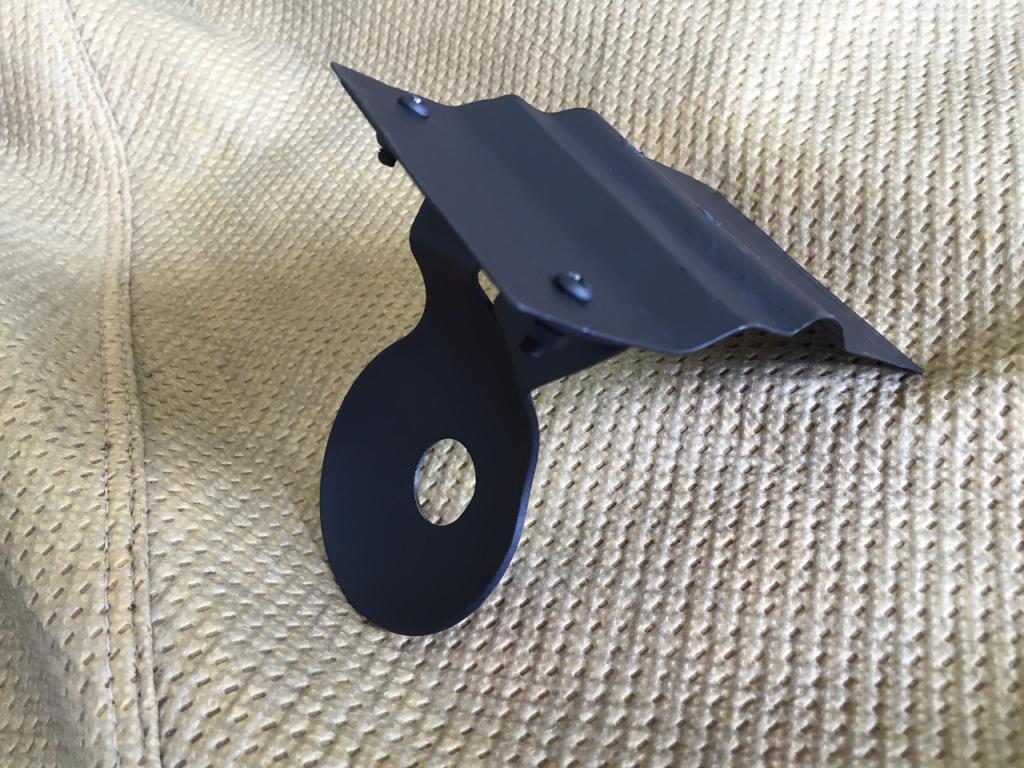 And the installation. The drop down distance of the horizontal bracket is just enough to keep the two mounting screws from touching the underside of the padded dash. 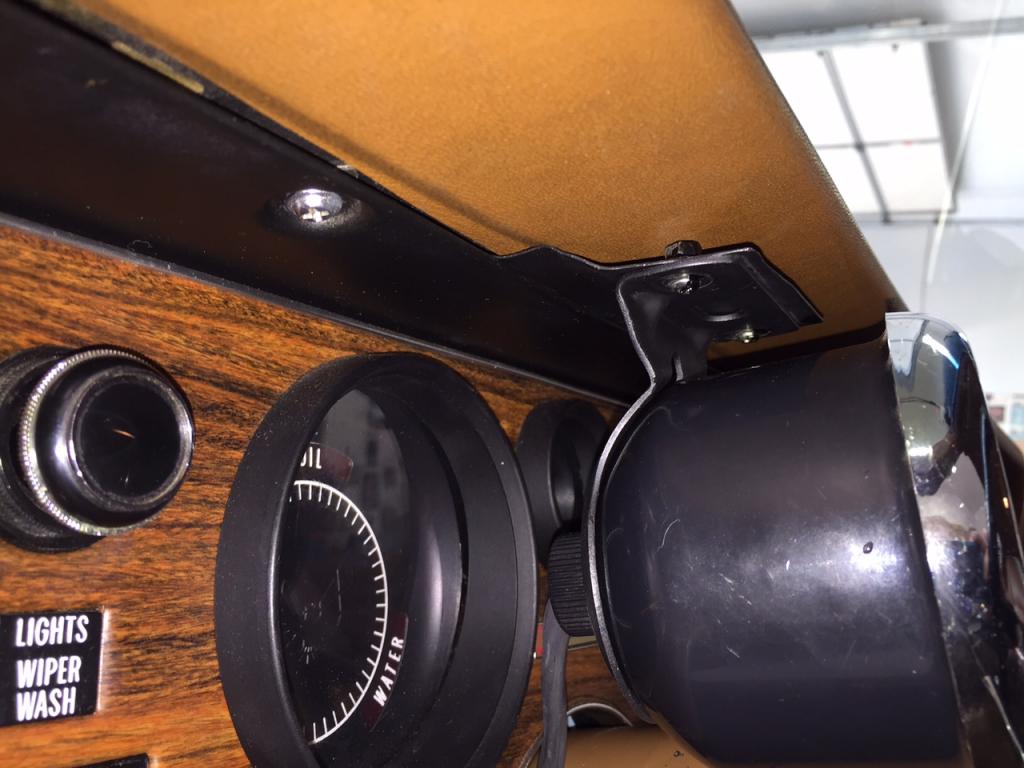 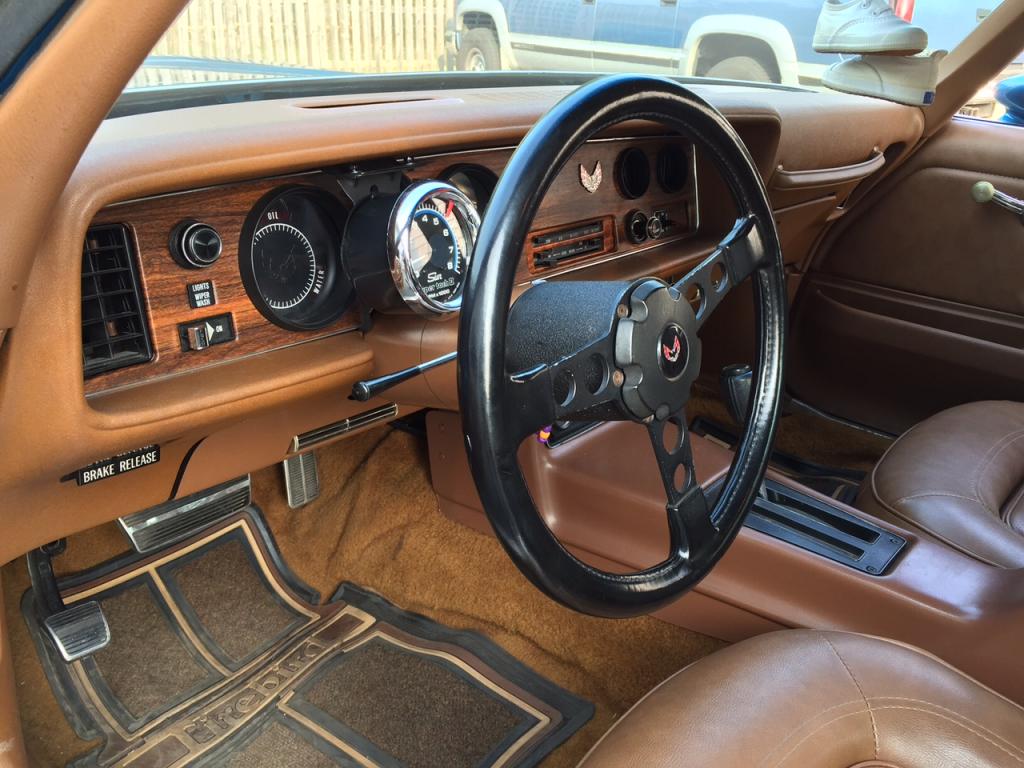 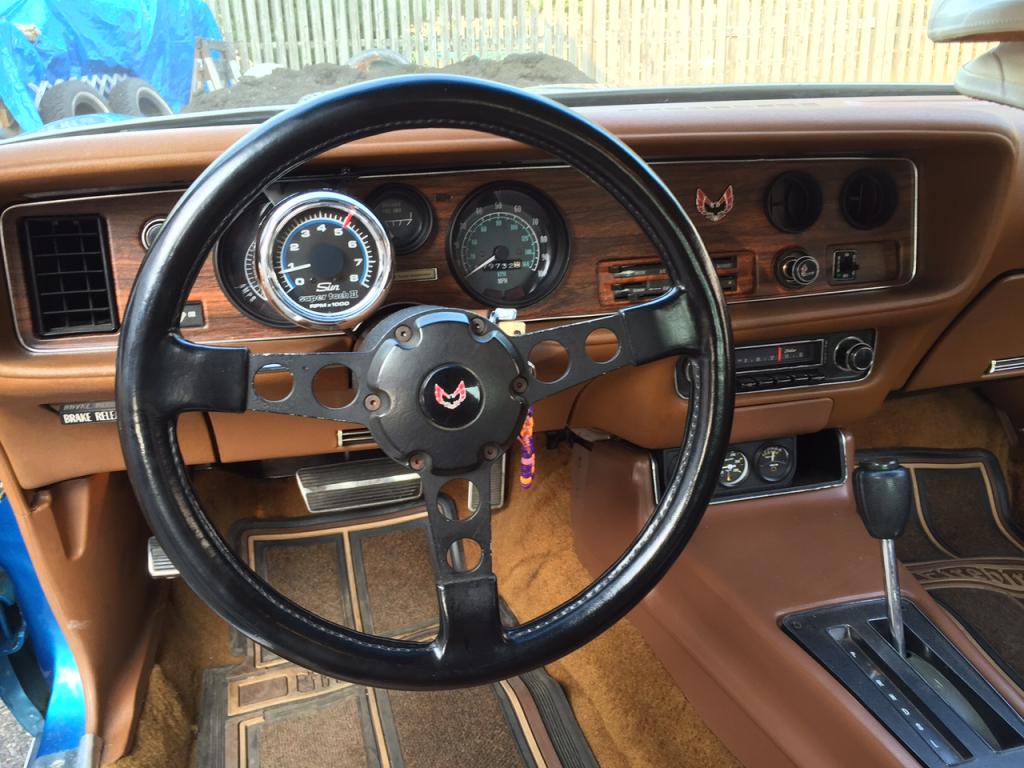
|
|
#156
09-04-2015, 07:12 PM
|
||||
|
||||
|
Steve, is that a different dash bezel and accessory plate? The pattern should look more like your heater fascia.
|
|
#157
09-04-2015, 07:29 PM
|
||||
|
||||
|
Those are all the original pieces from when Gramma bought the car back in '75.
|
|
#158
09-04-2015, 07:51 PM
|
||||
|
||||
|
Excellent setup Steve. TY for sharing.
|
|
#159
09-04-2015, 08:48 PM
|
||||
|
||||
|
Quote:
I was such an idiot - I threw away that pristine original steering wheel when I installed the Formula wheel. Doh! 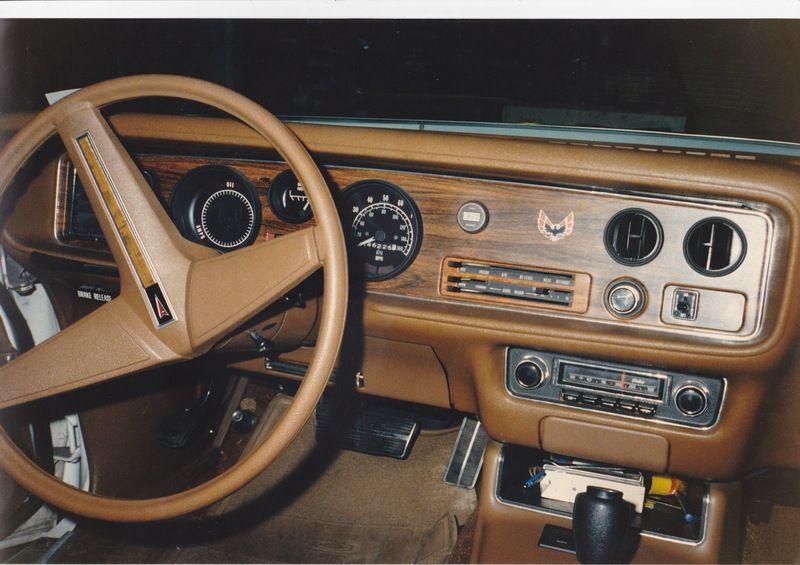
|
|
#160
09-06-2015, 12:19 PM
|
||||
|
||||
|
While I was digging around the archive I found another original photo of the engine bay from 1978. Interesting to see original finishes like the grey phosphate finish on the rear alternator bracket (not painted black).
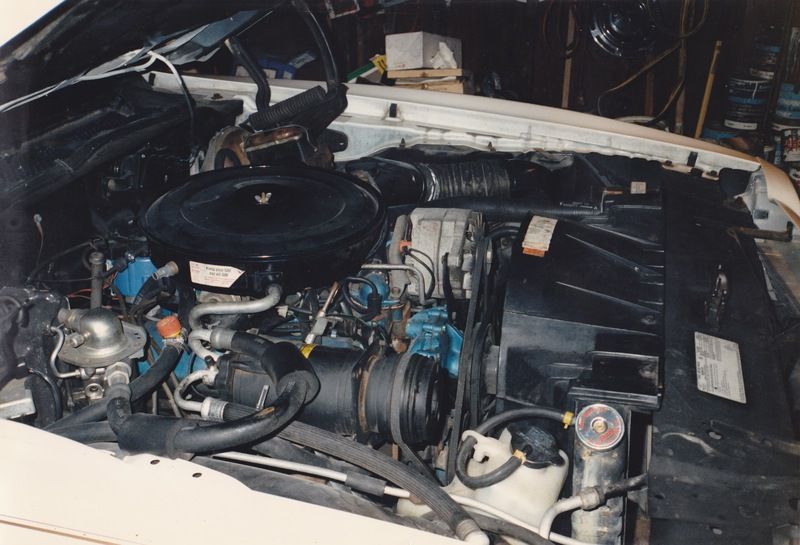 [ [
|
| Reply |
|
|
The PY Online Forums is the largest online gathering of Pontiac enthusiasts anywhere in the world. Founded in 1991, it was also the first online forum for people to gather and talk about their Pontiacs. Since then, it has become the mecca of Pontiac technical data and knowledge that no other place can surpass.


 Linear Mode

