


| FAQ |
| Members List |
| Social Groups |
| Calendar |
| Search |
| Today's Posts |
|
#241
 07-05-2012, 10:09 AM
|
||||
|
||||
|
Looks good !
|
|
#242
07-05-2012, 11:50 AM
|
|||
|
|||
|
My NOS stripes were in the GM tubes for 15 years before I used them. I just layed them out with a weight on each corner for a few days and they were flat. So this should not be of any concern. Chad
|
|
#243
07-05-2012, 05:51 PM
|
||||
|
||||
|
Hey, I recognize that car!
 First, I want to thank Greg for driving up to Austin and helping me with the install! While this might be able to be done with just a single person, I really don't think it would work very well. You need to work quickly to get the air/liquid out from under the stripe before it dries at the edges. With the size of the pieces on this car, that would be really hard to do with just 1 person. Greg has put together a terrific product here! While I don't have the experience and knowledge of many of you here regarding the NOS stripes, I can say that these pieces are exceptional from what I can see. As Greg said, we didn't finish the nose bird, but I can do that one alone as it's so small... A few other suggestions that I may add to Greg's list:
To install the 4 pieces that you see in the pictures took us about 2.5 hours. We were working pretty methodically, and Greg took a few pictures, but I doubt we could have taken off more than 30 minutes at most. And there are still the nose bird and lettering which we haven't installed, so plan accordingly when you are thinking about when to do this. And out of the sun is probably helpful, especially the Texas sun in the summertime. Phew, sorry for being so wordy, but hopefully those thoughts/tips will help some of you when doing your own install. Now, if I could just get started on all of the other projects that I have for this car... 
|
|
#244
07-05-2012, 07:01 PM
|
|||
|
|||
|
Thanks for your input, Bryan.
|
|
#245
07-05-2012, 07:42 PM
|
||||
|
||||
|
As for the remaining bubbles: As painful as they are to look at (like a prom queen's pimple on prom night) they will go away. Refrain from using the needle unless you use the finest gauge insulin needle you can locate. Don't use a pin - it's way too blunt and way too big. It will stretch and tear the vinyl and leave a permanent defect you will see later.
Leaving the "pimples" alone is the best route. It just takes time. Sometimes as along as a week or two depending upon your ambient heat and humidity: the higher the heat and lower the humidity, the faster the bubbles will vent to the atmosphere through the vinyl. It took almost two weeks for all the bubbles to disappear from my original decal installation. And all the ones that I ignored and didn't use a hypodermic needle on, were completely invisible at the end of the two weeks. The ones that I struggled to squeegy and pin prick, were the ones you could see. |
|
#246
07-08-2012, 10:54 PM
|
||||
|
||||
|
Friday when my mail came with it came my new stripe kit from Greg. All I can say is Greg got it right. All the issues with the Phoenix Graphics kit were addressed and corrected. The Quality of this product is the highest level. From the shipping to the packing and of course the product this is simply done right.
I opened the protective tube to find the whole kit heat sealed in a plastic wrapper for protection. I pulled it out to take a look and I am impressed. From the quality of the kit to the directions to the warranty it all top notch. Congratulations Greg, finally a product vendor who gets it. We want the highest quality available for our cars and Greg is providing that. Here is hoping that this venture is VERY SUCSESSFUL for Greg so he might consider making 100% correct decal kits for other years. I'm pretty sure that you SD and Bandit Guy's want the same quality as I do. Thanks Greg, you hit a Home Run with these http://www.transamstripes.net/ Shipping Tube 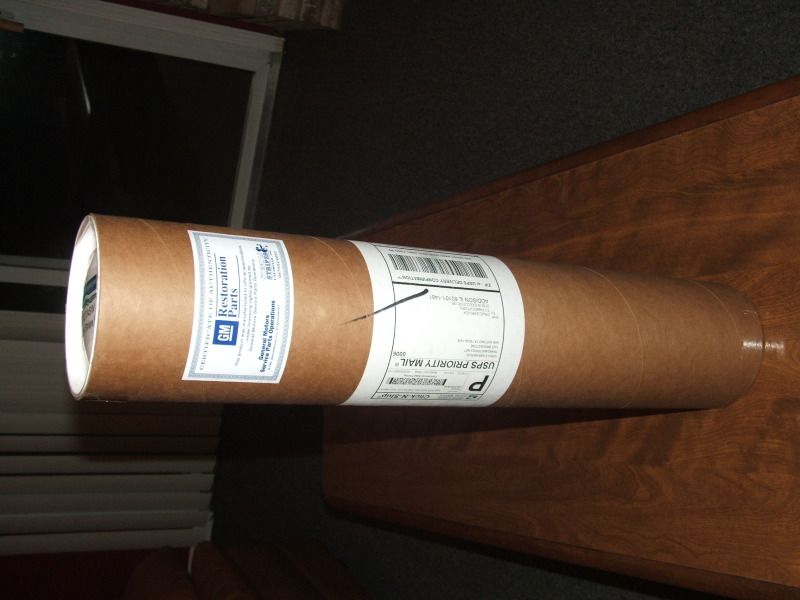 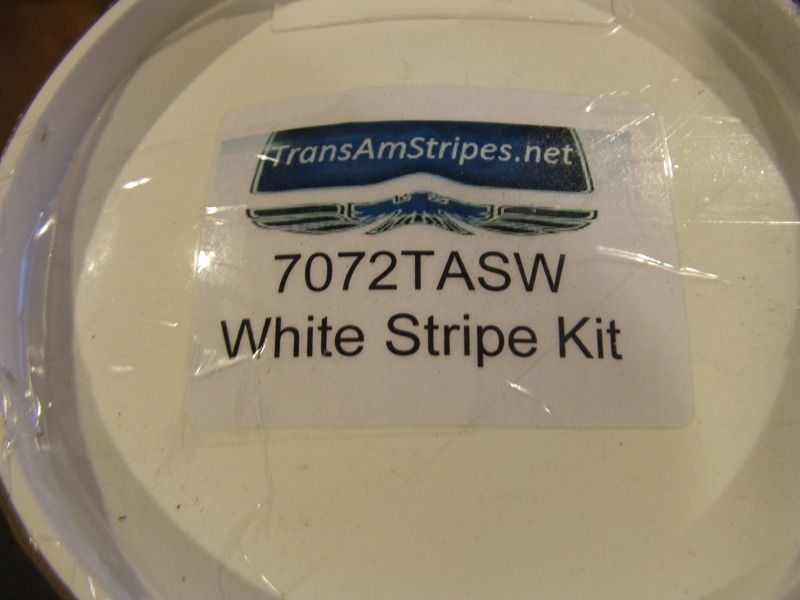 GM Authorized  Packing 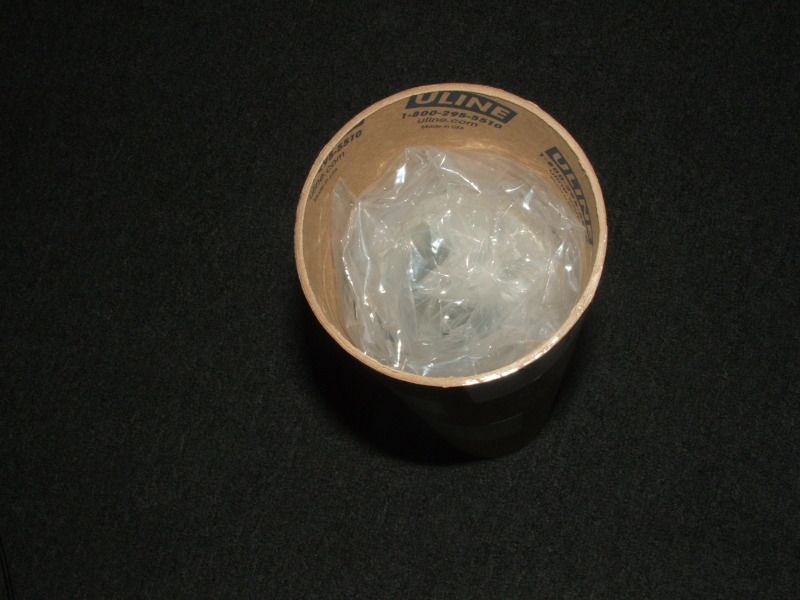 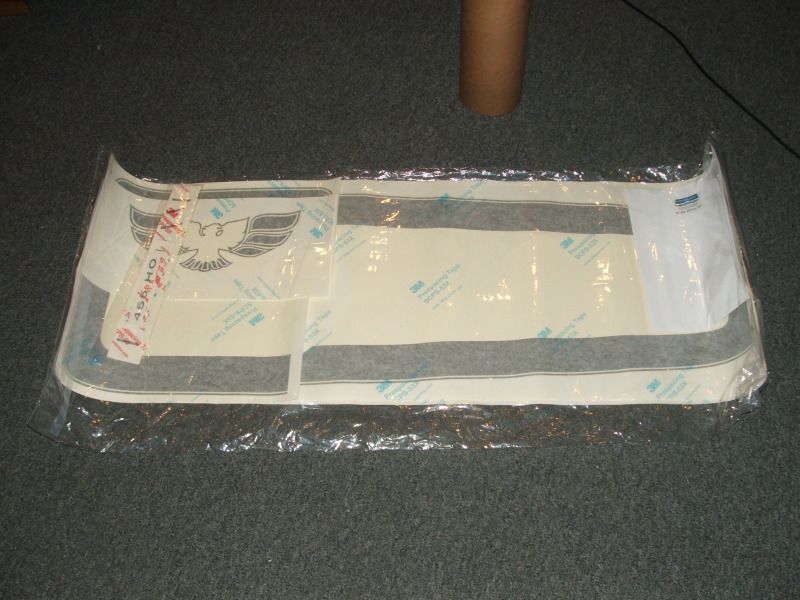 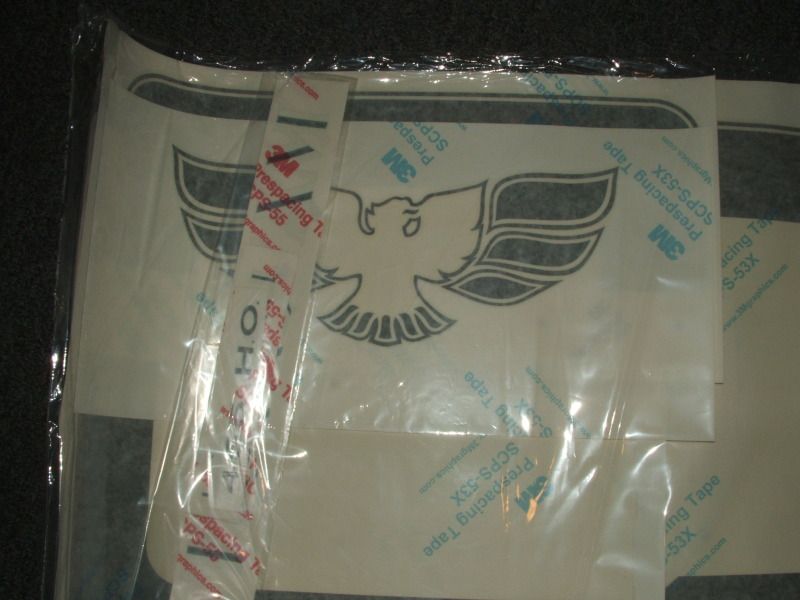 Decals 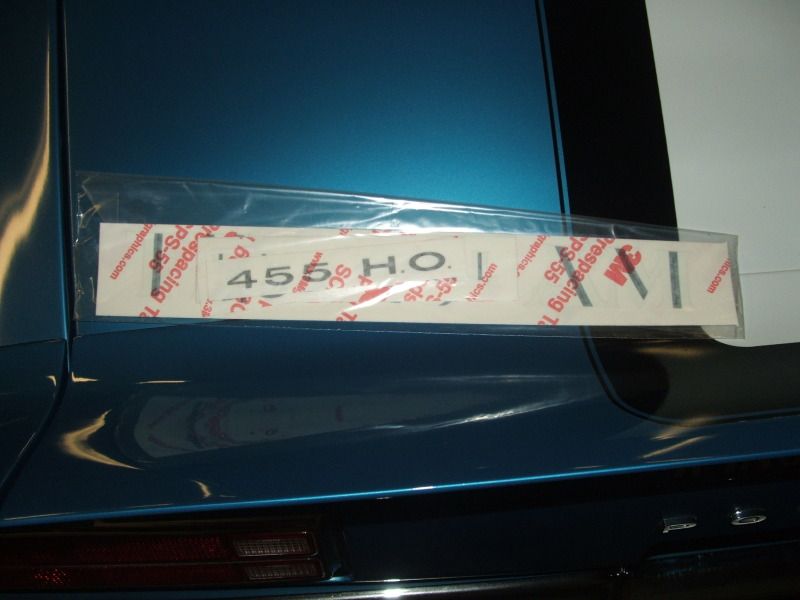 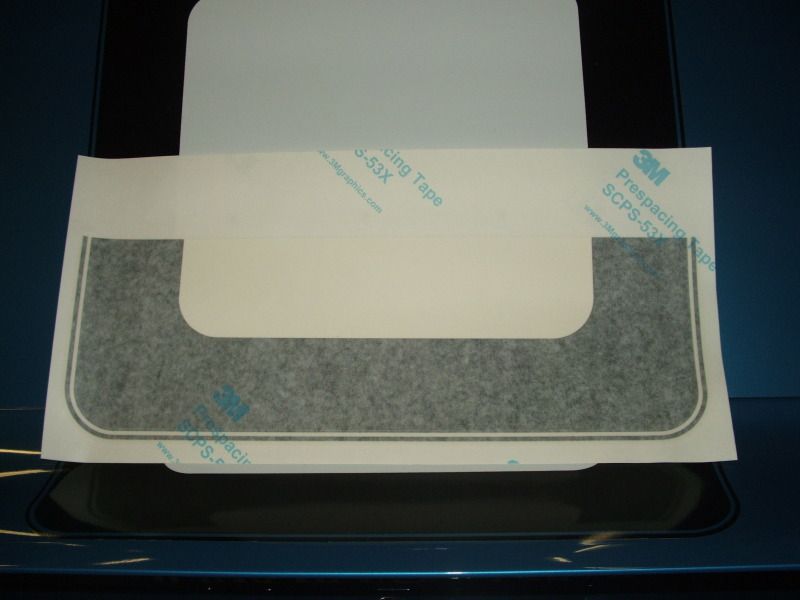 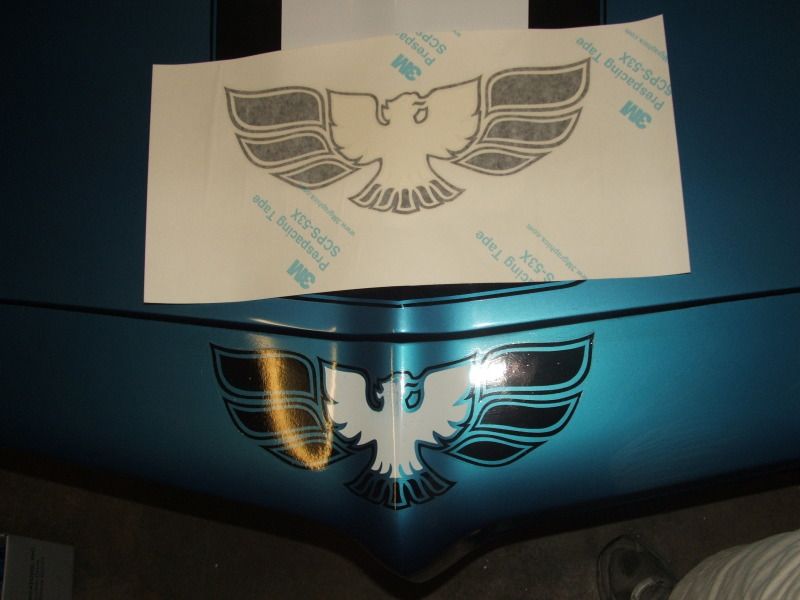 Warranty  Directions  
|
|
#247
07-10-2012, 07:58 PM
|
||||
|
||||
|
Just got my kit today Greg....CANT FREAKIN WAIT to paint the car next year and put these on.....
Like Norwood Said ....everthing looks top notch and packed perfect...Thanks Greg awesome product....Chris
__________________
 1973 Firebird Navajo Orange w/shaker,1973 400/461,1972 Intake SD CNC'd,1977 Q-Jet 800 CFM w/ Cliffs Kit,Tanks Inc PA4 255 Walbro intank pump ,-8an feed/return,RobbMc Regulator,RobbMc 40 micron filter,253 CFM 6x-8's w/H.S 1:5 Roller Rockers,SD Stump Puller H/R Cam 230/236 @.050 112 lobe separation 565/.570 lift,Crower Solid Rollers,28150 Hedman Headers,3" exhaust,full tailpipes,350 Turbo,9.5" 3200 Converter,3:42 gear,8.5 posi,C/E slide-alinks,Koni adj frt shocks,Best 12.18@110.55 Lookin for 11's 1973 Firebird Navajo Orange w/shaker,1973 400/461,1972 Intake SD CNC'd,1977 Q-Jet 800 CFM w/ Cliffs Kit,Tanks Inc PA4 255 Walbro intank pump ,-8an feed/return,RobbMc Regulator,RobbMc 40 micron filter,253 CFM 6x-8's w/H.S 1:5 Roller Rockers,SD Stump Puller H/R Cam 230/236 @.050 112 lobe separation 565/.570 lift,Crower Solid Rollers,28150 Hedman Headers,3" exhaust,full tailpipes,350 Turbo,9.5" 3200 Converter,3:42 gear,8.5 posi,C/E slide-alinks,Koni adj frt shocks,Best 12.18@110.55 Lookin for 11's
|
|
#248
07-12-2012, 07:48 PM
|
||||
|
||||
|
Good news, it looks like I'll be able to make it to POCI next week in St. Charles Ill.
I should have a display of some sort put up somewhere if all goes well! If you are going to POCI and you'd like to purchase a set of stripes prior to the trip and take delivery at the show, then send me an email or PM and I'll give you a discount code to enter during checkout that will deduct shipping from the order. If you'd like to purchase a set at the show, please let me know. It'll help me determine how much inventory to bring. Continued thanks for the positive feedback I'm continuing to receive from those of you who have taken delivery of your kits. Thank you Carbuff, cnc, Norwood for your comments. They are truly appreciated.
__________________
http://www.starspangledbannerchallenge.com/ |
|
#249
07-12-2012, 07:54 PM
|
||||
|
||||
|
Well for those who bought the kit I thought I would share a little somethin I found out tonight....
For those that have not opened there kit ....ya might want to and find the little EXTRA inside.... I opened my kit ( a little birdie suggested I do ) and well there is an "EXTRA " TRANS AM lettering inside.....WTF  Its the Large rear spoiler one ....so if ya haven't opened it, crack it open and put that extra decal to use......just a heads up on a GREAT KIT.... this thing is toooo coool 
__________________
1973 Firebird Navajo Orange w/shaker,1973 400/461,1972 Intake SD CNC'd,1977 Q-Jet 800 CFM w/ Cliffs Kit,Tanks Inc PA4 255 Walbro intank pump ,-8an feed/return,RobbMc Regulator,RobbMc 40 micron filter,253 CFM 6x-8's w/H.S 1:5 Roller Rockers,SD Stump Puller H/R Cam 230/236 @.050 112 lobe separation 565/.570 lift,Crower Solid Rollers,28150 Hedman Headers,3" exhaust,full tailpipes,350 Turbo,9.5" 3200 Converter,3:42 gear,8.5 posi,C/E slide-alinks,Koni adj frt shocks,Best 12.18@110.55 Lookin for 11's
|
|
#250
07-26-2012, 12:57 AM
|
||||
|
||||
|
I will have some of Greg's stripes for sale at Norwalk. I spend most of my time on PY in the RACE section however I am a proud customer of Greg. His stripes are going on my 72 TA race car and my 71 restoration. And Greg is a very good customer of my engine shop. So, when I found out he was not going to Norwalk I offered to display and sell a few stripe sets for him. We will be set up in the pits and will be with Milt "Big Chief" Milton. Milt is racing and I am spectating...this year. Look for a BIG yellow 66 Bonneville drag car with skirts and 8 lugs...along with the www.transamstripes.net banner. Come by our pits to say Hello and see these beauties for yourself.
See you there, Jim Home of the 800HP Iron Dports www.racev8s.com |
|
#251
07-28-2012, 07:00 AM
|
||||
|
||||
|
Greg was nice enough to sell me the hood stripe only. I didn't get the squeegee, Any suggestions where I can pick one up, or something that will work just as good?
__________________
"Look out for number 1, don't step in number 2." Rodney Dangerfield, Back to School 71 TA 455 HO |
|
#252
07-28-2012, 08:03 AM
|
||||
|
||||
|
My mistake, Greg did include a squeegee in my shipment. I guess all that's left is to install my stripe. I think tomorrow it goes on. I'll post pics when I'm done.
__________________
"Look out for number 1, don't step in number 2." Rodney Dangerfield, Back to School 71 TA 455 HO |
|
#253
07-28-2012, 10:37 AM
|
||||
|
||||
|
Good luck
|
|
#254
07-28-2012, 12:41 PM
|
||||
|
||||
|
yep good luck and please post pics ....
__________________
1973 Firebird Navajo Orange w/shaker,1973 400/461,1972 Intake SD CNC'd,1977 Q-Jet 800 CFM w/ Cliffs Kit,Tanks Inc PA4 255 Walbro intank pump ,-8an feed/return,RobbMc Regulator,RobbMc 40 micron filter,253 CFM 6x-8's w/H.S 1:5 Roller Rockers,SD Stump Puller H/R Cam 230/236 @.050 112 lobe separation 565/.570 lift,Crower Solid Rollers,28150 Hedman Headers,3" exhaust,full tailpipes,350 Turbo,9.5" 3200 Converter,3:42 gear,8.5 posi,C/E slide-alinks,Koni adj frt shocks,Best 12.18@110.55 Lookin for 11's
|
|
#255
07-28-2012, 01:01 PM
|
||||
|
||||
|
Why put off till tomorrow what you can do today!
I know... there's a little white showing on the hood over run but it's equal on both sides.I have a few small bubbles but I'm hoping the sun will take care of that. Overall I'm quite pleased with the results.
__________________
"Look out for number 1, don't step in number 2." Rodney Dangerfield, Back to School 71 TA 455 HO |
|
#256
07-28-2012, 03:50 PM
|
||||
|
||||
|
Quote:

__________________
http://www.starspangledbannerchallenge.com/ |
|
#257
07-30-2012, 10:40 AM
|
||||
|
||||
|
Damn fine product, Greg. Once again - a HUGE congrats for getting them done RIGHT!
What a crying shame that most other vendors / manufacturers don't give a flying leap about doing it right . . .
__________________
Regards, "455HO" Lloyd 2008 GMC Sierra Denali 2WD Crew, L92 6L80E, Silver w/ Ebony guts, 14.26 @ 98 
|
|
#258
07-31-2012, 06:04 AM
|
||||
|
||||
|
I wanted tp add a couple of tips from my experience. They said to move the car into the sun before finishing the shaker opening. This is to help curl the overrun down and enable the corners to stretch into place easier. I decided to have a blow dryer on the ready. When I got to the shaker opening I used it on the corners and then quickly around the perimiter (about 10-15 seconds total). Then I used my 3 fingers together perpendicular to the hood in a downward direction and the shaker opening came out great.
__________________
"Look out for number 1, don't step in number 2." Rodney Dangerfield, Back to School 71 TA 455 HO |
|
#259
08-01-2012, 05:02 PM
|
|||
|
|||
|
Quote:
|
|
#260
08-01-2012, 08:59 PM
|
||||
|
||||
|
Quote:
Those who have seen the NOS stripes matched up to these stripes may also be able to chime in on this one. A side note on this topic... When I picked up the product and NOS parts that were used in color matching, to my surprise, I found out in order to do a computer color rendering, they took a swatch of.... my NOS rear deck stripe.  Oh well, the price of success right? Luckily these came out as good if not better than NOS so no worries!
__________________
http://www.starspangledbannerchallenge.com/ |
| Reply |
|
|
The PY Online Forums is the largest online gathering of Pontiac enthusiasts anywhere in the world. Founded in 1991, it was also the first online forum for people to gather and talk about their Pontiacs. Since then, it has become the mecca of Pontiac technical data and knowledge that no other place can surpass.


 Linear Mode

