


| FAQ |
| Members List |
| Social Groups |
| Calendar |
| Search |
| Today's Posts |
|
#641
 06-19-2008, 09:33 PM
|
||||
|
||||
|
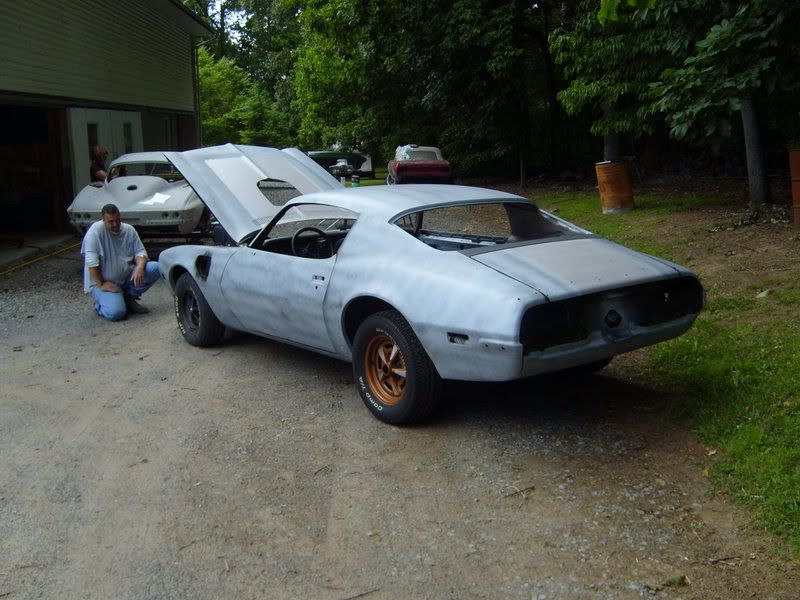
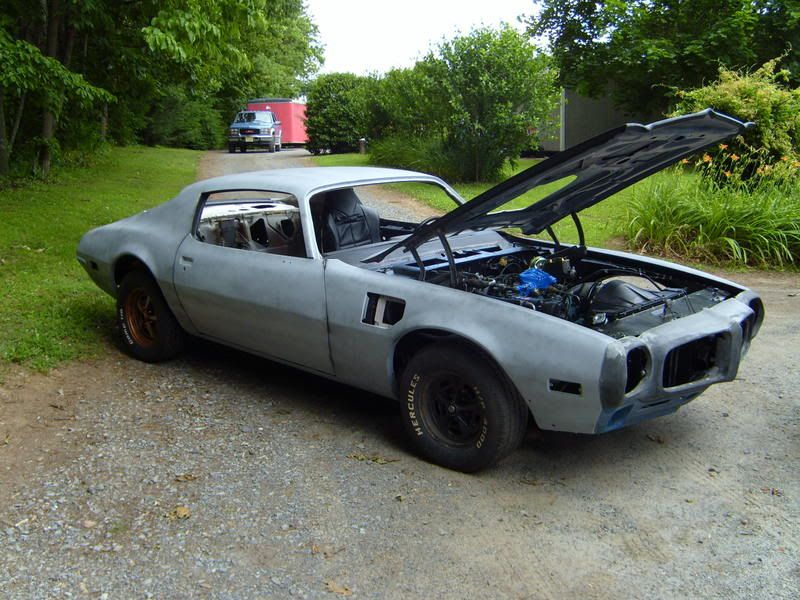
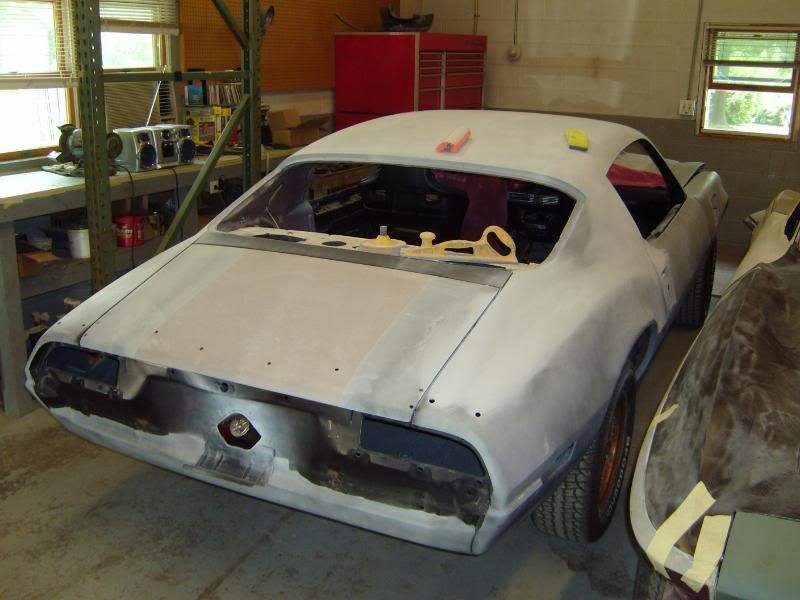
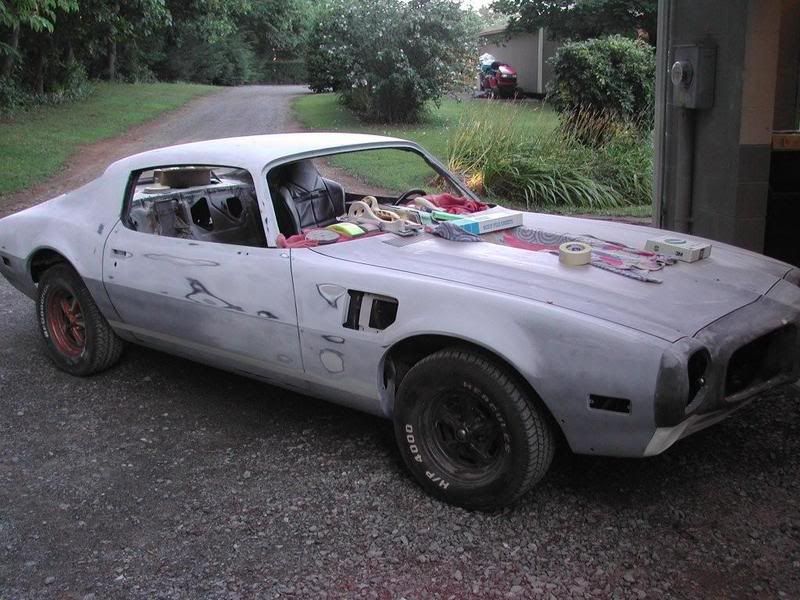
Well, I brought the car up to the bodyshop today to start the final body work and paint after sitting two months or so to settle, shrink and partially reassemble. We'll see how it progresses in the next month or so. Here it is getting dropped off:
|
|
#642
06-19-2008, 09:39 PM
|
||||
|
||||
|
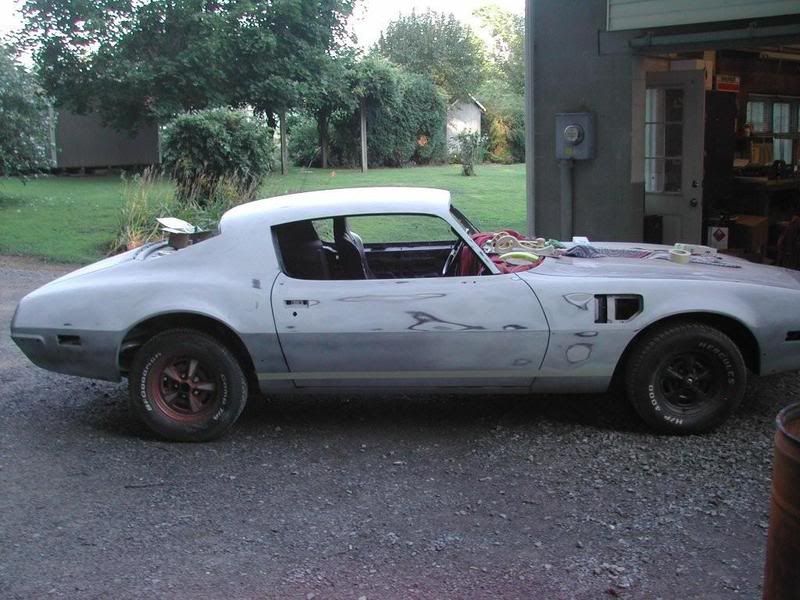
Steve even I'm getting a little antsy about your car.....
|
|
#643
06-25-2008, 09:06 PM
|
||||
|
||||
|
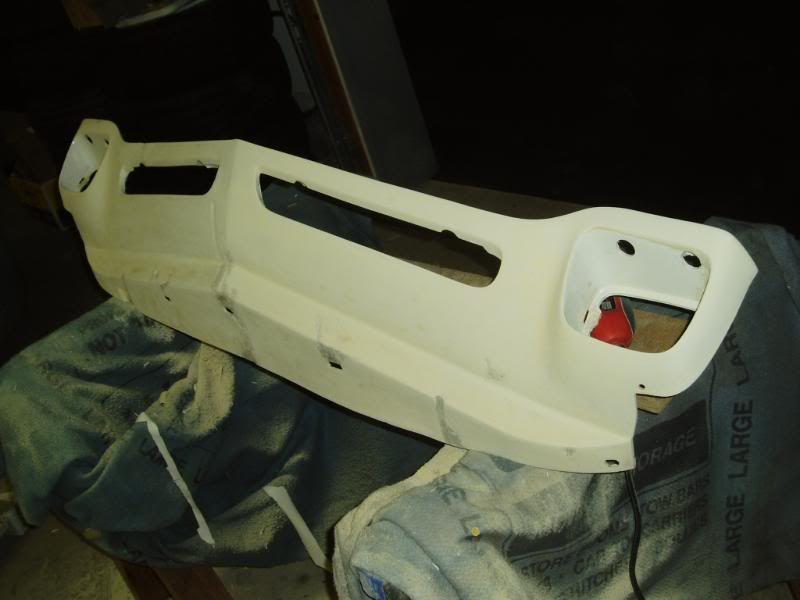
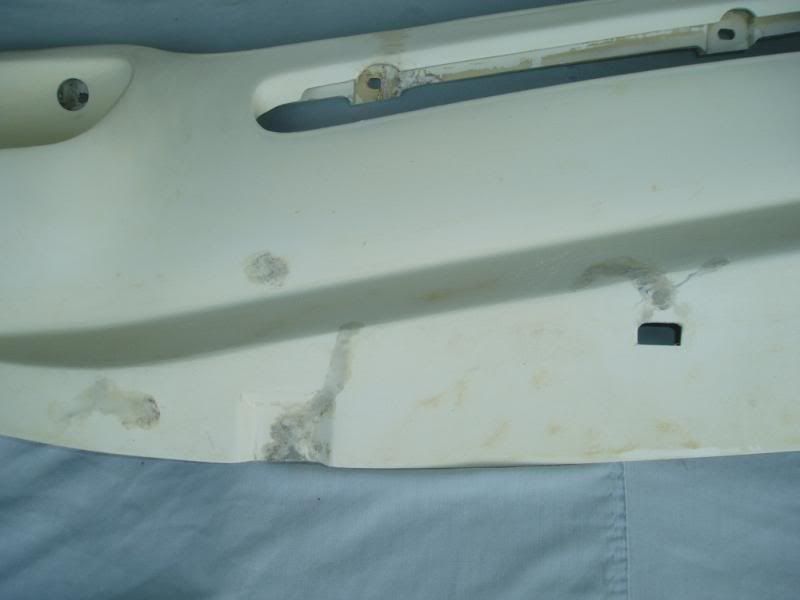
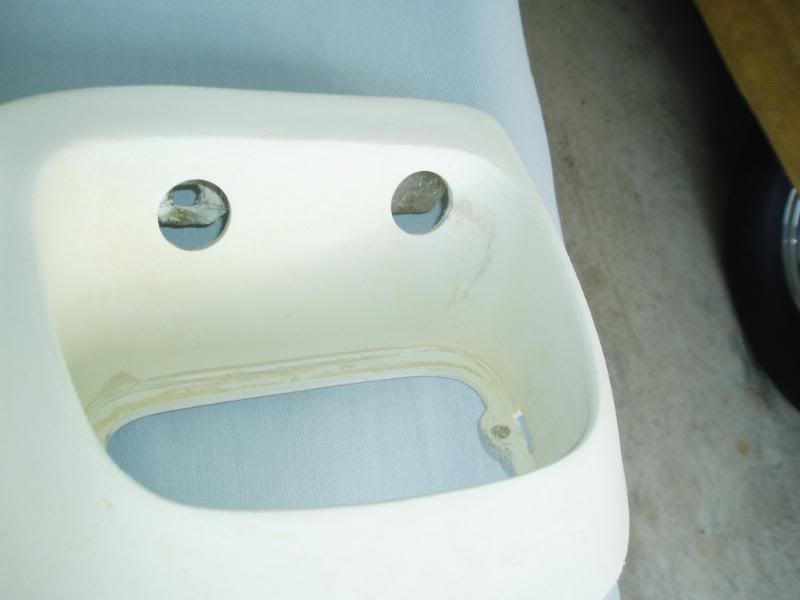
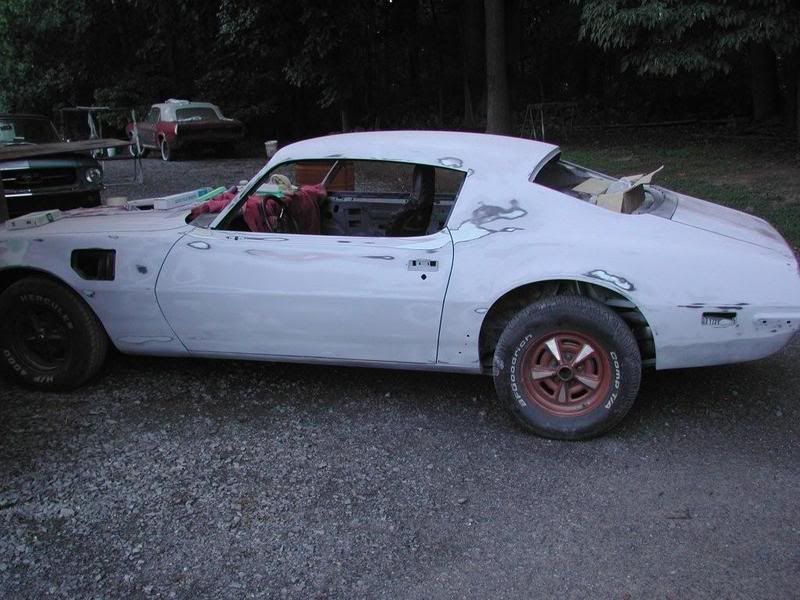
So now that the body is back at the bodyshop and I have nothing left to do, I decided to tackle the destroyed, allegedly unrepairable, original white polyethylene valance from the car.
All of the mounting points were not only broken but completely blown out and missing. If that wasn't enough, the upper support bar was broken and the center section was cracked in half with only about two inches still connecting the two halves together. Oh, and the parts that weren't broken were melted and warped from catching fire during the previous owner's carb fire/flambe/barbeque fest. 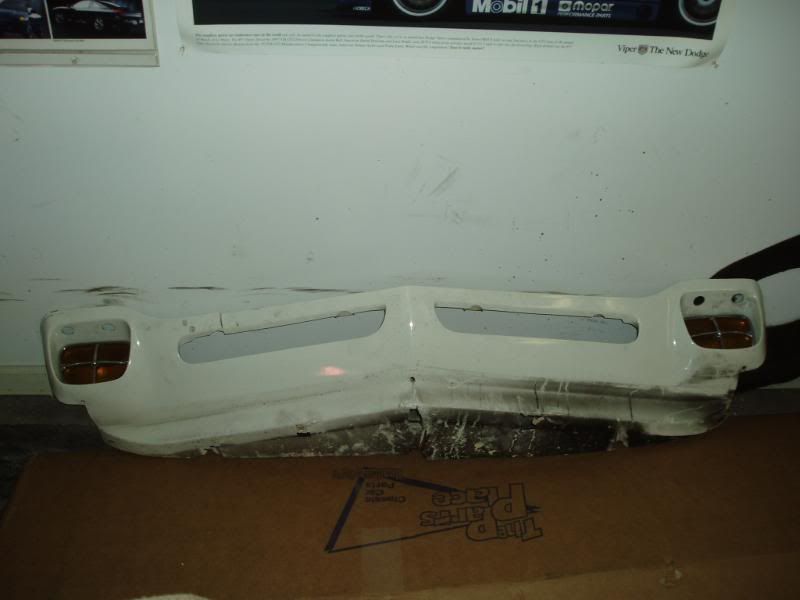 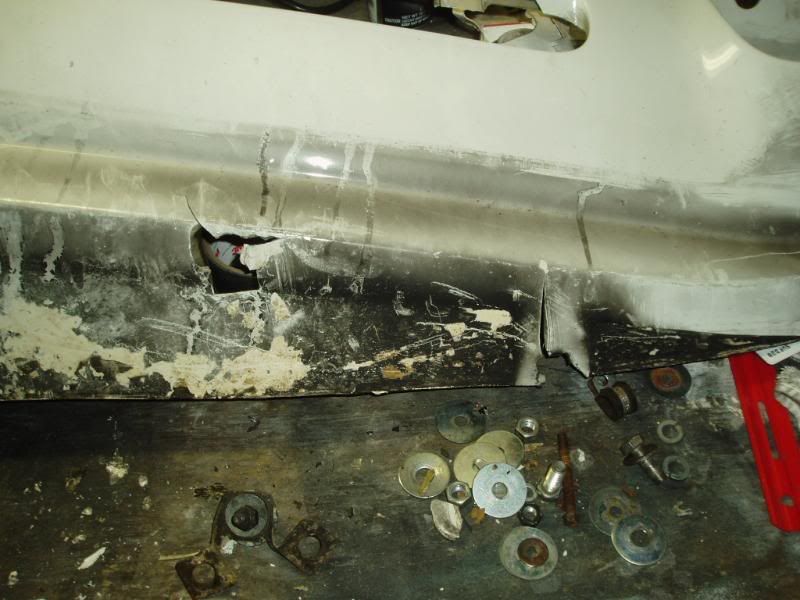 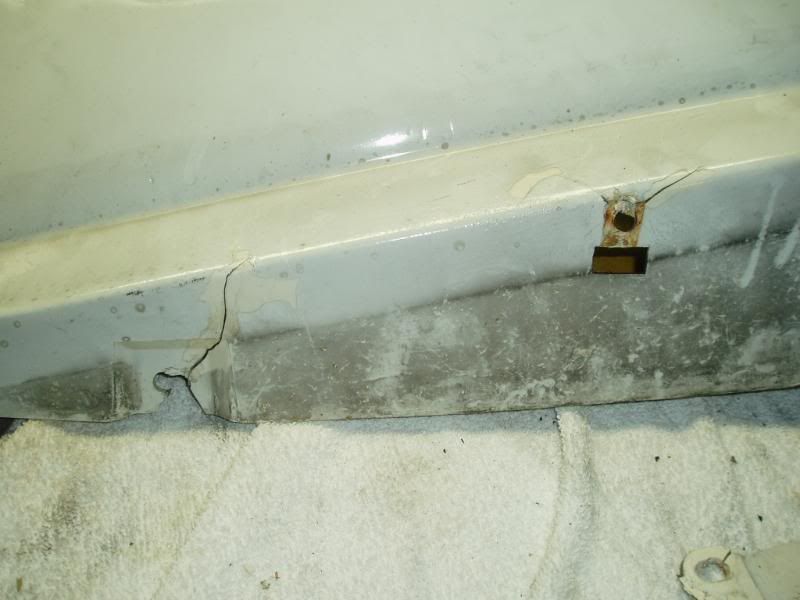 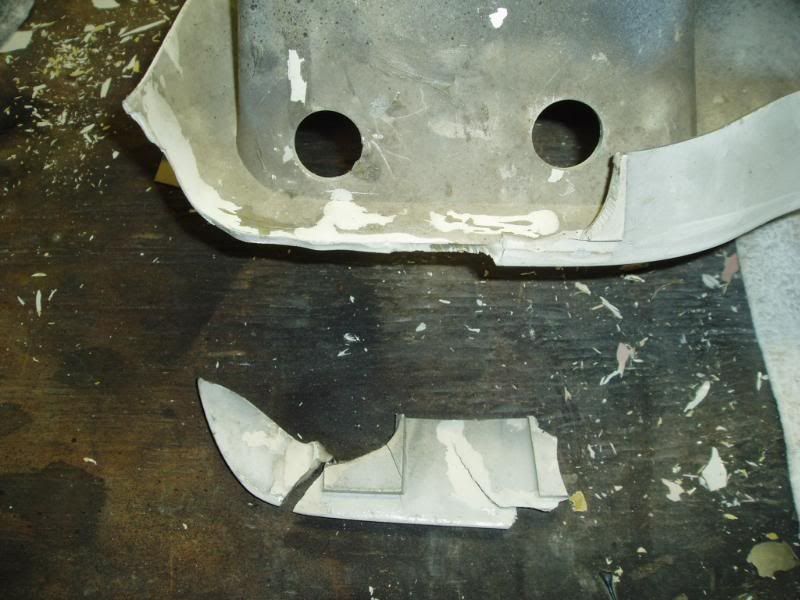 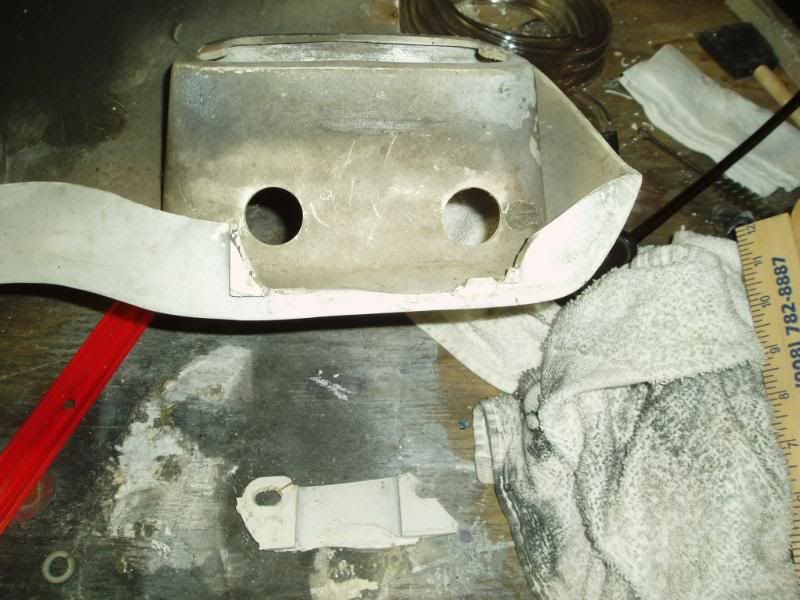
Last edited by njsteve; 06-25-2008 at 09:18 PM. |
|
#644
06-25-2008, 09:08 PM
|
||||
|
||||
|
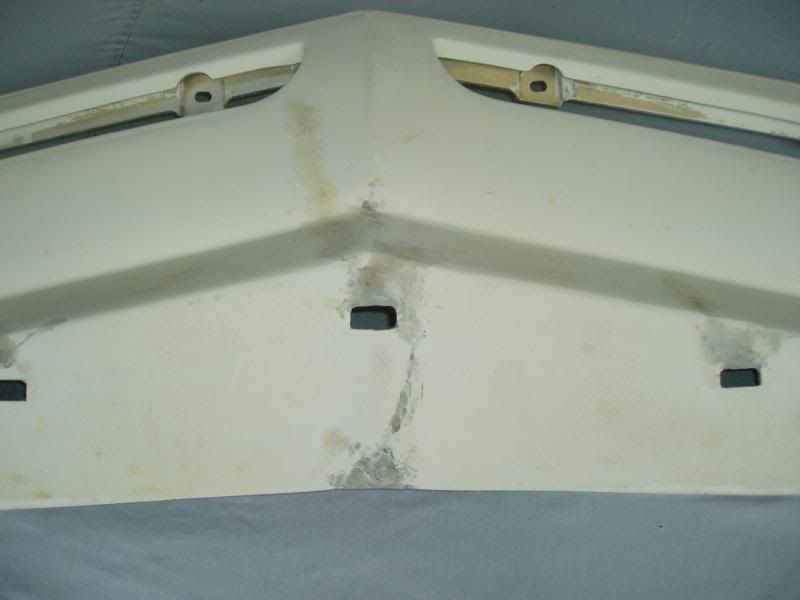
Like a triage attempt on a car crash victim, I had to stabilize the patient before I could even move it out of the emergency room (the basement) to surgery (the garage).
I got out the trusty plastic welder and did a fast, rough melt to get to main fracture and the upper support bar stabilized. By the time I got the welding done there was only one inch of plastic still holding the two sides together: By the way, most of the black area is not paint, but soot and fire damage from the original burning plastic! Only the upper portion had some flat black spraybomb paint on it.  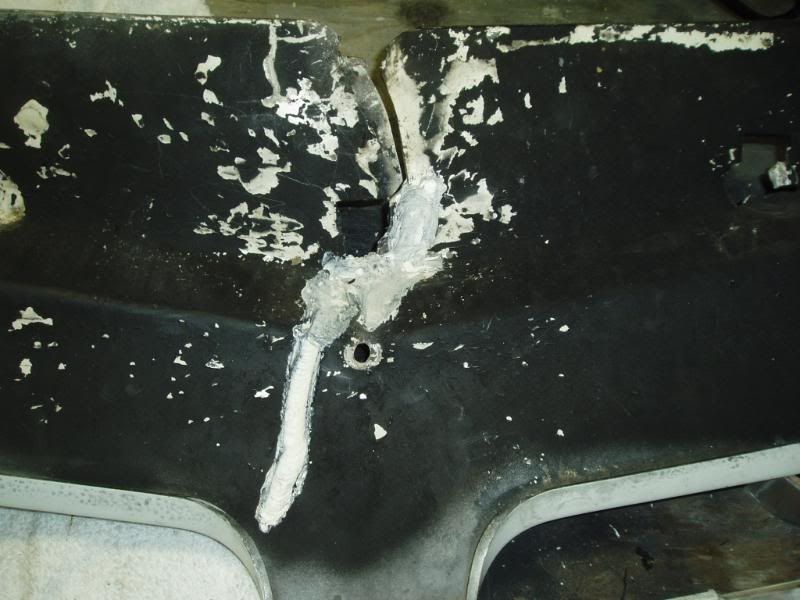 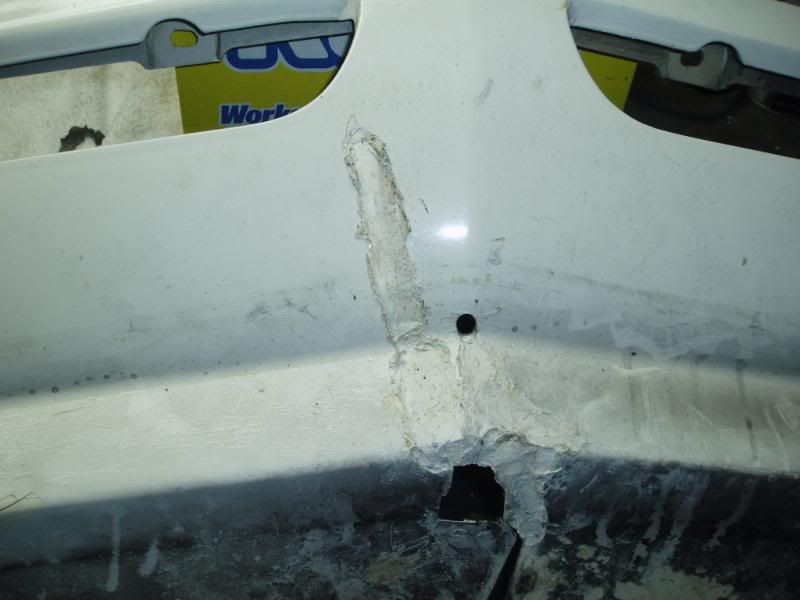 
|
|
#645
06-25-2008, 09:09 PM
|
||||
|
||||
|
Once the rough repair was done so that the valance could be moved without cracking further, I moved it to the garage and started the Franken-Valance process.
Here I used some white polyethylene welding rods to fill in the missing areas in the center fracture. I just kept melting and massaging in more polyethylene rods till the area was filled. 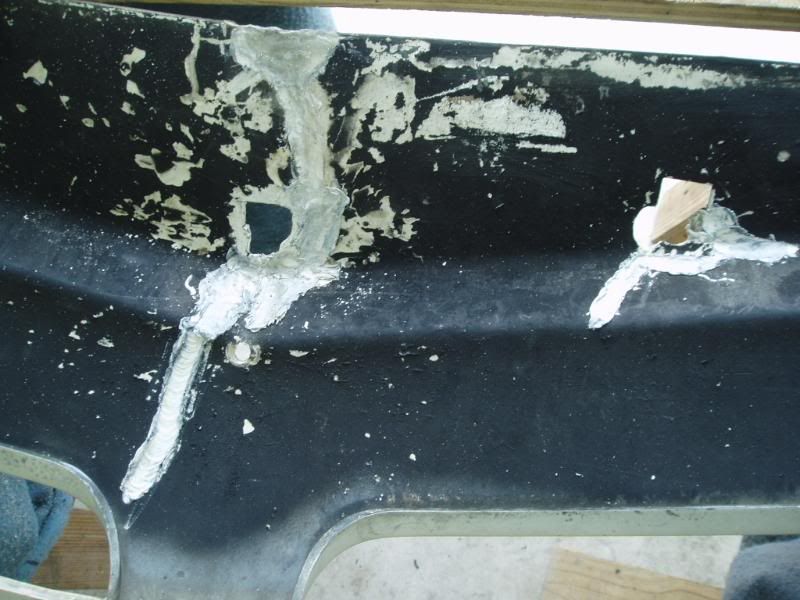 
|
|
#646
06-25-2008, 09:11 PM
|
||||
|
||||
|
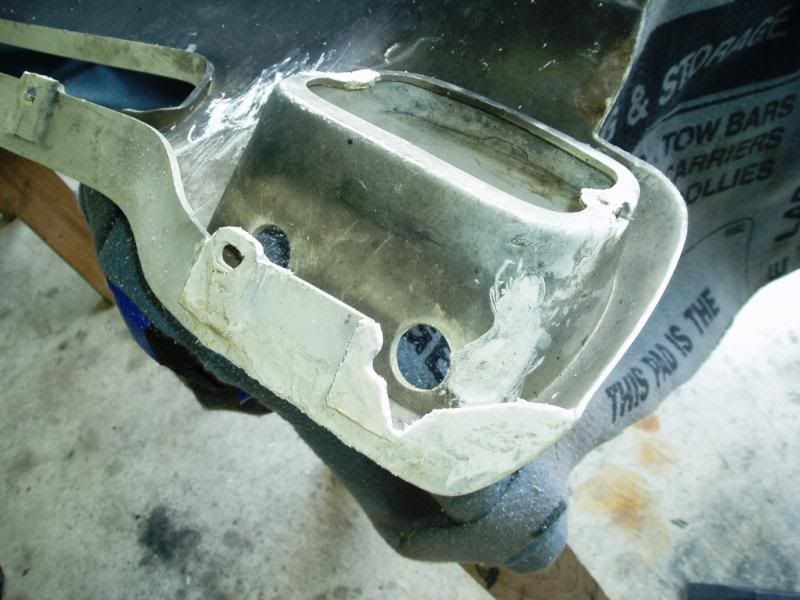
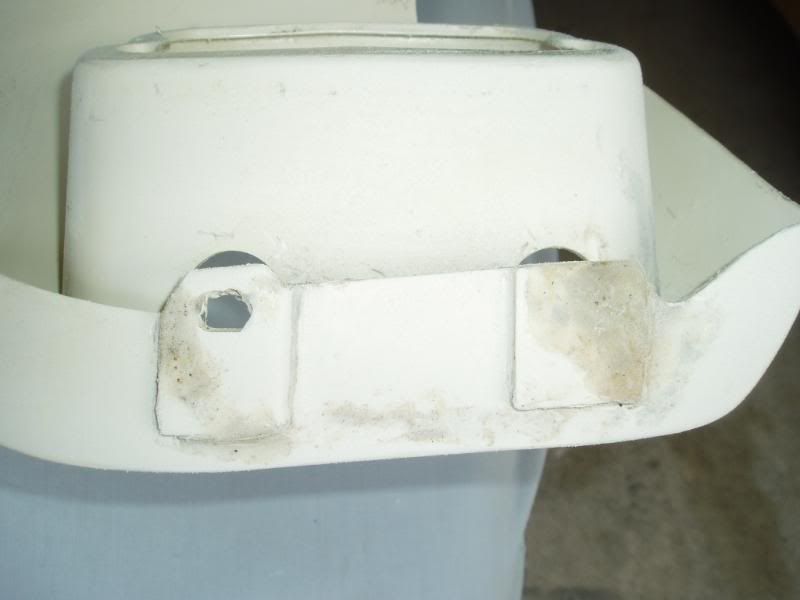
Here is the right mounting flange area. It was shattered completely. I had some of the parts so I used a Dremel tool and ground the edges clean and beveled them so I could get some good weld/heat penetration.
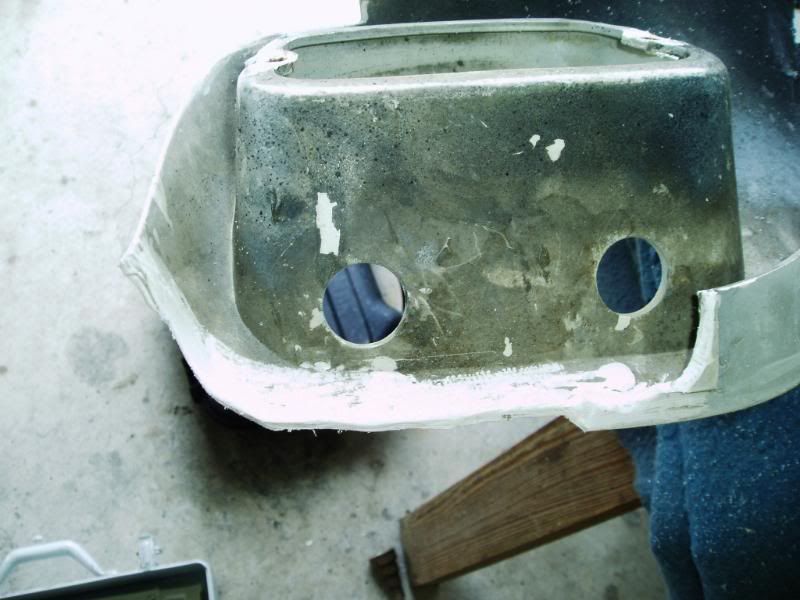 And here it is after welding and filling in extra material to make a rough estimation of the second mounting lug. Later sanding and heating will get the shape more accurately finished. 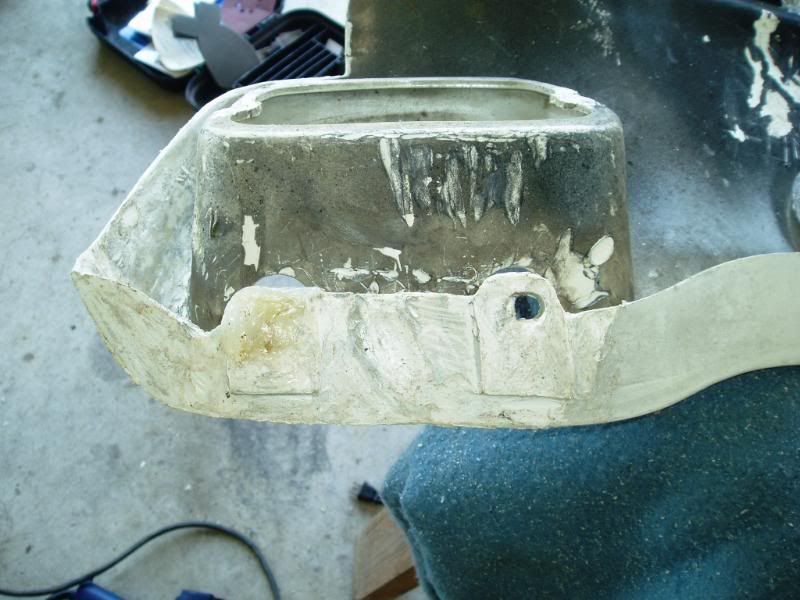
|
|
#647
06-25-2008, 09:11 PM
|
||||
|
||||
|
And here is the left side, during and after:
|
|
#648
06-25-2008, 09:12 PM
|
||||
|
||||
|
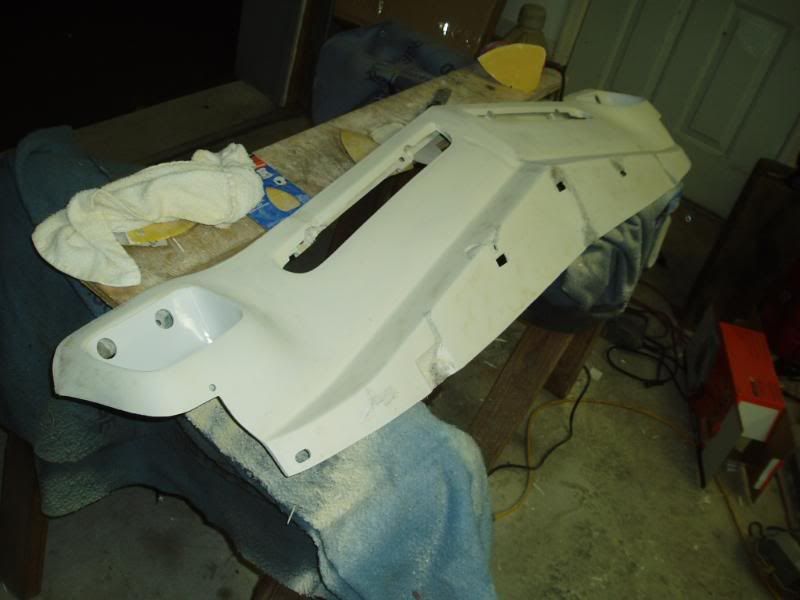
After about four hours of melting and inhaling burnt plastic fumes, here is the current result:
|
|
#649
06-25-2008, 09:14 PM
|
||||
|
||||
|
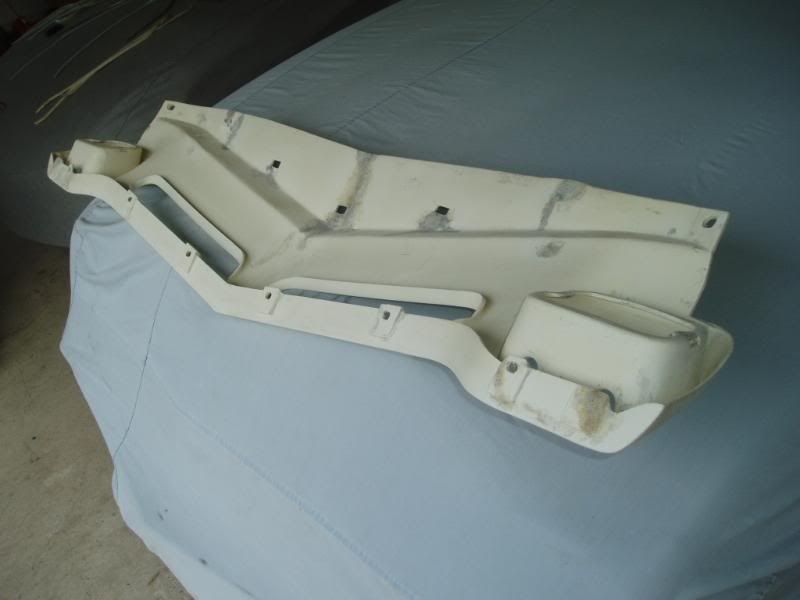
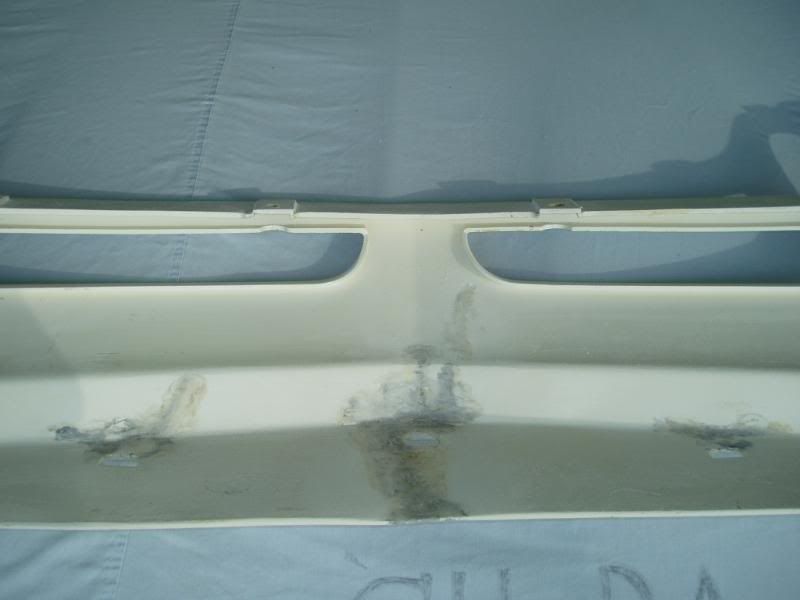
I soaked the valance in the old Purple Stuff degreaser over the last couple days. I used a tall kitchen garbage can and was able to get one third of the panel covered, and then turned it over to get the other third. For the center I had to lay it flat and cover that area with a towel soaked in the Purple Stuff and let it sit overnight on the area. That purple stuff works wonders: it removed all the soot and the flat black spray paint. The heavy white paint and primer surfacer is another story.
I had to use a razor blade and shave the white paint off. In some areas the paint and primer layer flaked away together, in others, just the white paint, and in others, neither came off. So I had to use the mini sander, which promptly burned out so now I have to buy another one... Here's the cleaned valance: 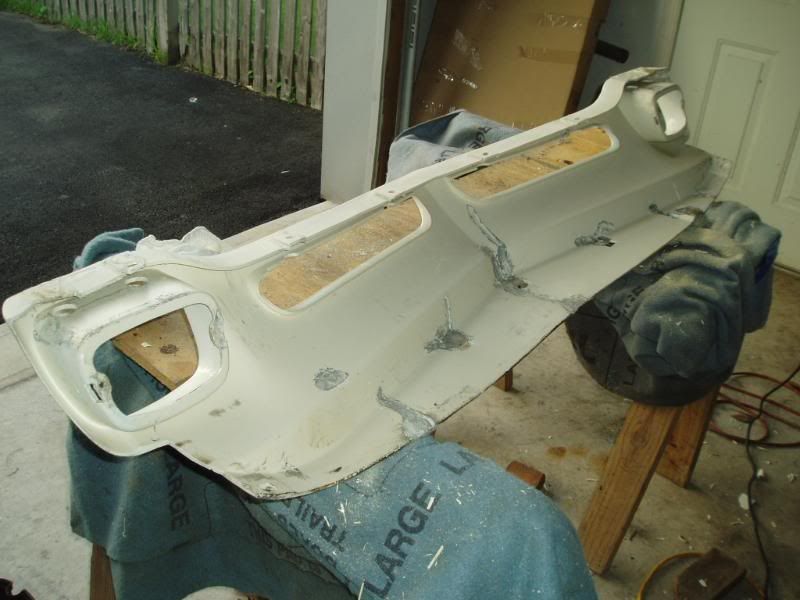 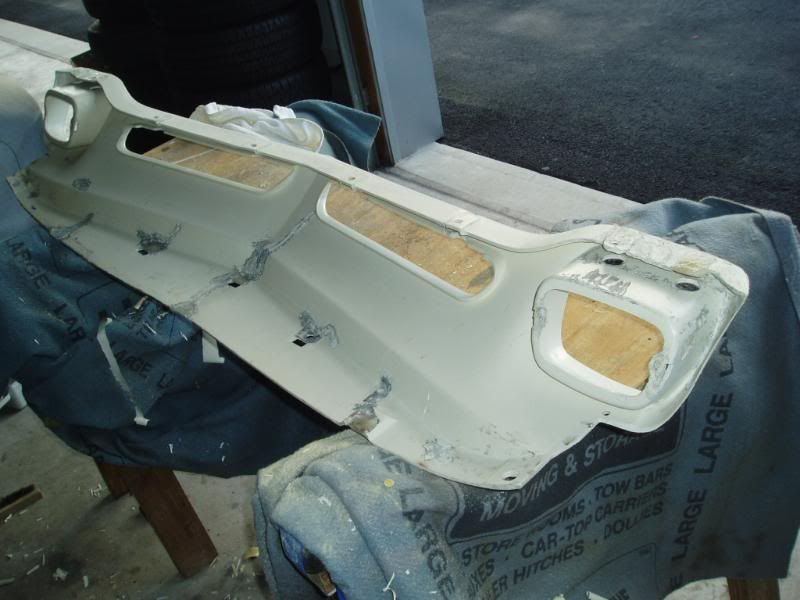 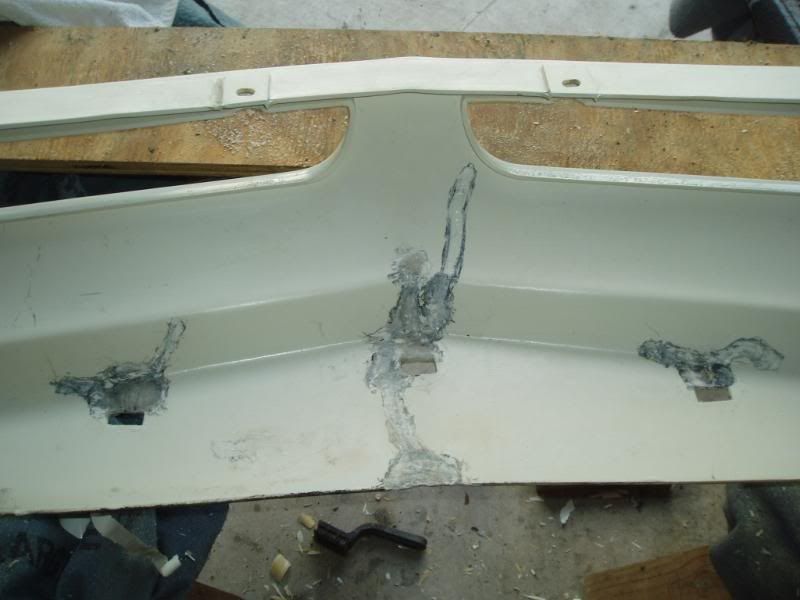
|
|
#650
06-25-2008, 09:16 PM
|
||||
|
||||
|
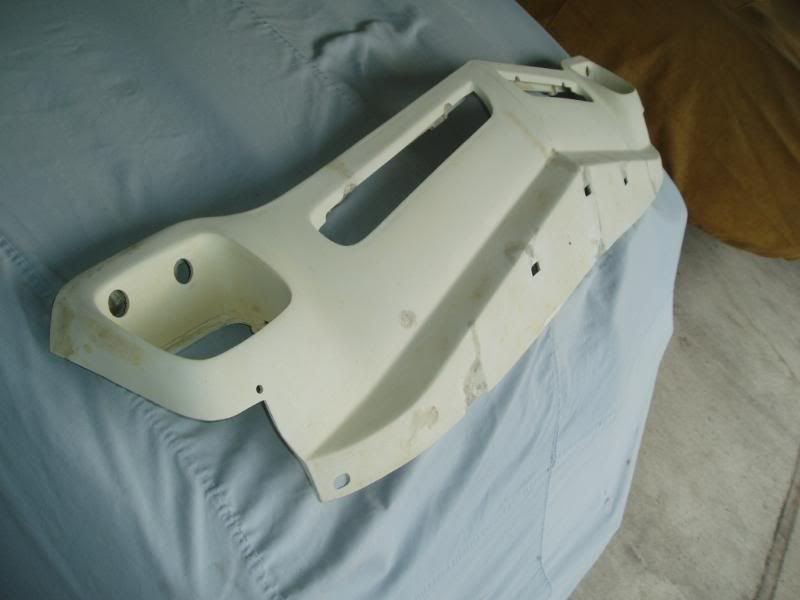
And the front side. You can see the different areas of good and bad paint adhesion.
 Here's some of the filled in rough repairs: 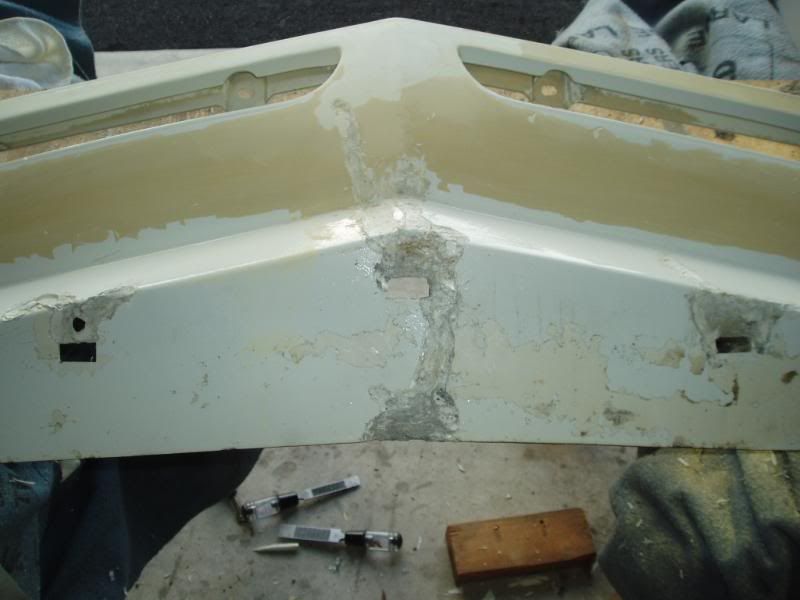 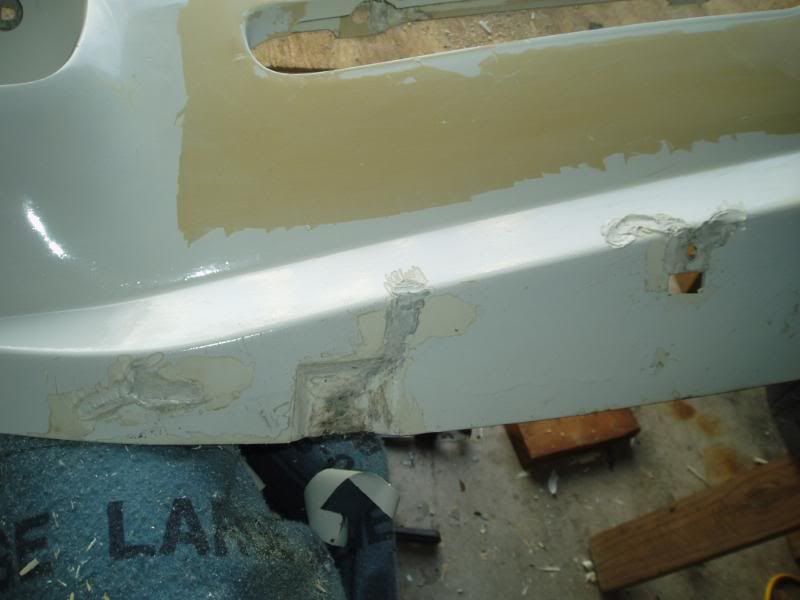 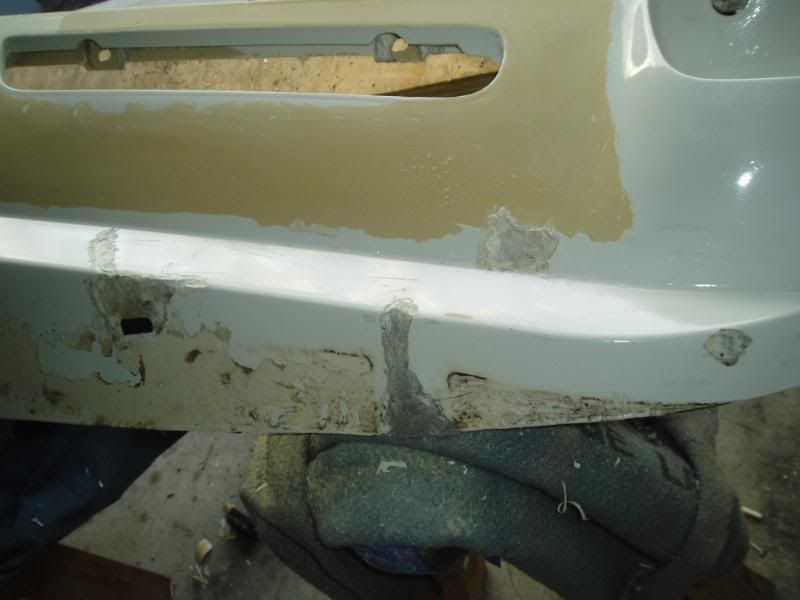 And the preliminary rough sanding of the upper face bar repair: 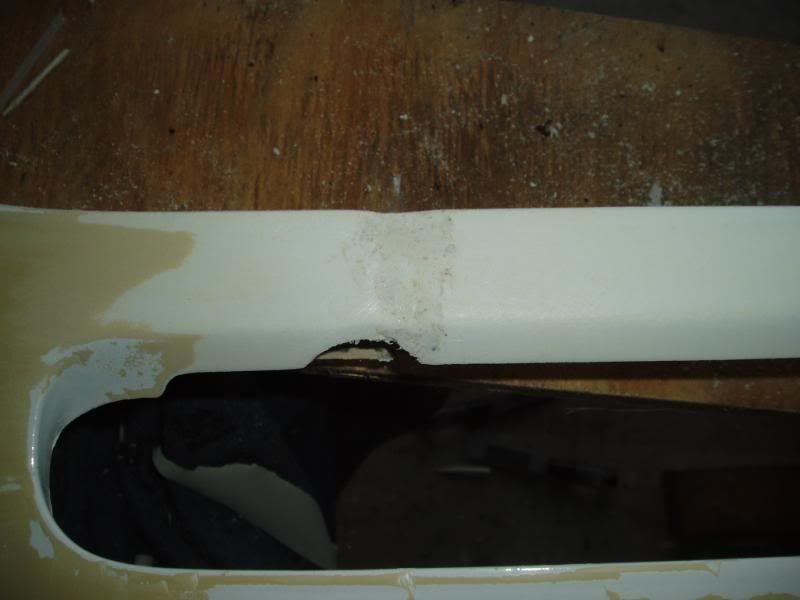
|
|
#651
06-25-2008, 09:18 PM
|
||||
|
||||
|
Stopped by Home Depot today and replaced the crappy Craftsman Mini Mouse Sander with a Black&Decker model. It worked fine. Using 80 grit, I had all the paint off of the front of the valance in about 2 hours. I can't feel my hands though. Maybe the feeling with come back in a day or two, in time to do the back of the panel.
|
|
#652
06-27-2008, 07:07 PM
|
||||
|
||||
|
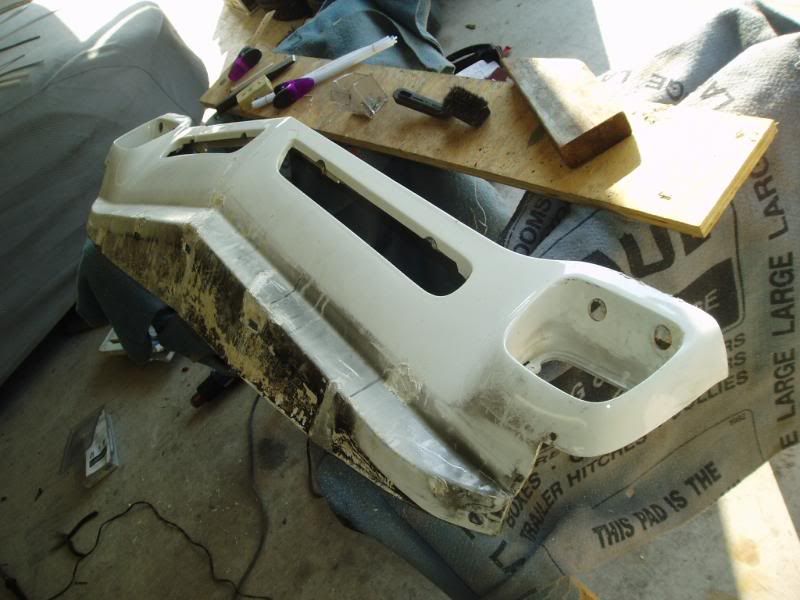
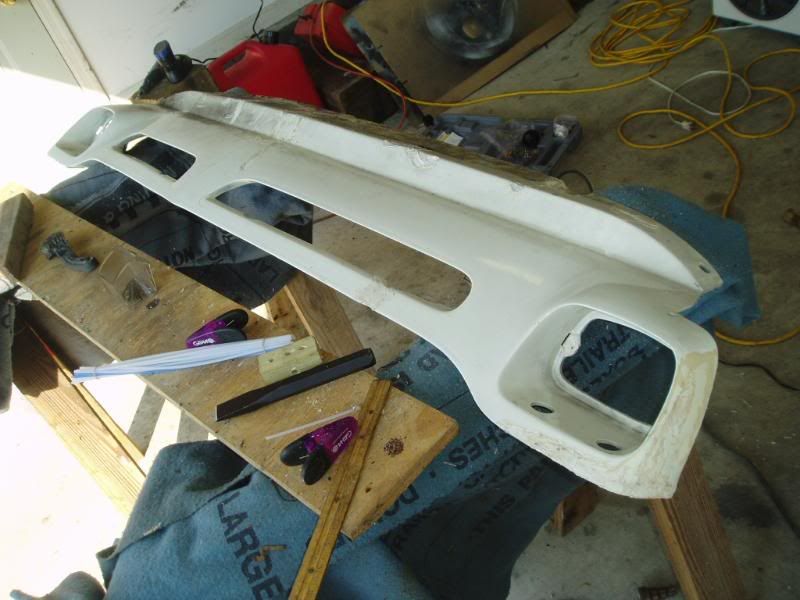
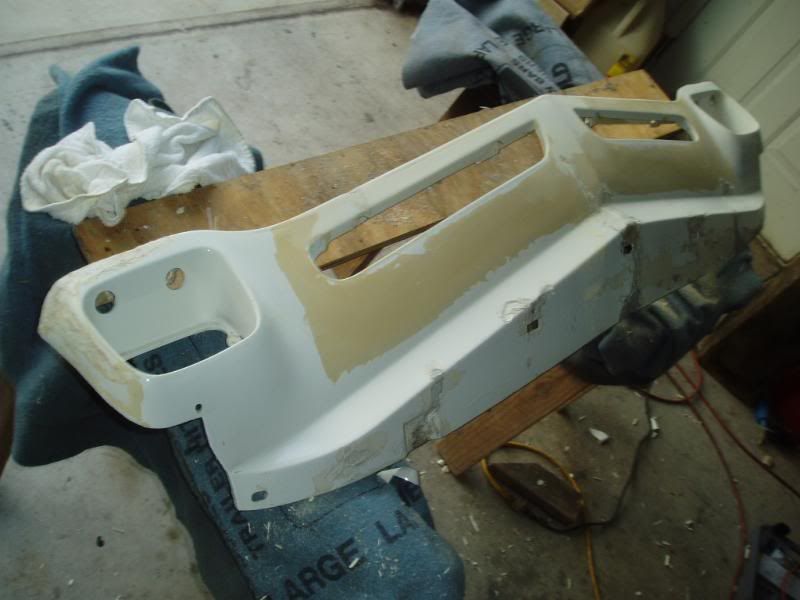
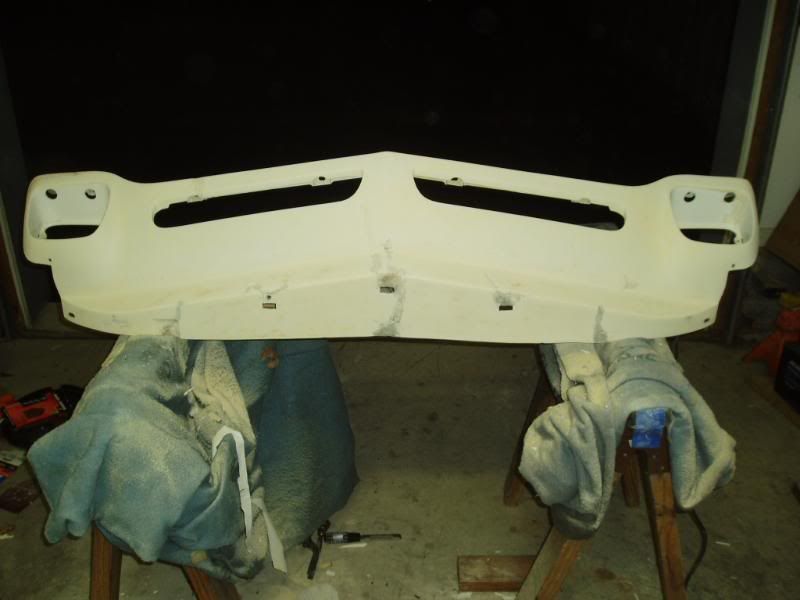
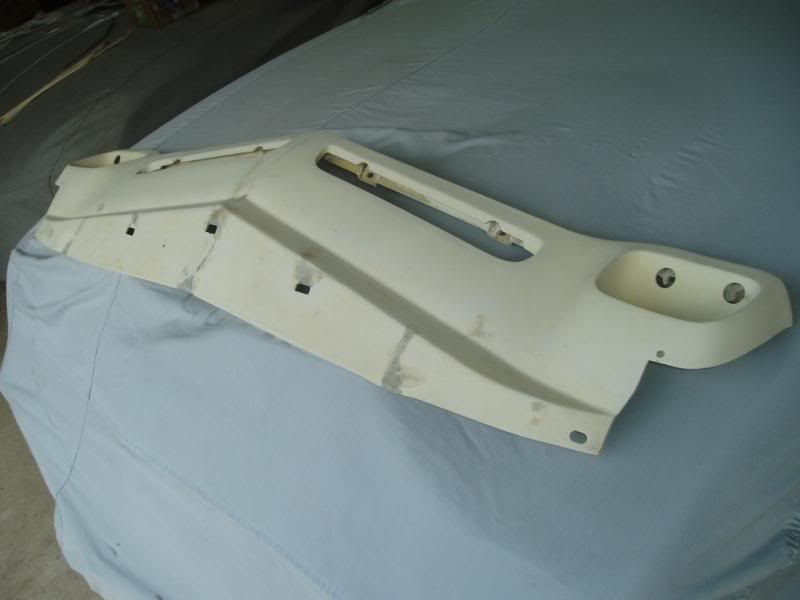
Well, here's the finished product. It took a few days of sanding and remelting and reapplying more polyethylene rods but this will work on the car. I left the main mounting holes filled in so I can redrill them in the correct spots one the valance is trial fitted on the car.
|
|
#653
06-27-2008, 07:08 PM
|
||||
|
||||
|
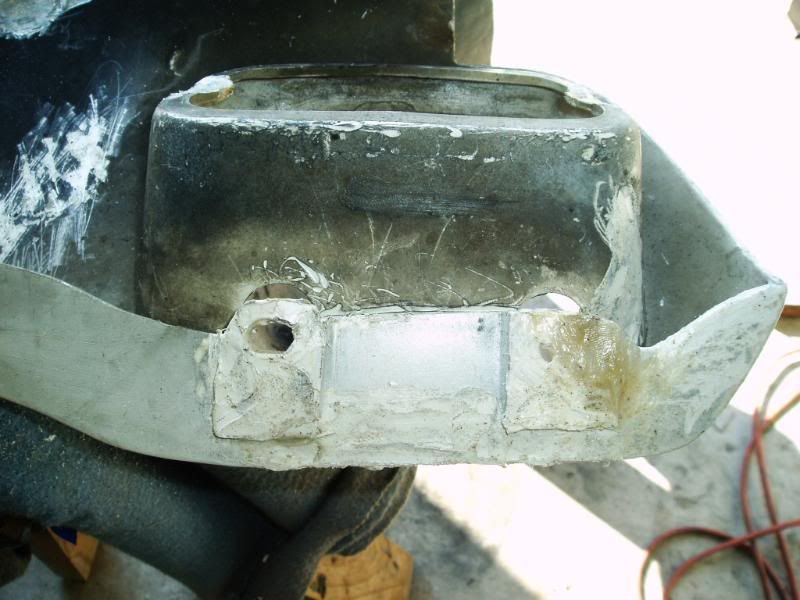
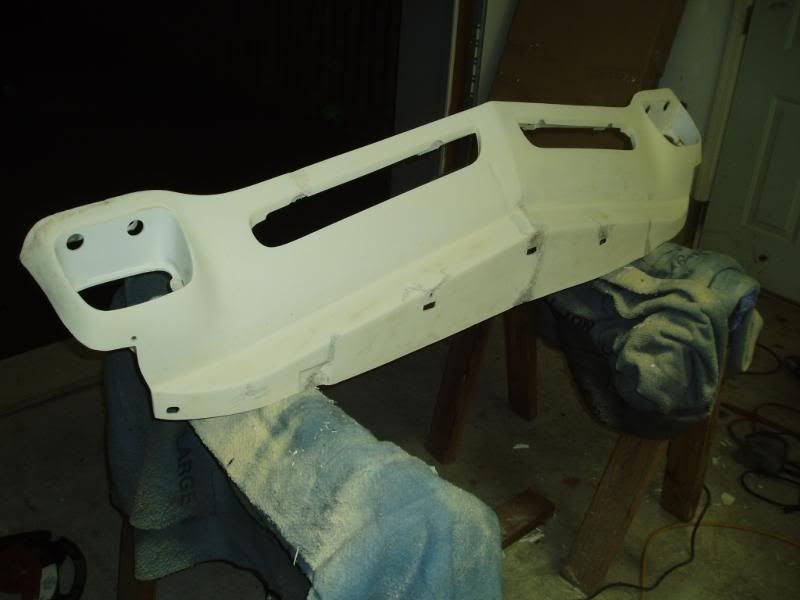
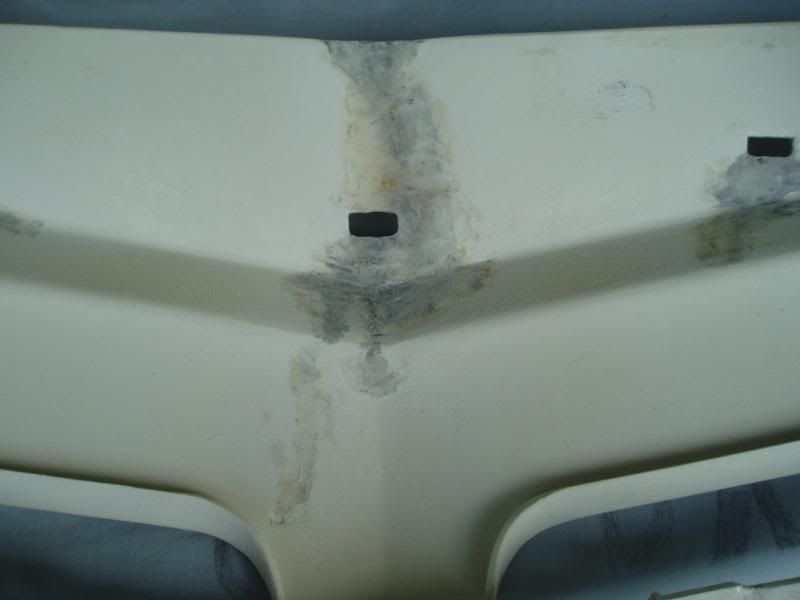
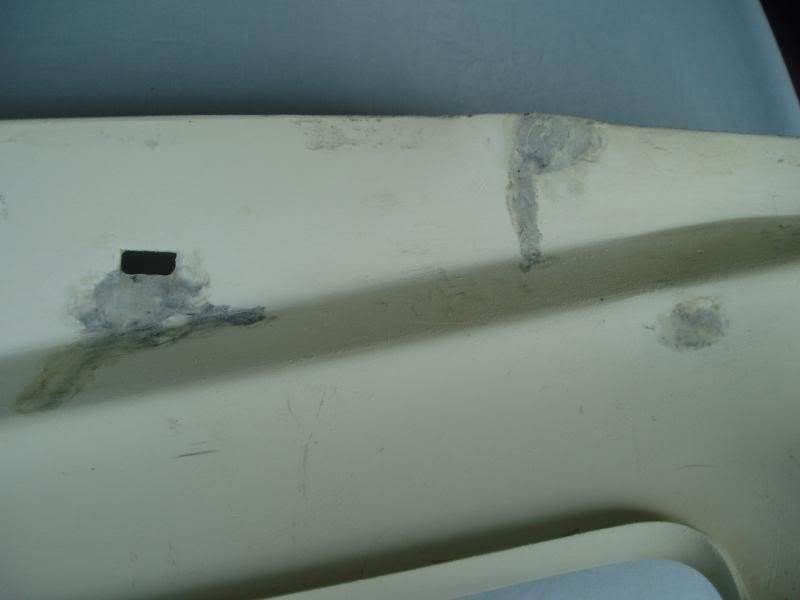
Here are the most difficult repaired areas, the upper mounting points, the turn signal housing and the upper face bar.
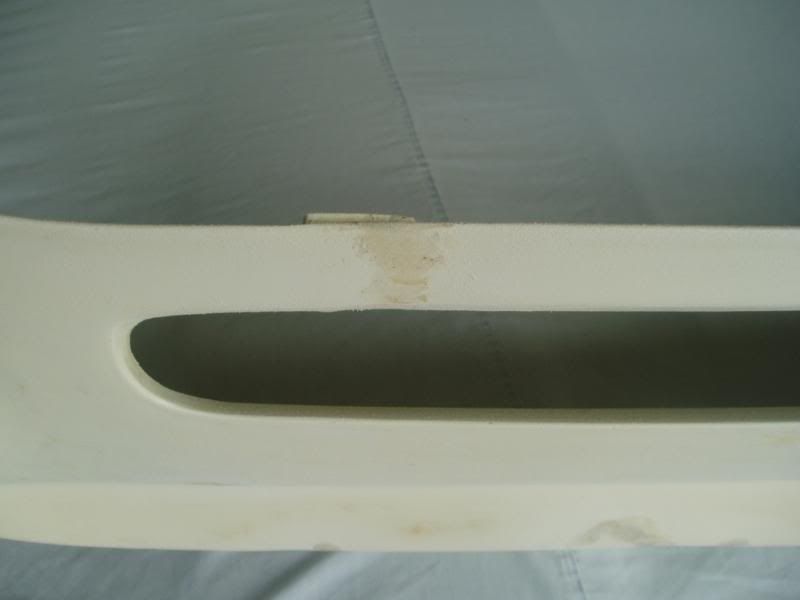   The yucky looking yellow stuff in the outer edge of the passenger side turn signal housing is extra welded in polethylene rod I added for reinforcement. It doesn't have to look pretty, it's just there for the added bracing. 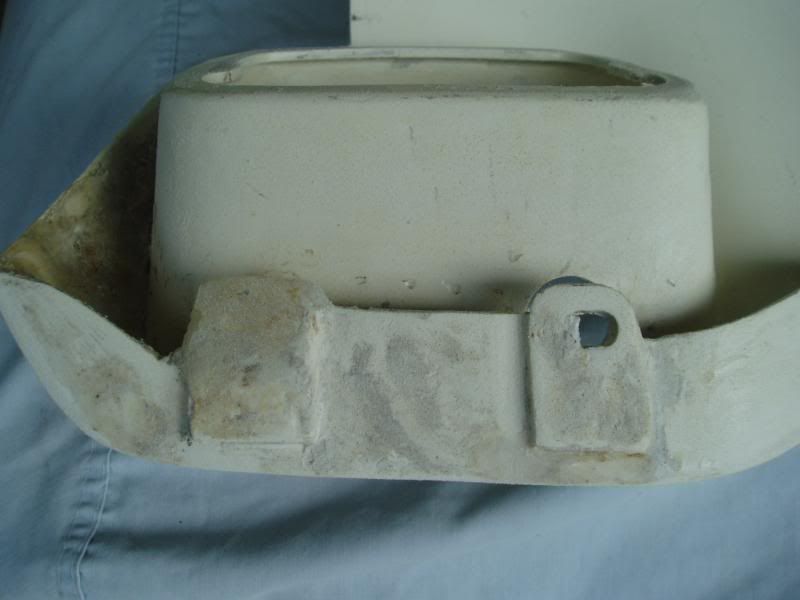
|
|
#654
06-27-2008, 07:10 PM
|
||||
|
||||
|
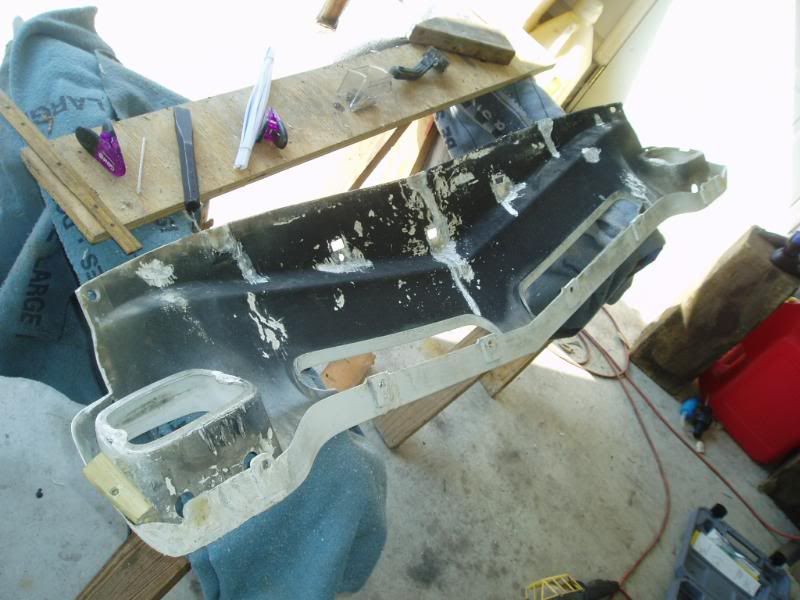
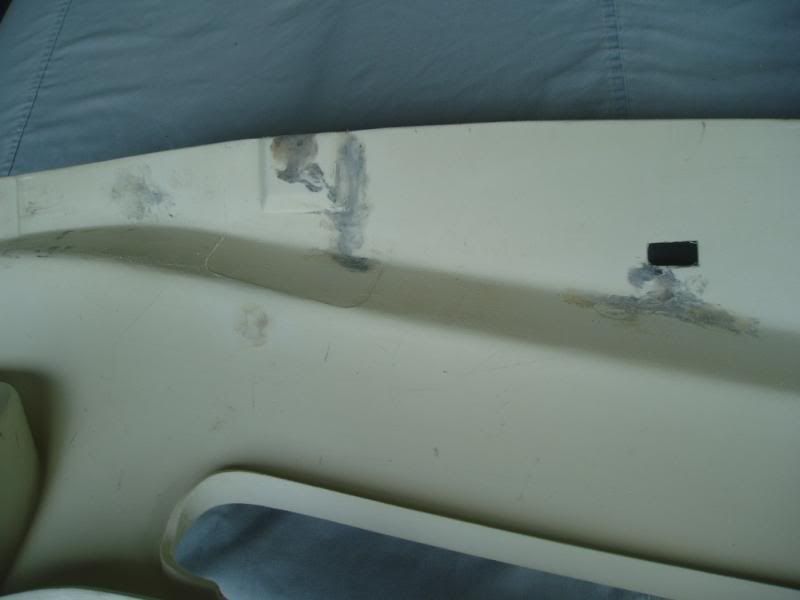
The back side of the panel. I used some fine stainless steel screen and melted/embedded it into the main center fractured area to add some reinforcement. This is the recommended method when repairing areas that will face stress when installed.
|
|
#655
06-27-2008, 08:39 PM
|
||||
|
||||
|
Nice work, Steve.
I think I'll buy one of those plastic welders instead of trying to find new flares and a spoiler... 
__________________
keith k 70 Trans Am RA III / T400 / Lucerne Blue / Bright Blue 70 Trans Am RA III / M20 / Lucerne Blue / Sandalwood 70 Formula RA III / M21 / Lucerne Blue / Bright Blue |
|
#656
06-27-2008, 10:42 PM
|
||||
|
||||
|
|
|
#657
06-28-2008, 04:14 PM
|
||||
|
||||
|
I went to the bodyshop today to trial fit the valance.
First, I bolted the valance in place, finger tight, and then drilled the filled-in upper mounting holes with a small drill and a Dremel tool, accessing the location through the headlight area. I made a pilot hole from the top side down through the mounting screw holes in the lower part of the bumper. Once I could see where the pilot hole was from underneath, I used a larger grinder bit to open up the hole to the correct size. Worked like a charm. Once the valance was in place I held the front spoiler in the right spot. (the front fender flares actually do a good job of setting the spoiler in the right spot for alignment purposes.) I then used the Dremel tool to grind out the new holes in the valance using the spoiler's holes as a template. And as predicted, the majority of the original factory hole locations were about 3/4 of an inch off. So I was glad I filled them in. I drilled the new holes and used some nuts and bolts and set it all in place in a new position that doesn't require you to heave on and abnormally stress the valance when it's bolted into position. The car's original white valance lined up beautifully, better than the blue valance. There's nothing like using the original parts from your car. (with a whole lotta massaging) 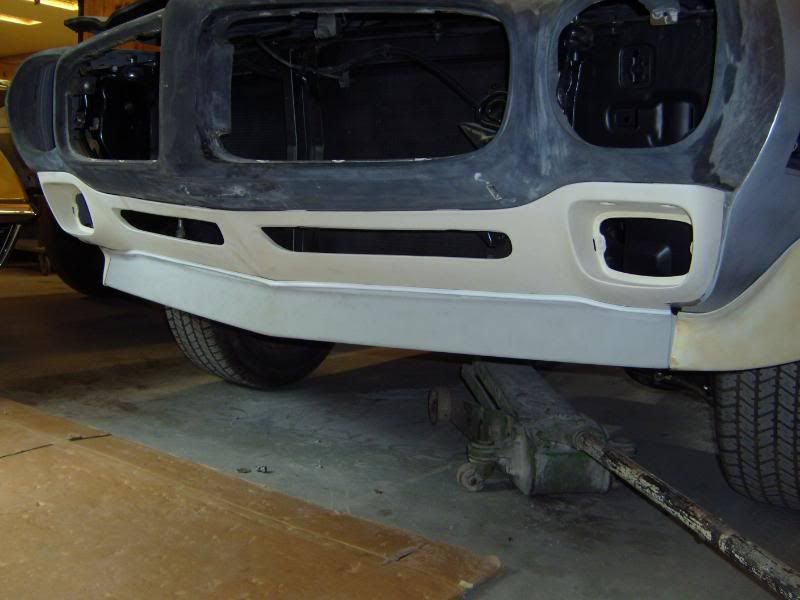 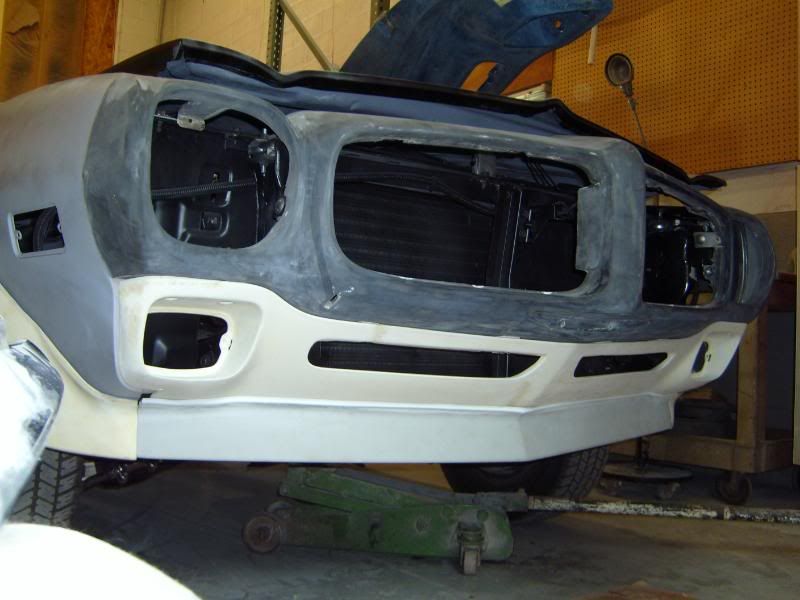 Here's the original before shot from October 2004, for comparison purposes (and to remind me of how this car is supposed to look when not in grey primer.) 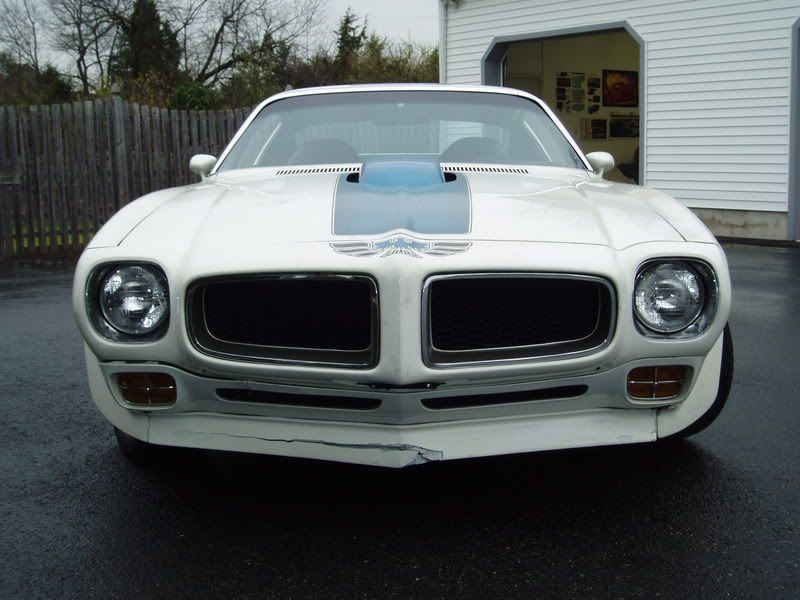
|
|
#658
06-28-2008, 04:15 PM
|
||||
|
||||
|
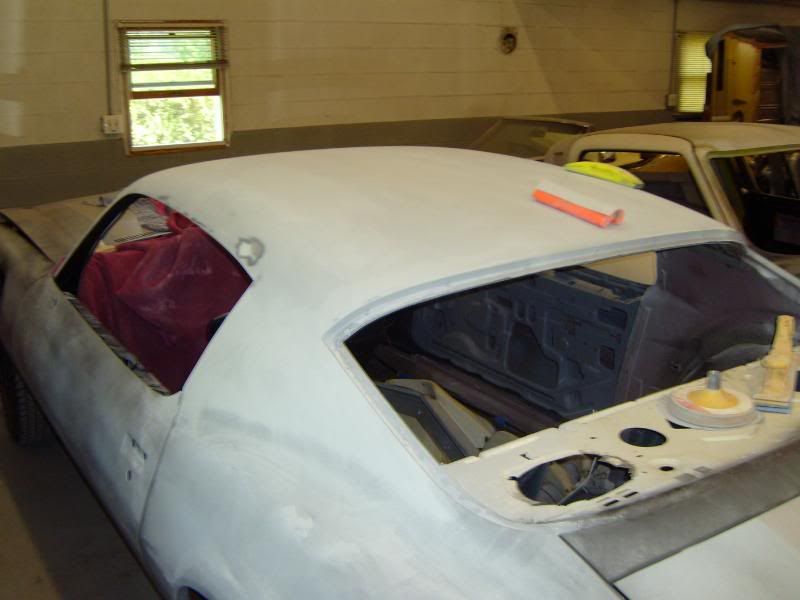
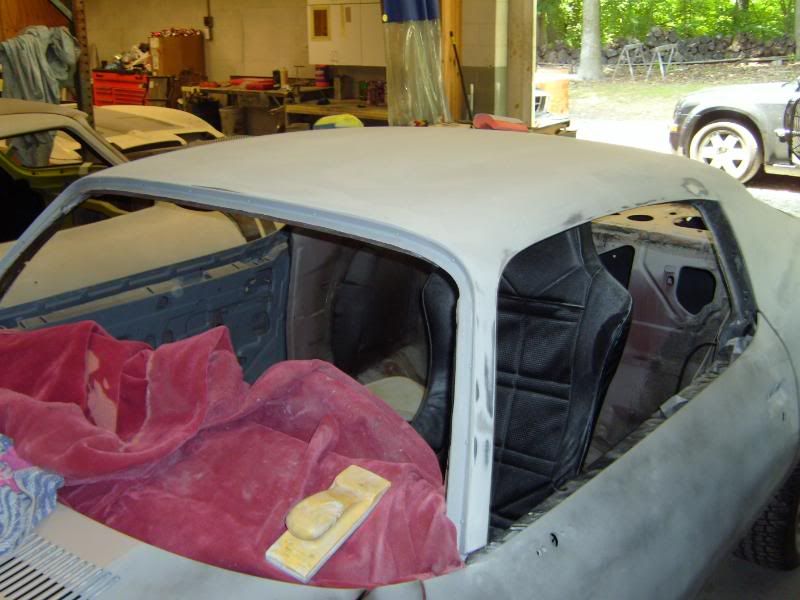
And here is the progress on the block sanding. He started on the roof and upper quarters. Takes a lotta time. That is why I hate body work and don't do it myself. I just don't have the patience. If it involves grease or burning/melting things, I enjoy it.
|
|
#659
07-24-2008, 11:23 PM
|
||||
|
||||
|
Current progress from the bodyshop. A lot of block sanding to make everything flat and straight before the next layer of primer...
|
|
#660
07-24-2008, 11:29 PM
|
||||
|
||||
|
looks great Steve, the fact they are spending so much time on the panels is going to pay off when the paint goes on, looks like not much longer. I am about a year behind you and it helps keep me moving to see your progress, thanks for the updates and keep em coming!
__________________
'72 Formula 455HO TH400, Revere Silver, black deluxe '74 Trans Am SD 4 speed, Admiralty Blue, blue deluxe |
| Reply |
|
|
The PY Online Forums is the largest online gathering of Pontiac enthusiasts anywhere in the world. Founded in 1991, it was also the first online forum for people to gather and talk about their Pontiacs. Since then, it has become the mecca of Pontiac technical data and knowledge that no other place can surpass.


 Linear Mode

